
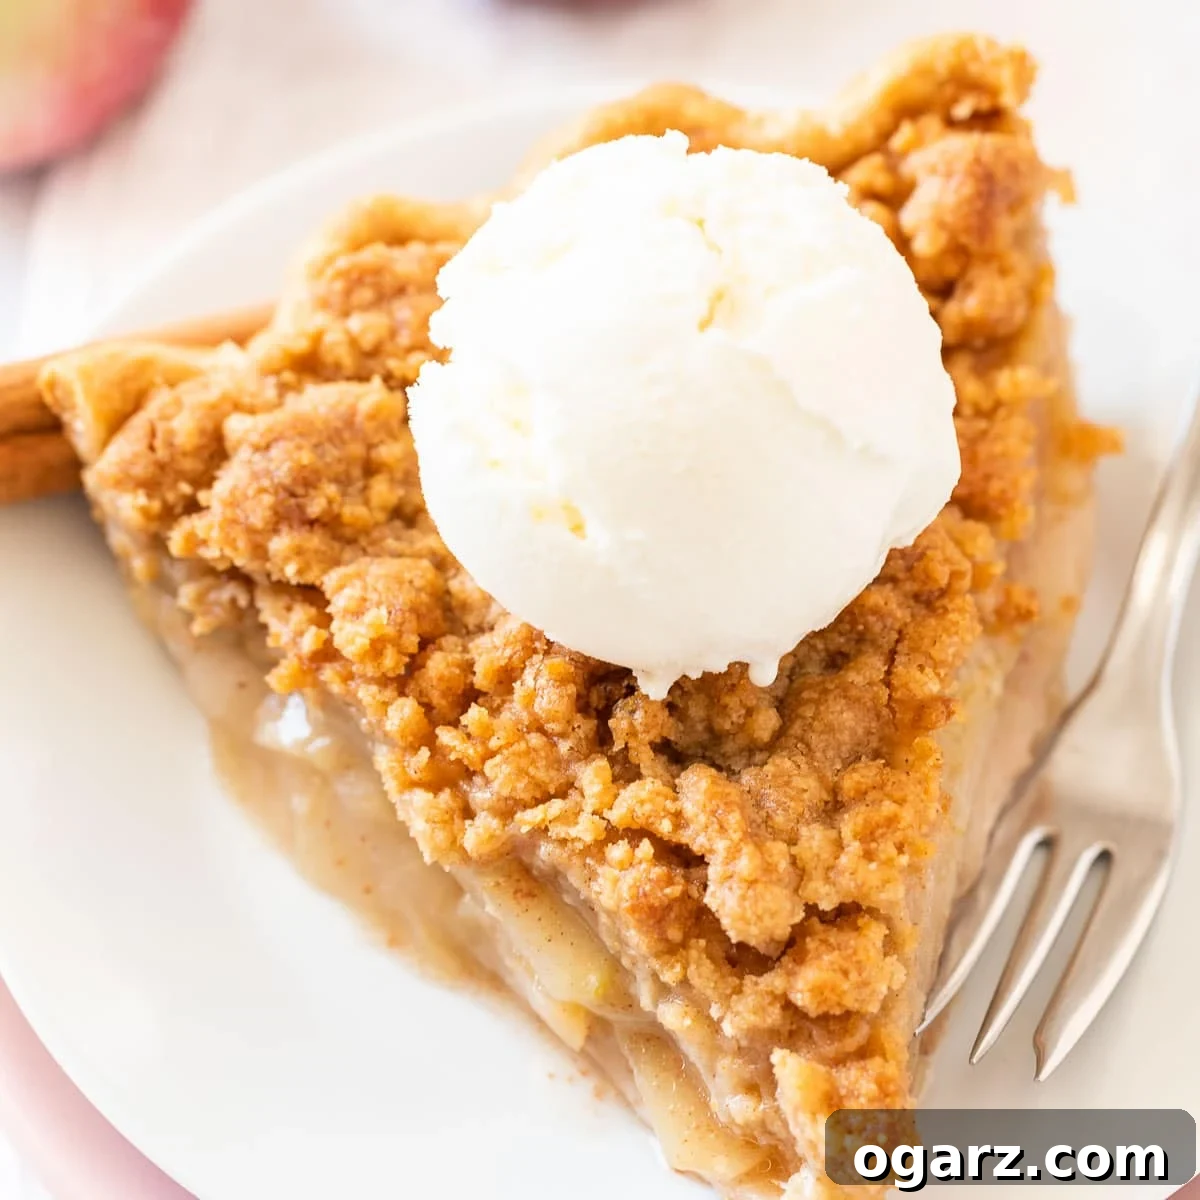
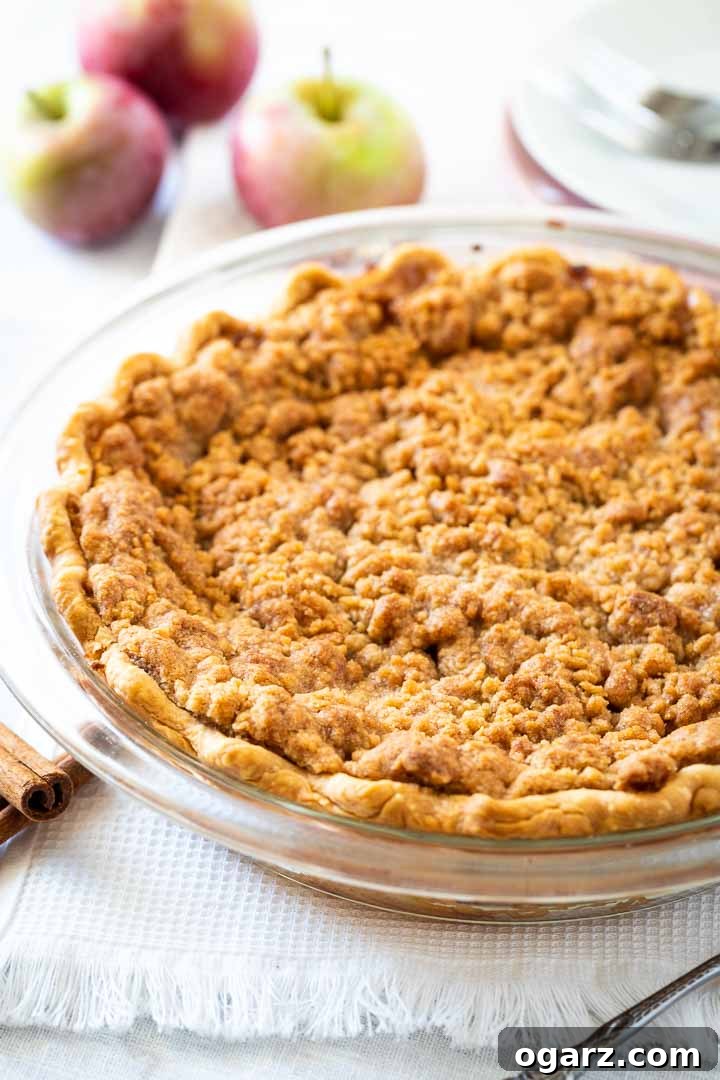
Immerse yourself in the comforting flavors of fall with our exquisite Apple Crumble Pie. This delightful homemade Dutch apple pie features a tender, buttery crust generously filled with sweet, spiced apples and crowned with a golden, irresistible streusel topping. It’s an effortlessly elegant dessert, often easier to prepare than a traditional double-crusted pie, making it the perfect centerpiece for any autumn gathering or a cozy weeknight treat.
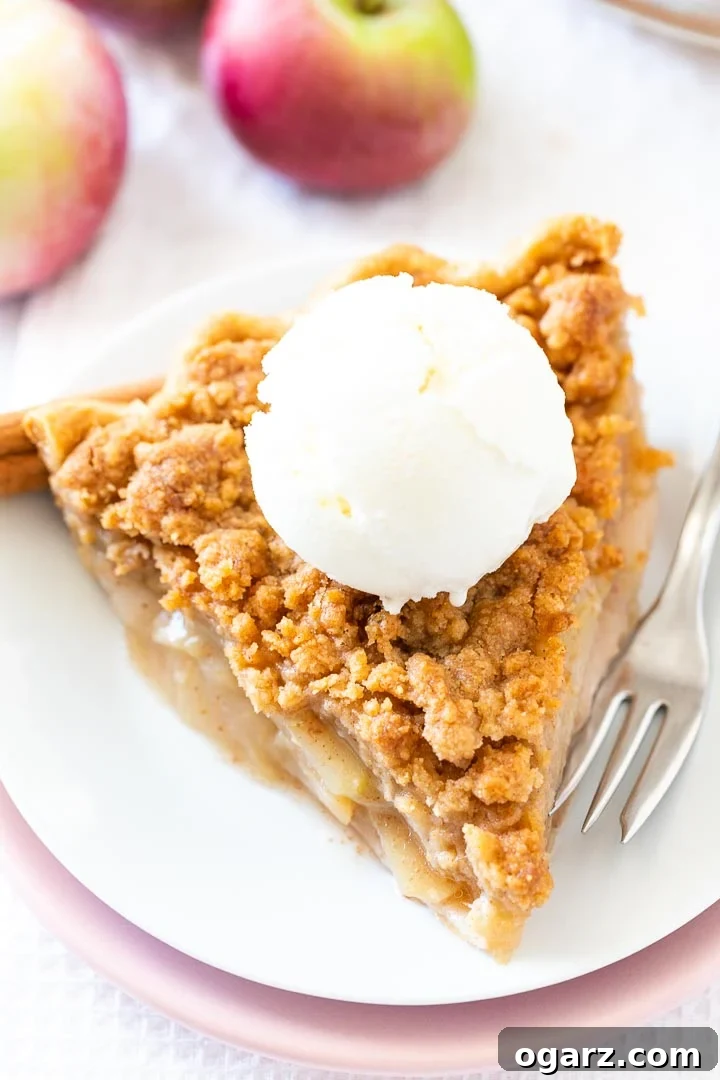
Discovering the Magic of Dutch Apple Pie
As the leaves begin to turn and a crispness fills the air, our thoughts inevitably drift to warming, spice-filled desserts. Fall is a season synonymous with apples, and nothing captures its essence quite like a freshly baked apple pie. While classic apple pies hold a special place in our hearts, the Dutch Apple Pie, also known as Apple Crumble Pie, offers a wonderfully unique and often preferred twist on this beloved dessert.
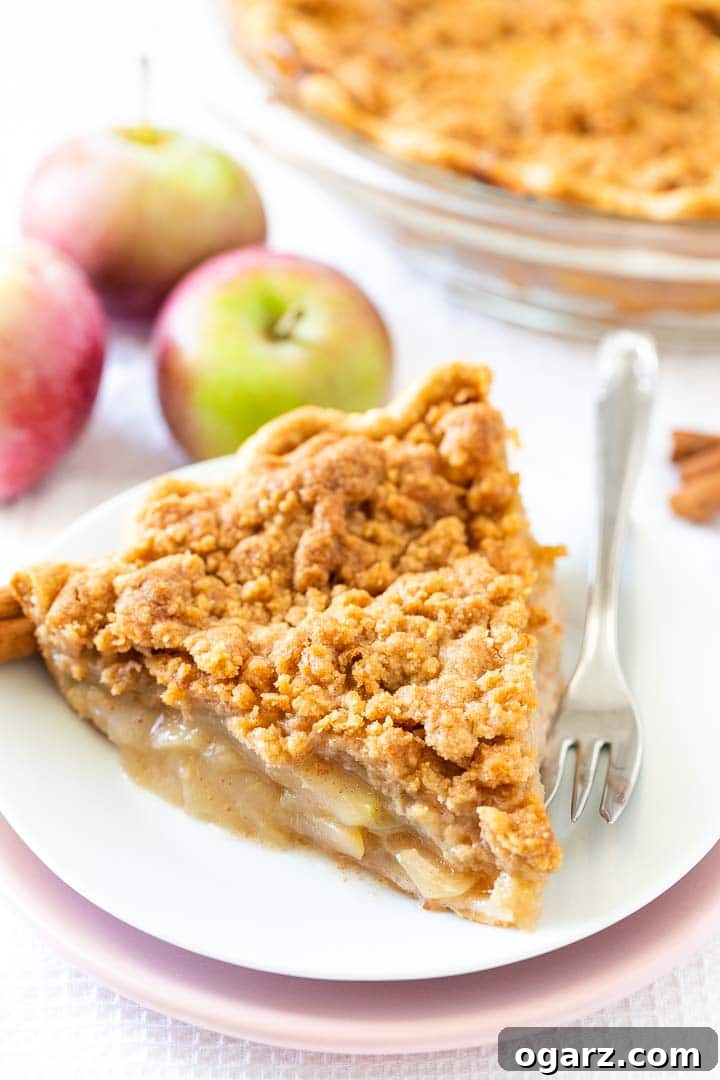
The defining characteristic of a Dutch Apple Pie is its glorious streusel topping. Unlike traditional pies that rely on a second pastry crust, this variation boasts a buttery, sweet, and crunchy crumb topping that bakes to golden perfection. This not only adds an exciting texture and depth of flavor but also simplifies the baking process considerably, making it an ideal choice for both seasoned bakers and eager beginners. It’s an especially sought-after dessert for festive occasions like Thanksgiving, where its comforting aroma and inviting appearance truly shine.
The Secret to a Spectacular Apple Filling: Choosing Your Apples Wisely
The foundation of any exceptional apple pie lies in the quality and type of apples used. The goal is to achieve a filling with a balanced flavor profile – sweet enough to satisfy but tart enough to let the inherent apple taste shine through, all while maintaining a pleasant texture that isn’t overly mushy. While many recipes instinctively recommend Granny Smith apples for their firmness, they can sometimes lack the complex flavor needed to elevate a pie on their own, often being quite tart.
To truly craft the BEST Apple Pie, we advocate for a thoughtful blend of different apple varieties. Combining apples with varying levels of sweetness, tartness, and firmness ensures a more dynamic and satisfying filling. Imagine a symphony of flavors and textures, where some apples hold their shape beautifully, while others gently soften and contribute to the rich, gooey consistency of the filling. This nuanced approach guarantees a pie that delights with every single bite.
Why You’ll Fall in Love with This Apple Crumble Pie Recipe
- Irresistible Crumb Topping: Forget the fuss of a double-crust pie! Our signature streusel topping is not only delightfully delicious but also incredibly simple to prepare, adding a satisfying crunch and buttery sweetness that perfectly complements the soft apple filling. It’s a game-changer that makes this recipe stand out.
- Expert Apple Recommendations: Navigate the world of apple varieties with confidence. We provide detailed guidance on selecting the perfect combination of apples to suit your taste, ensuring your pie filling is always flavorful, well-textured, and never bland or mushy.
- Remarkably Easy to Make: Designed with simplicity in mind, this recipe is perfect for bakers of all skill levels. By opting for a quality store-bought pie crust, even novice bakers can achieve a homemade masterpiece without the intimidation of making pastry from scratch.
- Perfect for Any Occasion: While undeniably a fall favorite, this Dutch Apple Pie is versatile enough for any celebration. Its comforting nature makes it ideal for holiday gatherings like Thanksgiving, but it’s equally wonderful as a treat for family dinners or a casual get-together.
- Make-Ahead Convenience: Save time and reduce stress, especially during busy holidays. This pie can be prepared in advance, allowing you to enjoy a freshly reheated, perfectly crisp dessert when you’re ready to serve.
Crafting Your Homemade Apple Crumble Pie: A Step-by-Step Guide
Creating this magnificent Apple Crumble Pie is a rewarding experience, designed to be straightforward and enjoyable. From preparing the tender apple filling to assembling the pie and baking it to golden perfection, each step contributes to a truly memorable dessert. Detailed measurements and full instructions can be found at the bottom of the page on the printable recipe card, but let’s walk through the process to ensure your baking journey is a success.
Preparing the Filling and Crust
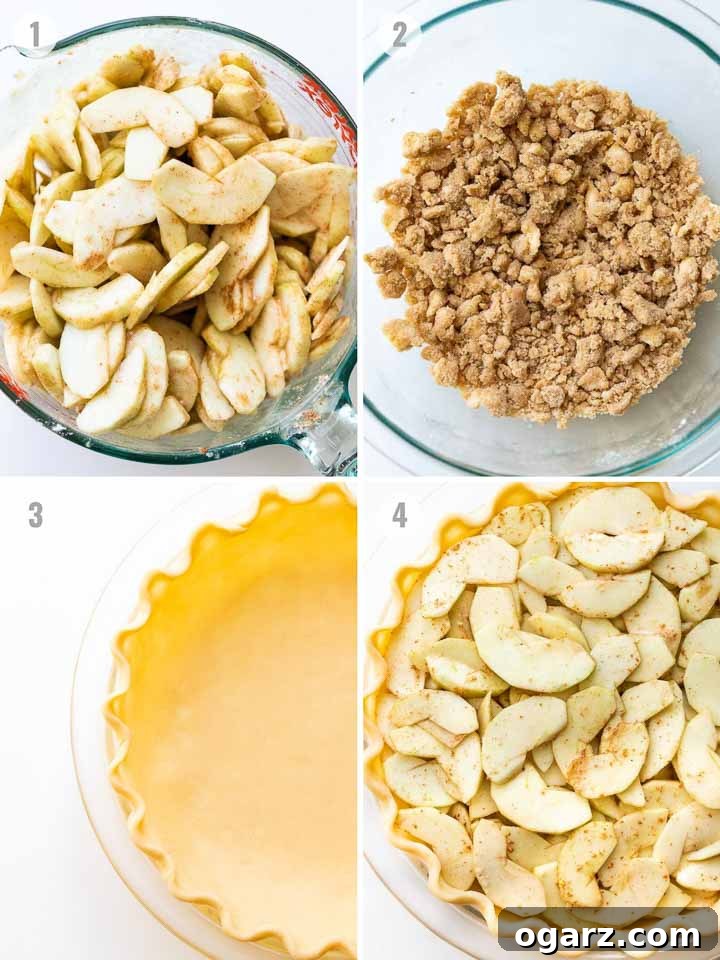
Begin by preparing your chosen pie crust. If you’re using a homemade pie crust, follow its specific recipe instructions for preparation. The key to a fantastic apple pie is allowing the apples to release their natural juices, so we start by preparing the apple filling before the oven even begins to preheat. This crucial resting period ensures a thick, flavorful, and perfectly set filling once baked.
In a separate bowl, whisk together all the dry ingredients for the apple filling: sugar, flour, cornstarch, cinnamon, and nutmeg. This ensures an even distribution of spices and thickening agents. Next, add your thinly sliced and peeled apples to a large bowl, along with a splash of lemon juice to prevent browning and add a touch of brightness. Pour the thoroughly combined dry mixture over the apples and gently mix with your hands or a spatula until every apple slice is coated. Set this aside to allow the juices to develop.
While the apple filling rests, it’s time to prepare your pie dish and preheat your oven to 400°F (200°C). If you’re using a refrigerated, store-bought pie crust, remove it from the fridge approximately 15 minutes before unrolling to allow it to soften slightly, preventing cracks. Carefully place the pie crust into a standard 9×2-inch round pie dish. Use your fingers to gently tuck the crust into the corners, ensuring it fits snugly. Trim any excess overhang, leaving about a 1/2-inch border, and then flute the edges. Fluting not only creates a beautiful presentation but also helps to contain the generous apple filling during baking, preventing spillover.
Assembling and Baking Your Masterpiece
Once your crust is ready, spoon the apple filling into the prepared crust. Be mindful to leave behind any excess liquid that may have accumulated in the bowl; we want the flavor from the apples, not a watery pie. Distribute the apples evenly, mounding them slightly in the center as they will soften and settle during baking. Now, it’s time to create that signature crumble topping!
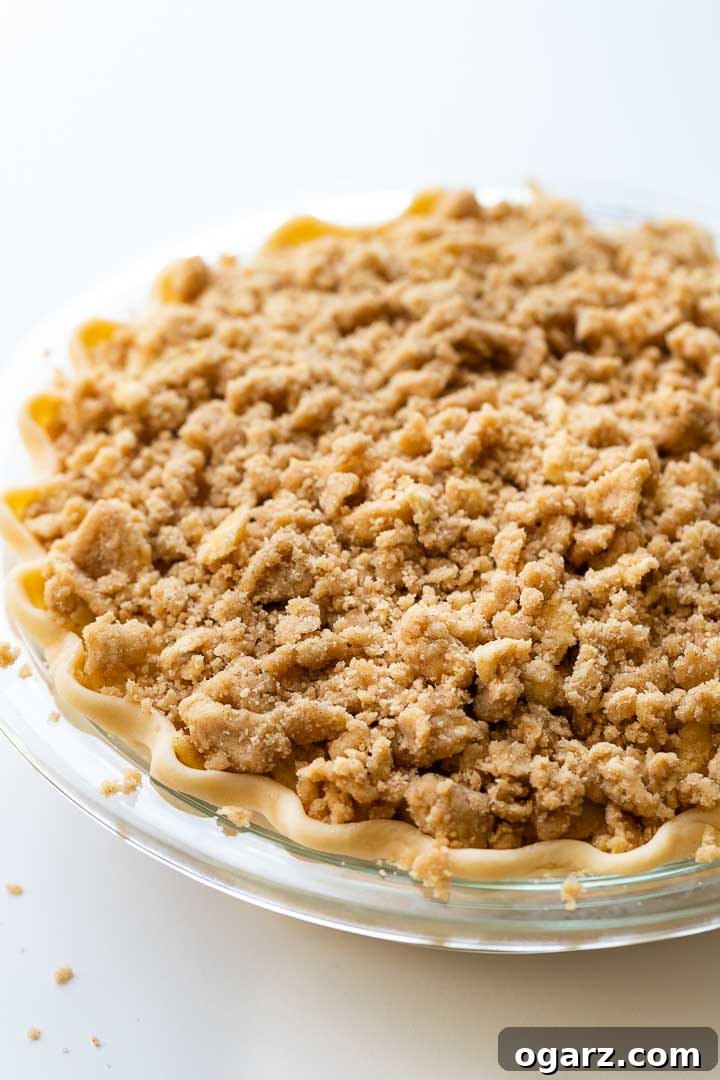
In a bowl, combine flour, packed light brown sugar, cinnamon, and cold unsalted butter (cut into small cubes). Using a fork, a pastry cutter, or even your fingertips, work the butter into the dry ingredients until coarse, crumbly pieces form. You want a mixture that resembles wet sand with some larger pea-sized crumbs for the best texture. Sprinkle this luscious streusel topping generously and evenly over the apple filling, covering the entire surface of the pie.
To prevent any potential messes from bubbling juices, place your pie dish on a baking sheet lined with parchment paper. This simple step saves you from scrubbing your oven later. Bake the pie in your preheated oven at 400°F (200°C) for the initial 20 minutes. This high heat helps to set the crust and begin browning the topping. After 20 minutes, reduce the oven temperature to 375°F (190°C) and continue baking for another 30-40 minutes, or until the topping is golden brown, and the filling is visibly bubbling around the edges. If the pie crust edges start to brown too quickly, loosely cover them with aluminum foil or a pie shield.
Expert Tips for the Perfect Apple Crumble Pie
- Pie Crust Prowess: Whether you choose the convenience of a good quality store-bought pie crust or opt for the rich flavor of a homemade buttery flaky pie crust, rest assured that this recipe is adaptable. Using a premade crust significantly streamlines the process, making it quicker and less daunting. If time allows, however, making your own pie dough adds an extra layer of homemade charm. Importantly, there’s no need for blind-baking the crust; the filling and topping will protect it from becoming soggy during the bake.
- The Peel Factor: Always take the time to peel your apples. While apple peels are nutritious, they tend to become tough and chewy during baking, detracting from the smooth, tender texture of the apple filling. A good apple peeler makes this task quick and easy.
- Thorough Sugar Mixture: Resist the temptation to simply sprinkle the dry filling ingredients over the apples without pre-mixing. Thoroughly combining the granulated sugar, flour, cornstarch, and spices in a separate bowl ensures that each apple slice is evenly coated. This even distribution is critical for consistent flavor and for the thickening agents to work effectively, preventing a watery pie.
- The Importance of Resting: After tossing the apples with the dry filling ingredients, allow the mixture to rest for at least 15 minutes. During this time, the sugar draws out moisture from the apples, creating a delicious, flavorful juice. This natural liquid, combined with the cornstarch and flour, will thicken beautifully as the pie bakes, resulting in a rich, luscious filling.
- Smart Baking for Easy Cleanup: Apple fillings can often bubble over as they bake, leading to sticky, burnt messes at the bottom of your oven. To save yourself considerable cleanup time, always place your pie dish on a parchment-covered baking sheet. Any overflow will simply land on the parchment, which can be easily discarded after baking.
- Patience is Key for Serving: It can be tempting to slice into a warm, fragrant apple pie immediately after it comes out of the oven, but for the best results, exercise a little patience. Allowing the pie to cool completely (ideally for several hours or to room temperature) gives the starch in the filling and the apples themselves time to set and thicken. Slicing too early often results in a crumbly pie with a runny filling.
Explore More Delightful Pie Recipes
If you’ve enjoyed crafting this Apple Crumble Pie, you’re in for a treat! Our collection of pie recipes offers a diverse array of flavors and textures, perfect for any season or craving. From creamy classics to fruity sensations, there’s always a new pie adventure waiting:
Pies, Crisps, & Tarts
Creamy Coconut Cream Pie
Pies, Crisps, & Tarts
Delightful Fresh Strawberry Pie
No Bake & Chilled Desserts
Effortless No-Bake Key Lime Pie
Cakes
Decadent Pecan Pie Cheesecake
Common Questions About Apple Crumble Pie
The exact quantity of apples required for an apple pie with a crumb topping can vary based on the size of the apples you select and the specific recipe. For this particular recipe, you’ll need approximately 8 cups of thinly sliced and peeled apples. This typically translates to about 2 ¾ pounds of apples, or roughly 7 to 8 medium-sized apples. Don’t be concerned if the apples appear to be stacked quite high in the pie dish before baking; they will significantly reduce in volume and settle as they cook down in the oven, creating a perfectly full pie.
To achieve the most balanced and delicious apple pie, we highly recommend using a combination of apples that offer both firm texture and rich flavor. A blend of sweet, tart, and firm varieties ensures a complex filling that holds its shape and avoids becoming overly mushy. Here’s a guide to some excellent choices:
- Granny Smith: Renowned for its firm texture, Granny Smith apples maintain their structure exceptionally well during baking, preventing mushiness. However, they are quite tart and can lack a strong, intrinsic apple flavor, making them ideal when paired with sweeter, more aromatic varieties.
- Honeycrisp: A favorite for its delightful sweetness, vibrant flavor, and relatively firm texture, Honeycrisp apples are fantastic for pies. They hold up well and contribute a wonderful fruity note. They pair beautifully with Granny Smith for a well-rounded pie, though availability can sometimes be limited.
- Golden Delicious: These apples offer a pleasant balance of sweet and tart, along with a good flavor profile. While they tend to soften a bit more during cooking compared to Granny Smiths, their taste contribution is excellent.
- Jonagold: If you can find them, Jonagold apples are an exceptional choice. They boast a firm texture and a superb blend of sweet and tart flavors, often capable of making a delicious pie entirely on their own.
- Gala: Sweet, flavorful, and possessing a firm texture, Gala apples are a solid contender for pie fillings. For optimal balance, they are best combined with a more tart apple variety.
- McIntosh: Known for being sweet, juicy, and intensely flavorful, McIntosh apples tend to break down more during cooking, contributing to a wonderfully soft and saucy filling. They are best used in combination with firmer apples like Granny Smith to ensure some textural integrity.
- Pink Lady (Cripps Pink): These apples offer a fantastic blend of sweet and sour flavors and hold their shape well, making them a versatile choice that can often star as the sole apple in a pie.
Crafting the irresistible streusel topping for your Dutch apple pie requires just a few basic ingredients: all-purpose flour, butter, sugar (typically brown sugar for a richer flavor), and a touch of cinnamon. The process is straightforward. In a bowl, combine your dry ingredients. Then, add cold unsalted butter, cut into small cubes. You can use a fork, a dedicated pastry cutter, or your hands to work the butter into the flour mixture. We highly recommend using your fingertips; this method allows you to feel the texture and control the size of the crumbs. Continue rubbing the butter into the flour until the streusel reaches your desired consistency. For an ideal Apple Crumble Pie, we prefer a coarser topping with a variety of crumb sizes, rather than a finely milled, sandy texture. These larger crumbs will bake up beautifully crisp and golden, adding an incredible textural contrast to the soft apple filling.
Elevating Your Apple Crumble Pie: Perfect Serving Pairings
While a slice of Apple Crumble Pie is undeniably delicious on its own, pairing it with the right accompaniment can transform it into an unforgettable dessert experience. Here are some of our favorite ways to serve this comforting classic:
- Homemade Whipped Cream: A cloud of homemade whipped cream is, without a doubt, a quintessential pairing. It’s incredibly easy to make from scratch with just heavy cream, a touch of sugar, and vanilla extract. For an extra special touch, consider flavoring it with a bit of vanilla sugar. The light, airy sweetness of whipped cream provides a delightful contrast to the warm, spiced apples and crunchy streusel. Everyone loves a generous dollop of this sweet, creamy topping!
- Silky Vanilla Sauce: For a touch of European elegance, consider a luscious vanilla sauce. This creamy, warm custard-like sauce is surprisingly simple to prepare and offers a sophisticated counterpoint to the pie. In Germany, it’s a traditional accompaniment for Apfelstrudel (apple strudel), but it’s equally magnificent drizzled over pancakes or any warm, sweet dessert. Its rich vanilla notes beautifully enhance the apple and cinnamon flavors.
- Classic Vanilla Ice Cream: When in doubt, you can never go wrong with a scoop of classic vanilla ice cream. The cold, melting ice cream creates a wonderful temperature contrast with the warm pie, and its simple, sweet flavor allows the apple pie to truly shine. It’s a universally loved pairing that’s always a hit!
Preparing Your Apple Crumble Pie in Advance
One of the many benefits of this Dutch Apple Pie recipe is its make-ahead potential, making it an excellent choice for holiday meal planning or when you simply want to enjoy a delicious dessert without last-minute fuss. To prepare your apple crumble pie in advance, follow the baking instructions precisely. Once baked, allow the pie to cool completely to room temperature. This step is crucial for the filling to fully set and for the flavors to meld beautifully. After cooling, cover the pie dish tightly with plastic wrap or aluminum foil and refrigerate it for up to 4 days.
On the day you plan to serve your magnificent pie, remove the pie dish from the refrigerator and let it sit at room temperature for about 30 minutes. This helps prevent thermal shock to the pie dish when it enters a warm oven. Then, preheat your oven to 375°F (190°C). Reheat the pie for 10 to 15 minutes, or until the apple filling is warm and bubbling slightly, and the streusel topping has regained its delightful crispness. This reheating process not only warms the filling but also revitalizes the crust and topping, bringing back that freshly baked texture and aroma, perfect for impressing your guests!
Essential Tools and Ingredients for Success
Having the right tools and quality ingredients on hand can make your pie-making experience even more enjoyable and efficient:
- Apple Peeler/Slicer: This handy gadget is a game-changer for pie prep! It significantly speeds up the process of peeling, coring, and slicing apples, ensuring uniform pieces for even baking. It’s also incredibly versatile and can be used for other produce, like potatoes.
- Cinnamon: The quality of your cinnamon truly impacts the overall flavor of your apple pie. We always recommend investing in high-quality ground cinnamon for its warm, aromatic notes. Many find that purchasing it in bulk, like from Costco, offers excellent quality at a great value.
- Durable Pie Plate: A reliable pie plate is essential. Look for one made from borosilicate glass, which is known for its ability to withstand extreme temperature changes. This means you can confidently transfer your pie directly from the freezer to the oven without the risk of shattering, offering great flexibility for make-ahead baking.
Never Miss A Delicious Recipe! Subscribe to our newsletter for exclusive updates and mouth-watering recipes directly in your inbox. Plus, connect with us and follow along on Facebook, Instagram, and Pinterest for daily inspiration and all of the latest culinary adventures.
Print Recipe
Apple Crumble Pie
Equipment
-
9-inch pie plate
Ingredients
- 1 pie crust, chilled
For the apple filling:
- 1/2 cup granulated sugar
- 2 Tbsp all-purpose flour
- 1 Tbsp cornstarch
- 2 tsp ground cinnamon
- 1/4 tsp ground nutmeg
- 8 cups thinly sliced and peeled apples, about 7-8 medium apples, see post for more info
- 2 Tbsp lemon juice
For the topping:
- 3/4 cup all-purpose flour
- 1/2 cup packed light brown sugar
- 1 tsp ground cinnamon
- 1/2 cup unsalted butter, cut into little cubes and softened a little
Instructions
-
In a medium bowl, combine the granulated sugar, all-purpose flour, cornstarch, ground cinnamon, and ground nutmeg. Whisk together until thoroughly mixed.
-
In a large bowl, combine the thinly sliced and peeled apples with the lemon juice. Then, add the mixed dry ingredients from the previous step and, using a spatula or your hands, stir everything together until the apples are evenly coated. Set aside to allow juices to release.
-
Preheat your oven to 400°F (200°C).
-
Carefully place your chilled pie crust into a 9-inch pie dish. Gently press it into the dish with your fingers to ensure it fits well. Trim any excess dough, leaving about a 1/2-inch overhang, and then flute or crimp the edges for a decorative finish.
-
Spoon the apple filling into the prepared pie crust, mounding it slightly. Try to leave most of the liquid that has accumulated in the bowl behind, as too much liquid can result in a runny pie.
-
To prepare the crumble topping, combine the 3/4 cup all-purpose flour, 1/2 cup packed light brown sugar, 1 tsp ground cinnamon, and 1/2 cup unsalted butter (cut into small cubes and slightly softened) in a bowl. Use a fork, pastry cutter, or your hands to work the butter into the dry ingredients until the mixture forms coarse, thick crumbs. Sprinkle this topping evenly over the apple filling.
-
Place the pie dish on a large baking sheet lined with parchment paper (to catch any drips). Bake in the preheated oven at 400°F (200°C) for 20 minutes. After 20 minutes, reduce the oven temperature to 375°F (190°C) and continue to bake for an additional 30-40 minutes, or until the streusel topping is golden brown and the apple filling is bubbling vigorously around the edges. If the pie crust edges begin to brown too quickly, you can loosely cover them with a pie shield or aluminum foil.
-
Once baked, remove the pie from the oven and let it cool completely on a wire rack before slicing. This allows the filling to properly thicken and set, ensuring neat slices. Cover any leftovers with plastic wrap and store them in the refrigerator for up to 4 days.
Notes
- Pie crust: Feel free to use a good quality store-bought pie crust for convenience or opt for a homemade buttery flaky pie crust recipe for an extra special touch. The crust does not require blind-baking for this recipe.
- Apple preparation: It’s essential to peel the apples, as the peels can become tough and chewy during baking, affecting the texture of your pie.
- Dry ingredients for filling: Ensure the sugar, flour, cornstarch, and spices for the filling are thoroughly combined in a separate bowl before adding them to the apples. This prevents clumping and ensures even flavor distribution and thickening.
- Apple resting period: Allow the apple mixture to rest for at least 15 minutes after combining with the dry ingredients. This step encourages the apples to release their natural juices, which helps to create a luscious and thick filling as the pie bakes.
- Baking cleanup: Always place your pie dish on a parchment-covered baking sheet. This simple trick will catch any apple filling that might bubble over, making cleanup significantly easier.
- Serving patience: For the best texture and to allow the filling to set properly, let the pie cool completely to room temperature before slicing and serving. Slicing a hot pie will often result in a messy, crumbly slice with a runny filling.
Nutrition
Love This Recipe? Rate and Share Your Thoughts Below!