
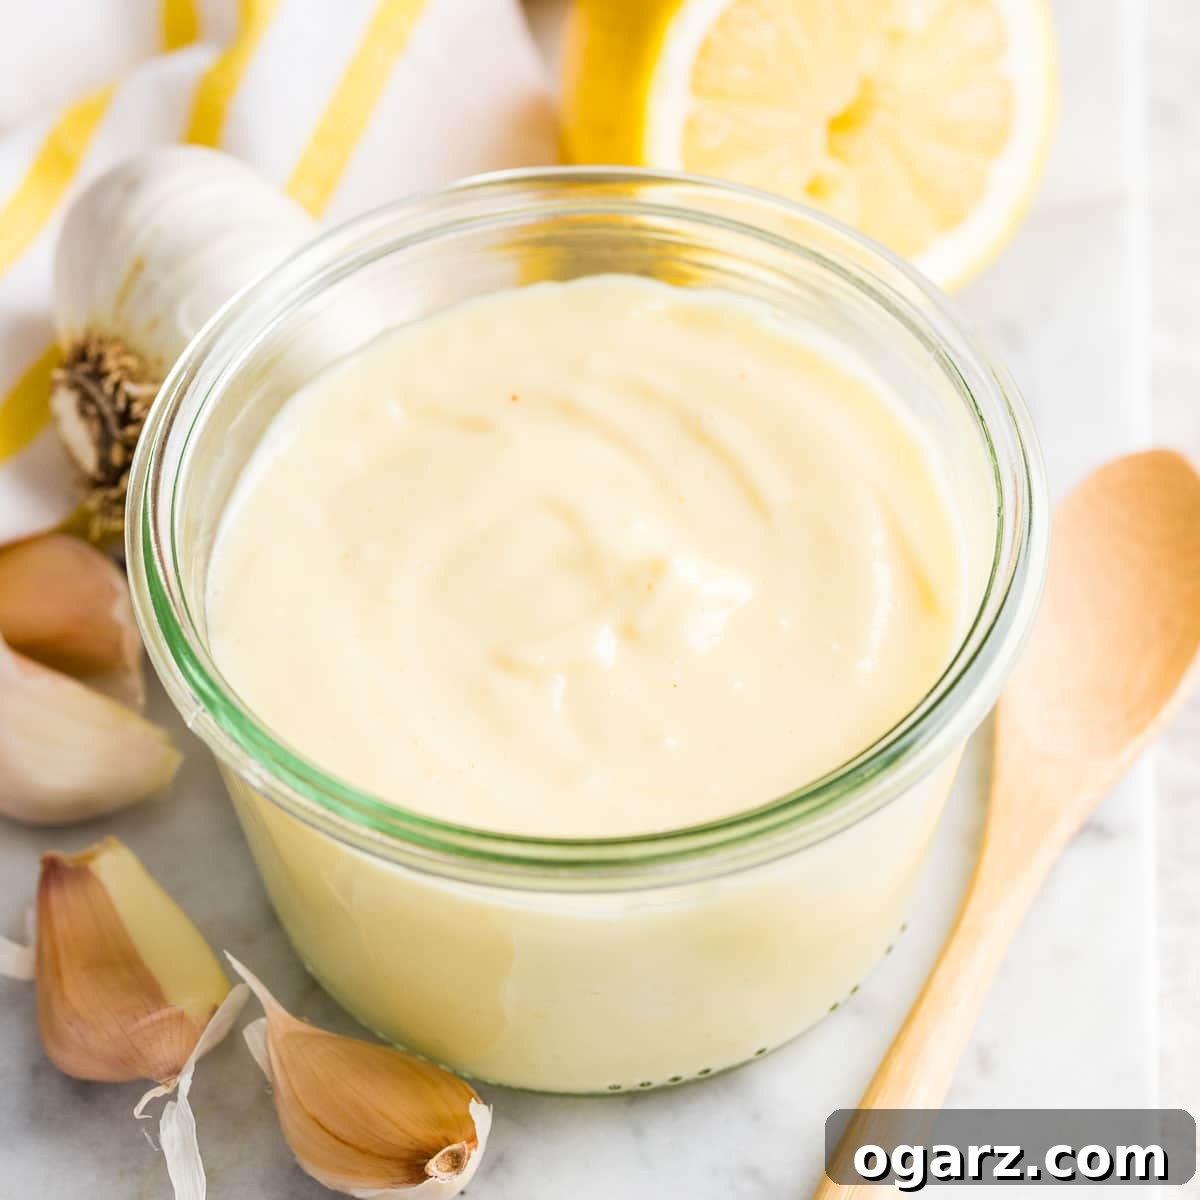
Unlock the secret to incredible flavor with this unbelievably easy-to-make **homemade Aioli sauce**! Prepared **in less than 10 minutes**, this creamy, garlicky lemon sauce is a game-changer for everything from crispy finger foods and rustic bread to gourmet burgers and sandwiches. Forget store-bought versions – discover my foolproof method to create authentic, restaurant-quality aioli right in your kitchen.

Mastering Homemade Aioli: The Ultimate Garlic Lemon Sauce
There’s something truly magical about homemade aioli. This iconic **Mediterranean garlic lemon sauce**, often hailed as the "butter of Provence," elevates any dish it graces. While many recipes simply suggest doctoring up regular mayonnaise, I’m here to show you how straightforward it is to create this famous emulsion **from scratch using just a few simple ingredients**.
The difference between a truly homemade aioli and a shortcut version is astounding. The vibrant, fresh flavors of raw garlic, bright lemon, and good quality olive oil create a depth that pre-made mayonnaise simply can't replicate. And the best part? It's **remarkably fast to prepare**, coming together in mere minutes, making it a luxurious yet accessible addition to your culinary repertoire.
Over the years, we've experimented with countless methods to achieve the perfect creamy texture for this French dipping sauce – immersion blenders, traditional whisking by hand, food processors, and even conventional blenders. Through all our trials, we’ve found that the **electric hand mixer is, without a doubt, the easiest and most foolproof technique**. This method offers unparalleled control over the emulsification process, allowing you to achieve the ideal consistency every time while preventing issues like bitterness from over-processed oil or the dreaded splitting of the mixture. Get ready to impress your taste buds and your guests with this authentic, delectable aioli!
Why Homemade Aioli is a Must-Try
While often confused with mayonnaise, aioli boasts its own distinct identity and a rich history. The word "aioli" itself translates directly to "garlic and oil," hinting at its foundational ingredients. Originating from the sun-drenched coasts of the Mediterranean – think Spain's allioli, the South of France, and parts of Italy – this creamy sauce is an emblem of regional cuisine, celebrated for its robust flavor and versatility.
Unlike standard mayonnaise, which typically uses neutral-flavored oils like canola or sunflower, traditional aioli always features olive oil and a generous amount of fresh garlic. This combination imparts a unique fruity, pungent, and savory character that sets it apart. While modern variations often include egg yolks and lemon juice to aid in emulsification and add brightness, the essence remains the powerful duo of garlic and oil.
Making aioli from scratch is a rewarding experience. It gives you complete control over the quality of ingredients, allowing you to fine-tune the garlic intensity and lemon tang to your personal preference. Plus, the fresh taste is simply incomparable to anything you'll find pre-packaged. It's a testament to how simple, fresh components can combine to create something truly extraordinary.
Essential Ingredients for Authentic Aioli
Crafting the perfect aioli begins with selecting fresh, high-quality ingredients. Here’s a closer look at what you’ll need and why each component is vital for that signature flavor and creamy texture.
- Garlic: The Soul of Aioli
This is the star of the show; without garlic, it simply isn't aioli! The type and amount of garlic greatly influence the final taste. For a **milder, more subtle garlic presence**, use one clove. If you crave a **more intense, pungent garlic flavor** that truly stands out, opt for two cloves. Always use fresh garlic, as pre-minced or jarred garlic won't deliver the same vibrant punch. - Egg Yolks: The Emulsifier
Egg yolks are crucial for creating the rich, creamy emulsion that defines aioli. They contain lecithin, a natural emulsifier that helps bind the oil and other liquids into a stable sauce. I highly recommend using **organic egg yolks** from fresh, reputable sources. You'll genuinely taste the difference in this recipe, where eggs are a prominent flavor component. Ensure your eggs are at room temperature, as this aids in better emulsification. - Lemon Juice: The Brightness Booster
Freshly squeezed lemon juice is non-negotiable for superior flavor. It not only adds a wonderful **bright, tangy counterpoint** to the richness of the oil and garlic but also helps stabilize the emulsion. Bottled lemon juice often contains preservatives and lacks the vibrant acidity of fresh lemons, so take the extra minute to squeeze it yourself. - Dijon Mustard: The Secret Stabilizer (Optional but Recommended)
A popular addition in French-style aioli, Dijon mustard serves multiple purposes. It contributes a subtle, complex flavor and a beautiful pale yellow hue to the sauce. More importantly, mustard acts as an excellent secondary emulsifier, thanks to its own lecithin content. This makes the emulsification process smoother and the resulting aioli more stable, reducing the risk of it splitting. Feel free to adjust the amount or omit if you prefer a purist approach, but it’s highly recommended for ease and flavor. - Cayenne Pepper: The Flavor Enhancer
A tiny **pinch of cayenne pepper** might seem unconventional, but it works wonders. It doesn't make the aioli spicy; rather, it subtly **enhances and awakens the other flavors**, adding a gentle warmth and complexity without overpowering the garlic and lemon. - Light Olive Oil: The Right Oil Choice
For an authentic Mediterranean flavor without any bitterness, I strongly recommend using **light-tasting olive oil**. Extra virgin olive oil, while excellent for finishing dishes, can be too intense and easily lead to a bitter taste when used in emulsions like aioli, especially if it's high quality and robust. The goal is a smooth, balanced flavor where the garlic and lemon shine through. If you don’t have light olive oil on hand, a blend of ½ cup vegetable oil (like grapeseed or sunflower) and 2 tablespoons of extra virgin olive oil can work as a substitute, offering some olive oil flavor without the risk of bitterness. - Salt and Sugar: The Balancers
A touch of salt is essential for seasoning and bringing out all the flavors. A small amount of sugar helps to balance the acidity of the lemon and the sharpness of the garlic, creating a more harmonious overall taste.
The Foolproof Method: How to Make Aioli from Scratch
Follow these simple steps for a creamy, perfect aioli every time. Detailed measurements can be found in the recipe section below.
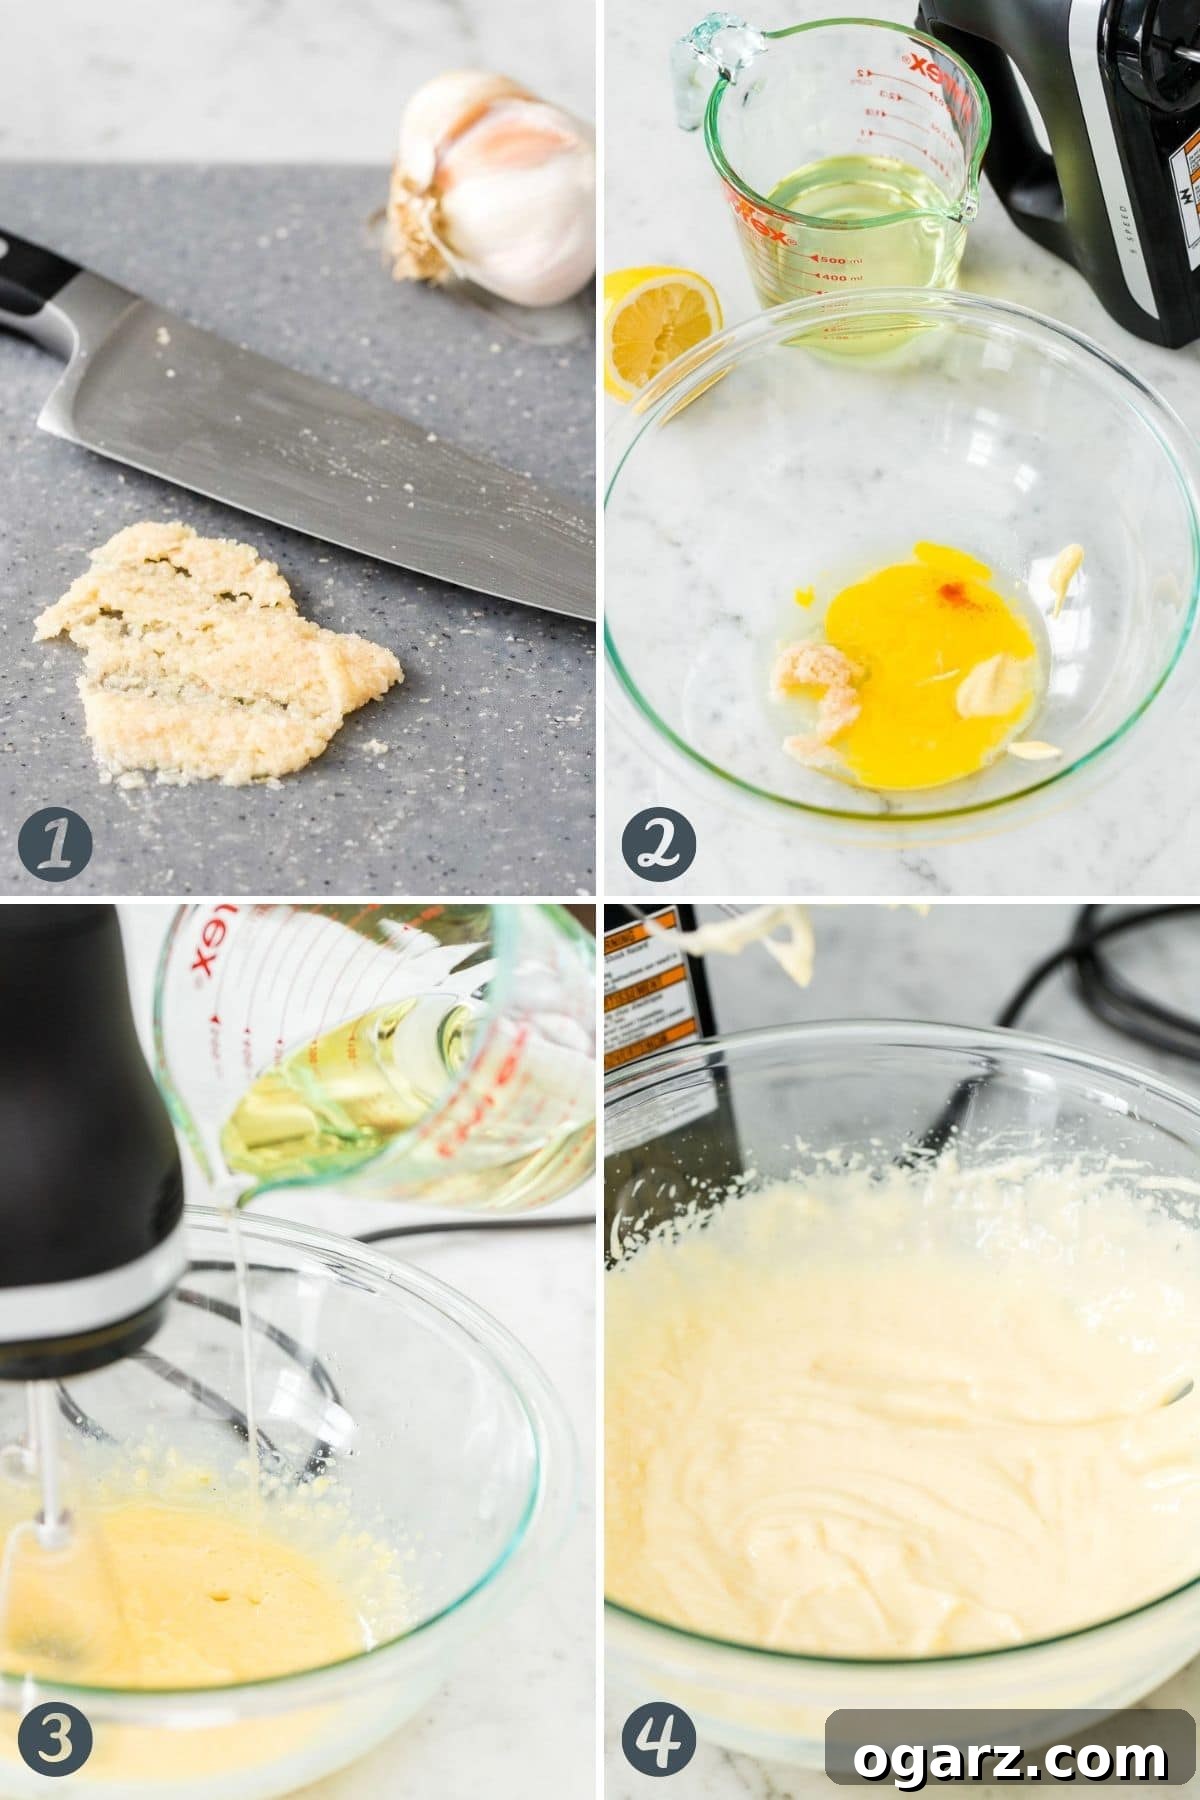
- Prepare the Garlic Paste: The texture of your garlic is paramount for a smooth aioli. Before anything else, transform your garlic cloves into a fine, smooth paste using one of the methods described in the "How to Make Garlic Paste" section below. We find using a knife and a pinch of salt to be very effective.
- Combine the Base Ingredients: In a medium-sized mixing bowl, combine the prepared garlic paste, egg yolks, freshly squeezed lemon juice, Dijon mustard (if using), salt, sugar, and cayenne pepper. Use an electric hand mixer set to medium speed and mix these ingredients thoroughly until the mixture is smooth and well combined. This ensures all the initial flavors are perfectly incorporated.
- Slowly Emulsify with Oil: This is the most crucial step for a successful aioli. With your electric hand mixer still running, but now set to high speed, begin to **slowly, steadily, and very gradually pour in the light olive oil** in a thin, continuous stream. The key is to add the oil drop by drop at the beginning, then in a very thin stream, allowing it to fully incorporate into the egg mixture. Continue mixing continuously throughout this process. Patience here is key; rushing this step can cause the emulsion to break.
- Achieve the Perfect Consistency: Once all the olive oil has been added, continue mixing with the hand mixer for approximately 2 more minutes. During this time, you will observe the mixture thickening significantly and becoming visibly paler in color, transforming into a luxurious, creamy aioli. It should be thick enough to hold soft peaks. Transfer the finished sauce into an airtight container and use it immediately, or refrigerate it for a few hours to allow it to thicken further and for the flavors to meld beautifully.
Crafting the Perfect Garlic Paste
Garlic is the heart of aioli, and its preparation significantly impacts the sauce's final texture and flavor. To ensure a smooth, uniform aioli without biting into raw garlic bits, transforming the cloves into a fine paste is essential. There are several effective ways to achieve this, depending on the tools you have readily available:
- The Traditional Way: Mortar and Pestle
This is the time-honored method and often considered the best for achieving the smoothest, most intensely flavored garlic paste. The pounding action of the pestle against the mortar breaks down the garlic's cell walls, releasing its aromatic oils and creating an incredibly smooth, creamy paste. This method also ensures uniform distribution of garlic flavor throughout your aioli. - The Modern Approach: Microplane Grater
If you don't have a mortar and pestle, a microplane grater is an excellent alternative. Grating the garlic on a very fine grater quickly produces a pulp-like consistency that integrates well into the sauce. Exercise caution when using a microplane, as the blades are extremely sharp. - The Kitchen Knife and Salt Method
This method is perfect if you lack specialized tools. It might leave slightly more noticeable garlic bits compared to a mortar and pestle, but it's far superior to simple mincing. Begin by coarsely chopping your garlic cloves. Then, sprinkle approximately ½ teaspoon of salt over the chopped garlic. Using the side of your knife blade, repeatedly press down and scrape the garlic against your cutting board, working it into a paste. The salt acts as an abrasive, helping to grind the garlic down into a smoother consistency. Continue until a fine paste forms.
Expert Tips for Aioli Success
Achieving a perfectly creamy and delicious aioli is simple with a few insider tips. Here's what we've learned through extensive testing:
- Yield: This recipe typically yields about **1 cup of luscious Aioli sauce**, perfect for serving a small gathering or enjoying over several meals.
- Garlic Paste is Key: As mentioned, properly prepared garlic paste is fundamental. Whether you use a **mortar and pestle** for traditional smoothness, a **Microplane grater** for efficiency, or the **knife and salt method** for a rustic touch, ensure your garlic is finely processed to avoid chunky texture.
- Chilling for Firmness: Don't be alarmed if your aioli appears slightly less thick immediately after whisking. Aioli, like many emulsions, **will firm up considerably when chilled!** It should roughly hold its shape once whisked, but its true, luxurious thickness will develop after a few hours in the refrigerator.
- The Role of Dijon Mustard: While optional, Dijon **mustard significantly aids in emulsification** by acting as an additional stabilizer and also imparts a beautiful color and a subtle tangy depth. Feel free to adjust the amount or omit it if you prefer a simpler flavor profile or don't have it on hand.
- Choose Your Oil Wisely: I cannot stress enough the importance of using **light-tasting olive oil!** Extra virgin olive oil can often lead to an overly bitter sauce due to its robust flavor compounds, which can become more pronounced during emulsification. If you **don't have light olive oil**, a good alternative is to use a blend of ½ cup neutral vegetable oil (like grapeseed or sunflower) and 2 tablespoons of extra virgin olive oil. This combination allows you to capture some of the desirable olive oil notes without the risk of bitterness.
- Fresh Eggs for Best Results: Always use **fresh eggs that have been properly stored in the fridge and are free of cracks**. For those concerned about raw eggs, using pasteurized eggs or egg yolks provides an extra layer of comfort and safety without compromising the recipe's integrity. Bringing eggs to room temperature before starting can also help with emulsification.
- Storage Guidelines: Store your freshly made aioli in an **airtight container in the fridge for up to 5 days**. For optimal freshness and to prevent flavor absorption from other fridge items, glass containers are highly recommended.
Troubleshooting Common Aioli Issues
Even with a foolproof recipe, sometimes things don't go exactly as planned. Don't worry, many common aioli issues are easily fixable!
- My Aioli is Too Thin/Not Thickening:
- Too much oil too fast: This is the most common culprit. The egg yolks couldn't emulsify all the oil.
- Solution: In a separate clean bowl, whisk an additional egg yolk or a teaspoon of Dijon mustard. Very slowly, drop by drop, whisk your broken aioli into this new yolk/mustard mixture. Continue until it emulsifies. You can also try adding a tablespoon of hot water or lemon juice to the broken aioli before slowly whisking it back into a fresh egg yolk.
- My Aioli Has Split/Curdled:
- This also often happens from adding oil too quickly or if ingredients are too cold.
- Solution: Follow the same steps as for "too thin." The key is to re-emulsify it with a fresh egg yolk or mustard as a base.
- My Aioli Tastes Bitter:
- This is almost always due to using a robust extra virgin olive oil.
- Solution: Unfortunately, bitterness is hard to remove once it's set. Next time, use light-tasting olive oil or a neutral oil blend as recommended. If it's only slightly bitter, you can try to mellow it with a tiny pinch of sugar or a bit more lemon juice.
- My Aioli is Too Thick:
- If your aioli becomes too thick after chilling, it's an easy fix!
- Solution: Simply whisk in a teaspoon or two of warm water or additional lemon juice until it reaches your desired consistency.
Aioli FAQs: Your Questions Answered
While similar in texture and both being emulsions, the main difference lies in their core ingredients and flavor profiles. **Aioli is always made with garlic and olive oil**, giving it a distinct pungent, fruity flavor. Mayonnaise, on the other hand, is typically made with a flavor-neutral oil (like canola or sunflower oil) and does not inherently contain garlic. Aioli is essentially a garlic-infused mayonnaise, but its traditional Mediterranean roots and olive oil base set it apart.
The word aioli literally translates from French to "garlic and oil." It is a creamy, emulsified sauce originating from the Mediterranean regions of Spain (where it's known as allioli), France, and Italy. Traditionally, it was just garlic and olive oil pounded together, but modern versions, including this recipe, commonly incorporate egg yolks and lemon juice for a smoother texture and enhanced flavor, sometimes with a touch of mustard for stability.
Yes, aioli is an excellent sauce to prepare ahead of time. It stores beautifully and often tastes even better after the flavors have had a chance to meld. Simply transfer it to an airtight container and **refrigerate for up to 5 days**. For the best quality and to prevent any off-flavors, I recommend storing it in a glass container.
Delightful Aioli Variations to Explore
While we adore our simple, classic garlic aioli, its creamy texture and robust flavor make it an ideal canvas for culinary creativity. Here are a few exciting variations to inspire your own unique sauces:
- Roasted Garlic Aioli: For a milder, sweeter garlic flavor, roast a whole head of garlic in the oven until soft and caramelized. Squeeze out one or two roasted garlic cloves and incorporate them into the recipe instead of raw garlic. This creates a wonderfully mellow and sophisticated aioli.
- Spicy Aioli: Craving a kick? Stir 1 teaspoon or more of your favorite hot sauce (such as Tabasco or Frank's RedHot) or a dollop of Sriracha into the finished aioli. Taste and adjust to achieve your desired level of heat.
- Chipotle Aioli: For a smoky, subtly spicy flavor, mix 1 teaspoon of chipotle chili powder or a spoonful of chipotle hot sauce (from adobo sauce) into the finished sauce. This pairs wonderfully with tacos, burgers, or grilled corn.
- Pesto Aioli: Infuse your aioli with fresh, herbaceous notes by stirring 2 teaspoons of your favorite pesto (store-bought or homemade) into the finished sauce. It's fantastic with Italian-inspired dishes or as a dip for fresh vegetables.
- Basil Aioli: For a bright, aromatic twist, finely chop one tablespoon of fresh basil leaves and fold them into the finished aioli. This is particularly good with tomato-based dishes or as a spread on caprese sandwiches.
- Truffle Aioli: Elevate your aioli to gourmet status by adding 2 teaspoons of high-quality truffle oil to the sauce while mixing it with the hand mixer. This luxurious variation is perfect with french fries, steak, or roasted potatoes.
Inspiring Uses for Your Homemade Aioli Sauce
The versatility of homemade aioli knows no bounds! Its rich, garlicky, and tangy profile makes it a perfect accompaniment to a vast array of dishes. It's much more than just a dip – it's a flavor enhancer that can transform everyday meals into culinary delights.
As a Dipping Sauce:
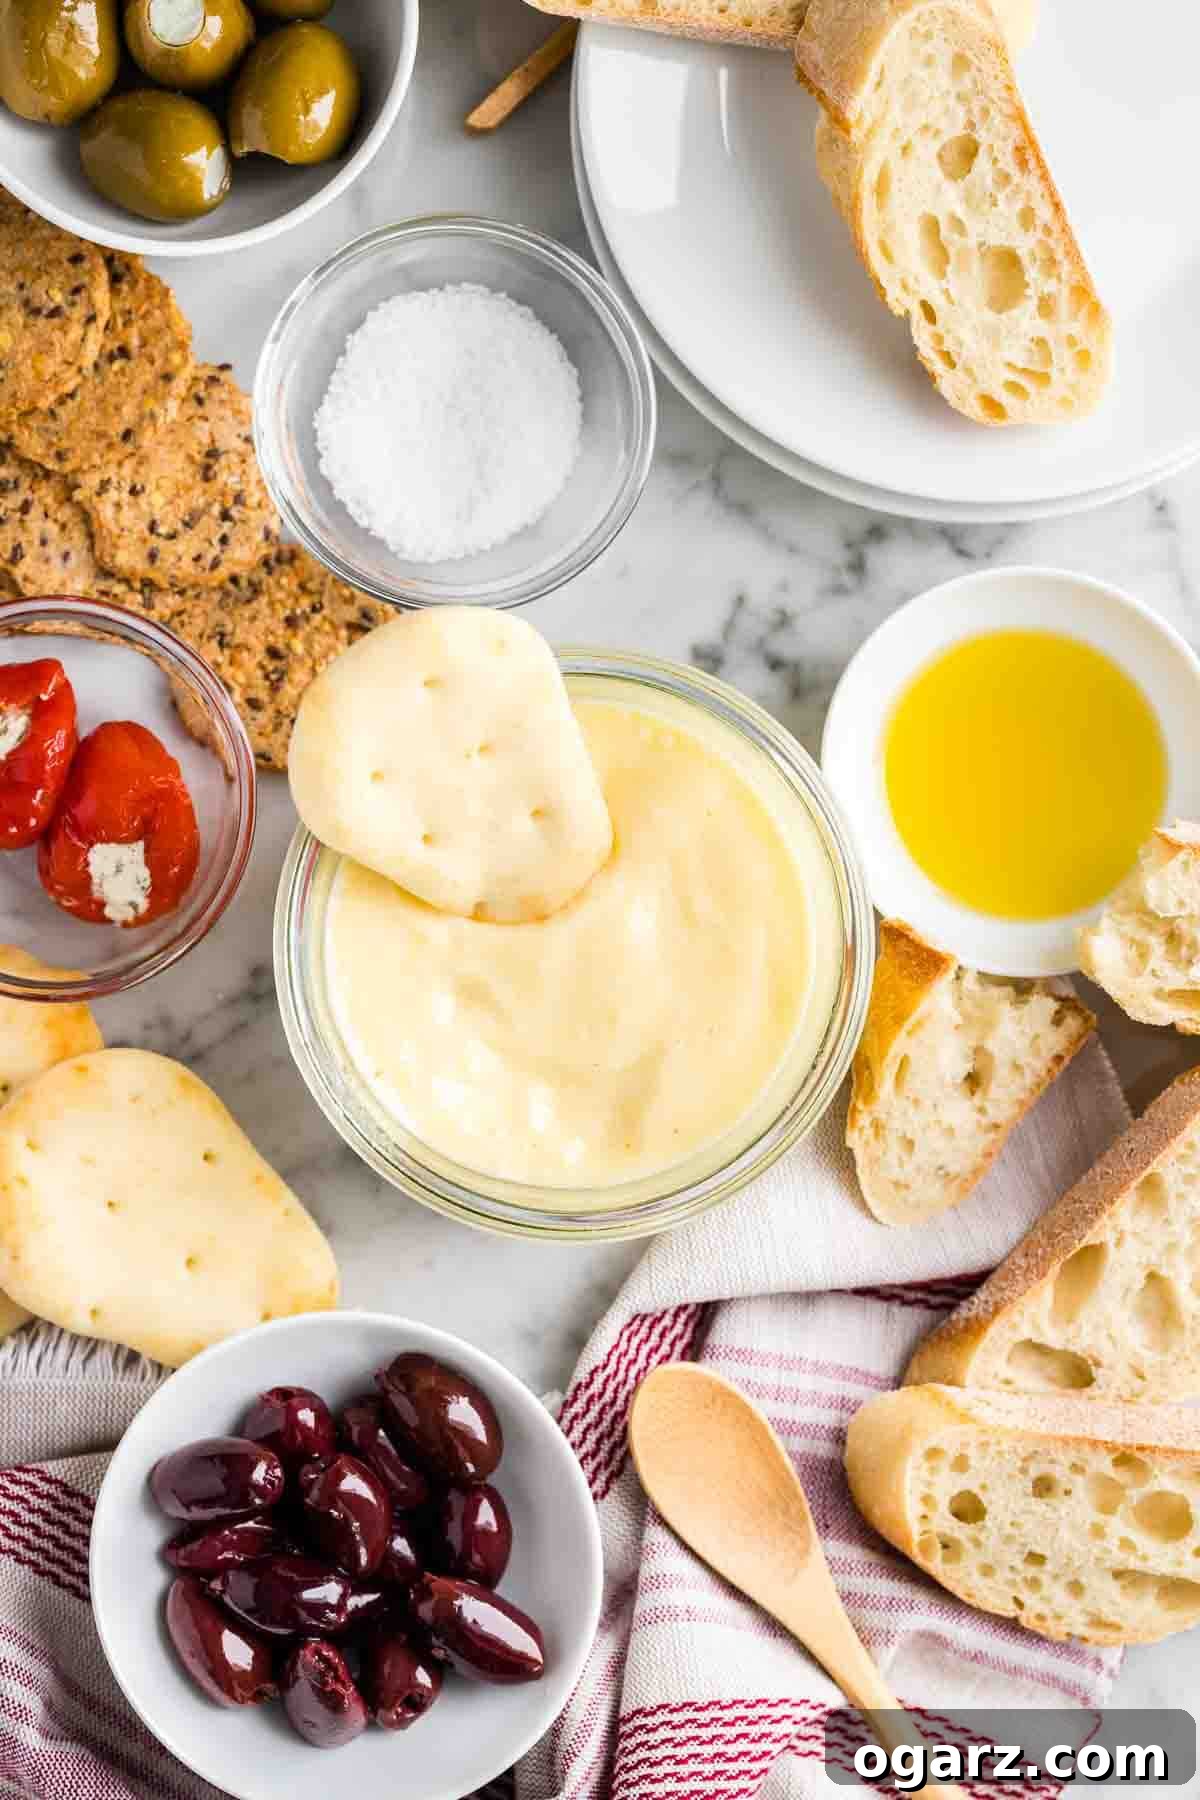
Aioli is the ultimate dipping companion. Its creamy texture clings beautifully to finger foods and vegetables, making them irresistible.
- Crispy Vegetables: Serve with carrot sticks, celery, bell pepper strips, cucumber, broccoli florets, or blanched asparagus.
- Fries & Wedges: A classic pairing! Dip Air Fryer Potato Wedges, regular French Fries, or sweet potato fries into generous dollops of aioli.
- Seafood: An exquisite partner for fried calamari, grilled shrimp, crab cakes, or even a simple pan-seared white fish. Try it with Air Fryer Shrimp.
- Poultry: Excellent with chicken tenders, roasted chicken pieces, or even grilled chicken skewers.
- Bread: Simple, rustic crusty bread or artisanal sourdough is transformed by a swipe of fresh aioli.
As a Spread:
Move over, mayonnaise! Aioli adds an incredible depth of flavor as a spread for sandwiches and burgers.
- Burgers: Elevate any burger, from classic beef to vegetarian patties, with a generous layer of aioli. It's particularly fantastic on Air Fryer Hamburgers.
- Sandwiches & Wraps: Replace your usual mayo with aioli for a gourmet touch on chicken sandwiches, turkey clubs, or vegetable wraps.
- Toasts & Crostini: Spread on toasted bread and top with fresh tomatoes, olives, or roasted vegetables for an elegant appetizer.
Incorporated into Dishes:
Don't limit aioli to just dipping and spreading. It can be mixed into salads or used as a base for other sauces.
- Potato Salad: For a richer, more flavorful potato salad, use aioli as the dressing base instead of standard mayonnaise.
- Deviled Eggs: Add a spoonful of aioli to your deviled egg filling for an extra layer of garlicky goodness.
- Grain Bowls: Drizzle over roasted vegetable and grain bowls for a creamy, savory dressing.
With so many ways to enjoy it, your homemade aioli is sure to become a staple in your kitchen!
Aioli Sauce
By: Julia Foerster
Homemade Aioli is so easy and quick to make and tastes great with veggies or burgers! Discover my foolproof way to make this garlic lemon sauce at home.
Cook Time: 0 minutes
Total Time: 10 minutes
Servings: 8
Ingredients
- 1-2 garlic cloves, made into a paste
- 2 large egg yolks
- 4 tsp lemon juice
- 1/2 tsp Dijon mustard (optional)
- 1/2 tsp salt
- 1/2 tsp sugar
- Pinch of cayenne pepper
- 3/4 cup light tasting olive oil
Instructions
- Prepare a paste from the garlic cloves using a mortar and pestle, microplane grater, or the knife and salt method.
- In a medium bowl, combine the garlic paste, egg yolks, lemon juice, Dijon mustard, salt, sugar, and cayenne pepper. Mix with an electric hand mixer set on medium speed until smooth.
- With the hand mixer still set to high speed, slowly pour in the light olive oil in a thin, continuous stream, mixing continuously.
- Once all the oil is added, continue mixing for about 2 more minutes until the aioli thickens and becomes paler.
- Fill into a container and use right away, or refrigerate for a few hours to allow it to thicken further.
- Store in an airtight container in the fridge for up to 5 days.
Notes
- This recipe makes approximately 1 cup of Aioli sauce.
- For making garlic paste, a mortar and pestle yields the smoothest result. A Microplane grater or chopping with a knife and salt are also effective.
- The aioli will become firmer when chilled in the refrigerator, so don't be concerned if it seems slightly less thick immediately after whisking.
- Dijon mustard helps with the emulsification process and adds a subtle flavor and color. It can be omitted if preferred.
- Always use light olive oil to prevent bitterness. If not available, combine 1/2 cup vegetable oil with 2 tablespoons extra virgin olive oil.
- Ensure eggs are fresh, refrigerated, and free of cracks. Pasteurized egg yolks can be used for added peace of mind.
- Store the finished aioli in an airtight container in the fridge for up to 5 days. Glass containers are recommended.
Quick Cheater's Aioli
If you're short on time or fresh eggs, this easy shortcut recipe is a great alternative:
- 1/2 cup mayonnaise
- 1 tsp olive oil (or use olive oil mayonnaise)
- 1 tsp lemon juice
- 1 garlic clove, minced to a paste
- 1/2 tsp Dijon mustard
Combine all ingredients in a bowl and season with a little bit of salt to taste. Mix well until fully incorporated.
Nutrition Information (per serving, based on 8 servings)
Calories: 196kcal | Carbohydrates: 1g | Protein: 1g | Fat: 21g | Saturated Fat: 3g | Cholesterol: 49mg | Sodium: 152mg | Potassium: 5mg | Sugar: 1g | Vitamin A: 65IU | Vitamin C: 1mg | Calcium: 6mg | Iron: 1mg
Enjoy your delicious homemade Aioli!