
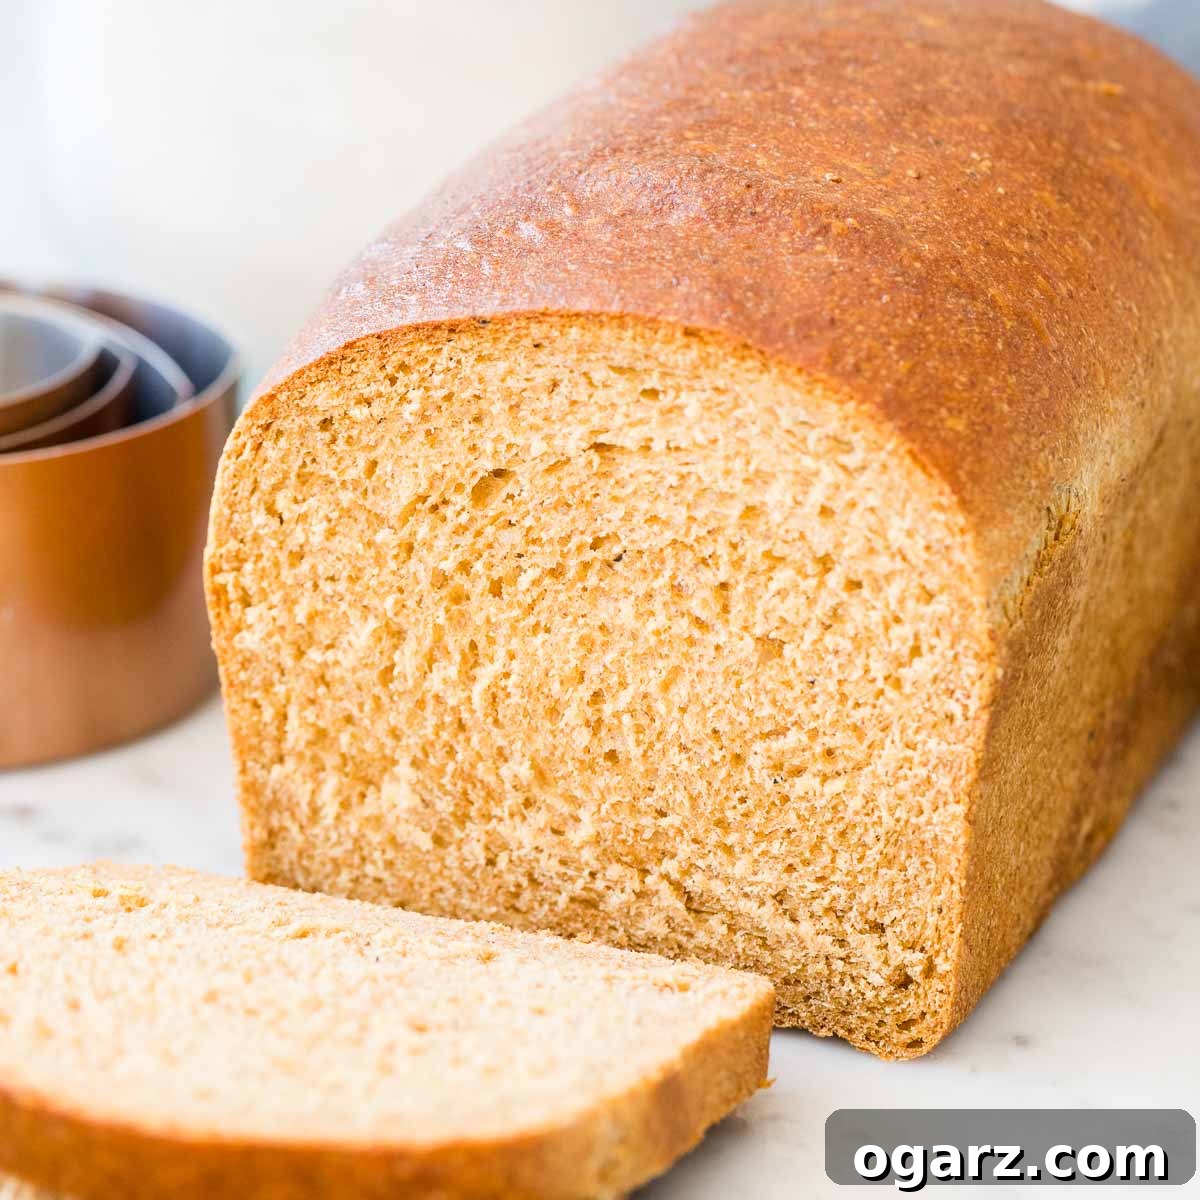
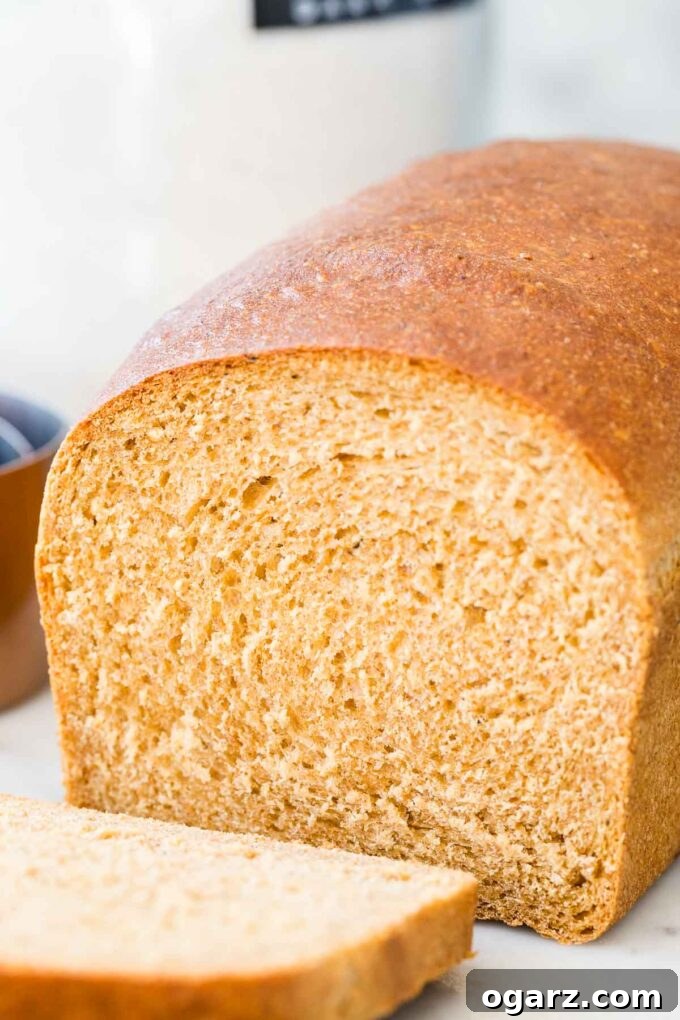
Welcome to the ultimate guide for baking perfect Whole Wheat Bread right in your own kitchen! Forget dry, dense loaves – this recipe yields a soft, fluffy sandwich bread made with 100% whole wheat flour and your choice of natural sweetener. It’s so delicious, you’ll want to make it again and again, and best of all, it stays incredibly fresh for days. Preparing homemade bread is a rewarding experience, filling your home with an inviting aroma and providing a wholesome alternative to store-bought options. If you’ve been searching for a reliable, easy-to-follow recipe that truly delivers on taste and texture, your quest ends here.
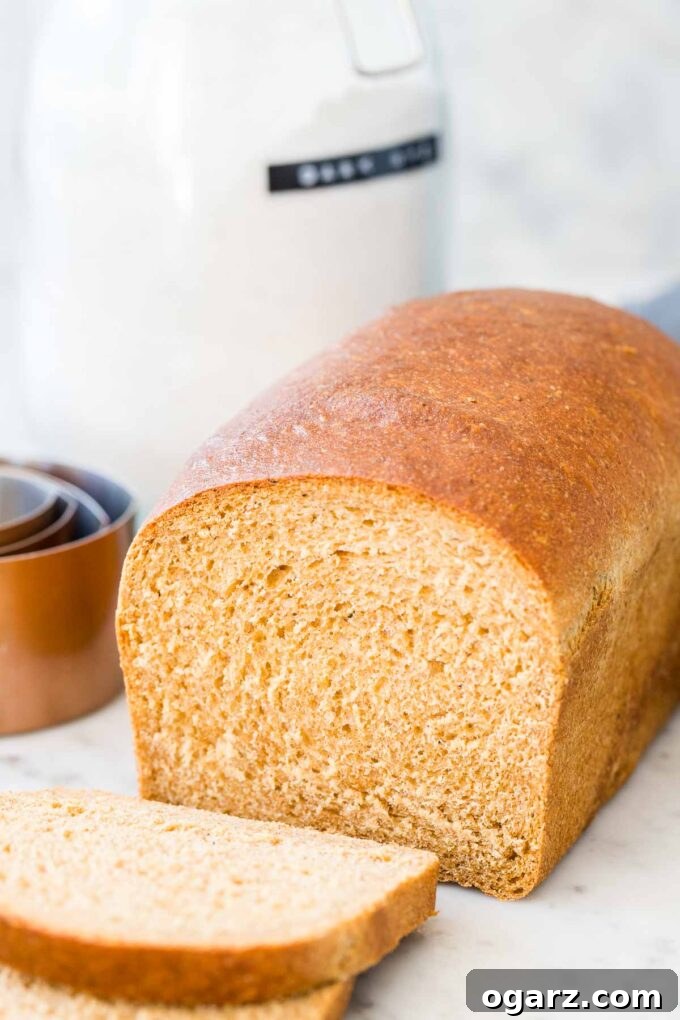
After countless requests from readers for a wholesome, whole wheat version of my popular White Bread recipe, I embarked on a mission to perfect it. Many rounds of testing, tweaking, and tasting have culminated in this phenomenal recipe, and I’m absolutely thrilled to share with you my foolproof method for a homemade bread crafted entirely with whole wheat flour. This isn’t just another bread recipe; it’s a carefully developed system designed to overcome common challenges associated with whole wheat baking, ensuring a delightful result every time. Get ready to impress yourself and your loved ones with this incredible loaf!
Why This Whole Wheat Bread Recipe Stands Out
Baking with whole wheat flour can sometimes be intimidating. People often worry about a bitter taste or a dense, heavy texture. However, this particular recipe has been meticulously crafted to address these concerns head-on, making it truly the best choice for both novice and experienced bakers alike. Here’s why this recipe is a game-changer:
- Simple, Accessible Ingredients: You won’t need to hunt for exotic items. This recipe relies on basic pantry staples that are readily available in most kitchens. Furthermore, many of the ingredients offer flexible substitutions, allowing you to adapt the recipe based on what you have on hand without compromising the final quality. This flexibility makes it incredibly convenient and budget-friendly.
- Achievable in Just a Few Hours: Despite its impressive results, this bread comes together remarkably fast. I’ve streamlined the process to be as efficient and straightforward as possible. Even if you’re new to baking or have never attempted bread before, you’ll find the steps easy to follow, leading to a perfectly baked loaf in a relatively short timeframe. This means fresh, warm bread can be a spontaneous treat, not just a weekend project.
- The Secret to Eliminating Bitterness: One of the biggest challenges with 100% whole wheat flour is its inherent bitterness. My unique secret ingredient effectively neutralizes this, resulting in a bread that’s subtly sweet and incredibly flavorful, without any unpleasant aftertaste. There’s no need to resort to adding all-purpose flour or going through the extra step of soaking the whole wheat flour to achieve a fantastic-tasting bread. This innovation truly sets this recipe apart, delivering a pure whole wheat experience that is both delicious and wholesome.
Essential Ingredients and Smart Substitutions
Understanding each ingredient’s role is key to successful baking. This recipe uses a thoughtful combination of elements, some with surprising benefits, to create the perfect whole wheat loaf. Here’s a detailed look at what you’ll need and how you can adapt it:
- Orange Juice: Your Secret Weapon! This might seem unusual for bread, but it’s my secret ingredient for a reason. The natural acidity in orange juice works wonders to cut through and mellow the sometimes-bitter notes of whole wheat flour. Beyond just balancing flavor, the subtle sweetness and acidity also contribute to a softer crumb and can even aid in yeast activation. Don’t skip this for the best results!
-
Lukewarm Water: The Foundation of Your Dough. The temperature of your water is critical for activating yeast. It should be lukewarm, ideally around 100-110°F (38-43°C), which feels slightly warmer than your body temperature. Water that’s too hot can kill the yeast, while water that’s too cold won’t activate it effectively.
The exact amount of water needed can fluctuate based on environmental factors like season, humidity, and even altitude. In humid summer months, you might require less water, while dry winter air often demands a bit more. The way you measure flour also impacts hydration:- Spoon & Level: If you lightly spoon flour into your measuring cup and then level it off, you’ll generally use less flour, requiring less water. This is my preferred method.
- Dip & Scoop: If you dip your measuring cup directly into the flour bag or canister, you’ll likely pack in more flour, which will then necessitate more water to achieve the correct dough consistency.
Always add water gradually and observe your dough. It should be slightly sticky but manageable.
- Milk: For Richness and Softness. Adding milk contributes significantly to a richer flavor and a tender, softer crumb in your bread. The fats and sugars in milk also help create a beautiful golden-brown crust. If you prefer to make this recipe dairy-free or simply don’t have milk on hand, you can substitute it with an equal amount of additional lukewarm water. The bread will still be delicious, though perhaps slightly less rich.
- Vegetable Oil: The Essential Tenderizer. Fat plays a crucial role in bread making, lending tenderness to the crumb and helping the bread stay fresh longer. From my extensive testing, various fats work exceptionally well in this recipe. You can confidently use vegetable oil, melted unsalted butter, salted butter (just adjust the added salt slightly), cultured butter, margarine, or even avocado oil. Choose your preferred fat, knowing it will contribute to a beautifully soft texture.
-
Natural Sweetener: Nourishment for Yeast and Flavor Balance. Sweetener isn’t just for taste; it feeds the yeast, helping it activate and rise effectively, and also balances the robust flavor of whole wheat. You have several excellent choices for natural sweeteners:
- Honey: Offers a classic, mild sweetness and helps keep the bread moist.
- Molasses: Imparts a distinct, old-fashioned, slightly darker flavor and color, adding a lovely depth.
- Maple Syrup: Provides a subtle, earthy sweetness that complements the whole wheat beautifully.
Feel free to use a single type or even a mixture to create your desired flavor profile.
- 100% Whole Wheat Flour: The Heart of the Loaf. As the name suggests, this recipe proudly uses 100% whole wheat flour, ensuring you get all the fiber and nutrients of the entire grain. It’s important to note that different brands of whole wheat flour can vary in their protein content and absorbency. This means you might need to slightly adjust the amount of liquid (water or milk) to achieve the ideal dough consistency. Start with the recommended amount and adjust as needed, looking for a dough that is soft and slightly tacky but not overly sticky.
-
Instant Yeast (Rapid Rise Yeast): The Quick Worker. This recipe calls for instant yeast, also commonly known as rapid rise yeast. Its fine granules mean you can mix it directly with your other dry ingredients, saving a step. It also tends to activate more quickly, contributing to the “done within a few hours” promise.
If Using Active Dry Yeast: Active dry yeast has larger granules and requires proofing. To use it, dissolve the yeast in the lukewarm water along with 1 teaspoon of your chosen sweetener (to give it something to eat). Let it sit for about 10-15 minutes until it becomes foamy and smells yeasty. This confirms your yeast is active and ready before you add the remaining ingredients. - Salt: Flavor Enhancer and Yeast Regulator. Don’t underestimate the power of salt in bread! It not only enhances the overall flavor of your bread, making it taste less bland, but it also plays a crucial role in controlling yeast activity. Without salt, yeast can work too quickly, leading to an over-proofed and collapsed loaf. It also strengthens the gluten structure, contributing to a better texture.
Step-by-Step Guide: How to Make Whole Wheat Bread
Baking delicious whole wheat bread is a journey of simple, yet precise steps. Follow this guide carefully, and you’ll be rewarded with a perfect loaf every time.
-
Prepare the Dough (The Foundation):
In the bowl of a stand mixer fitted with a dough hook (or a large mixing bowl if kneading by hand), combine all the ingredients: lukewarm water, orange juice, milk, vegetable oil, natural sweetener, whole wheat flour, instant yeast, and salt.
Mix on low speed until a shaggy dough forms. If using active dry yeast or if you’re uncertain about your yeast’s freshness, please refer to the “Notes” section at the end of the recipe for proofing instructions.
Once the dough comes together, let it rest for 20 minutes. This resting period, known as “autolyse,” allows the flour to fully hydrate and the gluten to begin developing, making the subsequent kneading much more effective and less strenuous.
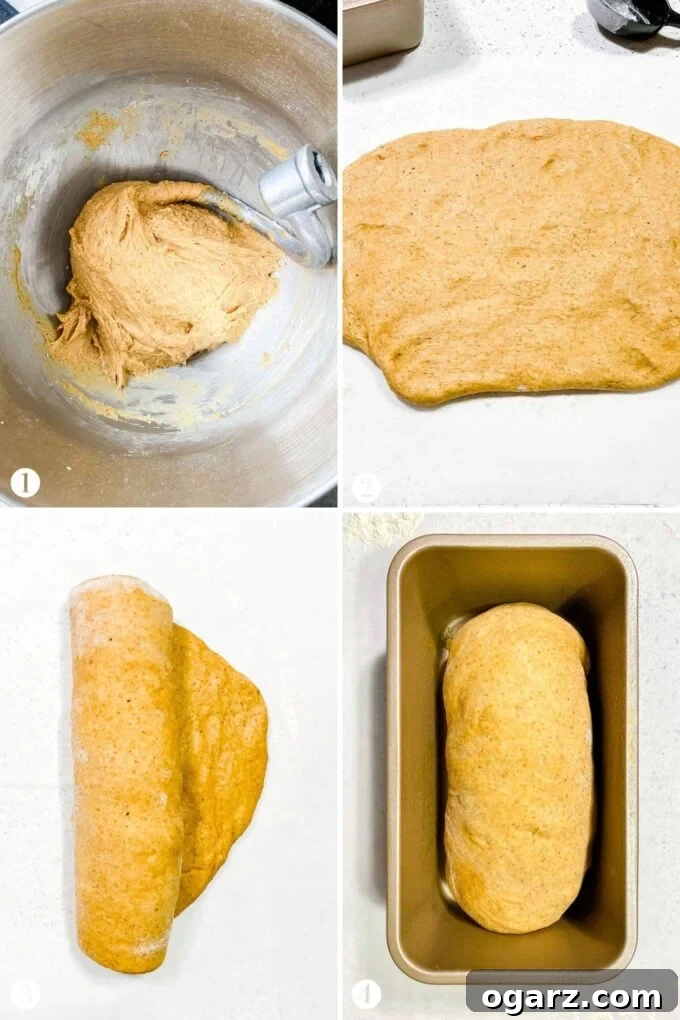
After resting, knead the dough for approximately 8-10 minutes with a stand mixer on medium-low speed, or about 15-20 minutes by hand. The dough should transform into a smooth, elastic ball that is slightly sticky to the touch. It should pass the “windowpane test” – if you can gently stretch a small piece of dough thin enough to see light through it without tearing, your gluten is well-developed. If kneading by hand, lightly oil your hands and working surface to prevent sticking. (Image 1: A close-up of the well-kneaded dough, smooth and slightly tacky.) -
First Rise (Proofing for Volume):
Lightly grease a large bowl with a little oil. Transfer the kneaded dough to this bowl, turning it once to coat the entire surface with oil. This prevents the dough from drying out. Cover the bowl tightly with plastic wrap or a clean tea towel.
Place the covered bowl in a warm, draft-free place to rise for about 1 hour, or until it has become visibly puffy and nearly doubled in size. A warm oven (turned off, with just the light on), or a sunny spot on your counter, works well. The goal here is to allow the yeast to produce carbon dioxide, creating air pockets and giving your bread its light texture. -
Shaping the Loaf (Crafting the Perfect Form):
Once the dough has completed its first rise, gently transfer it to a lightly floured work surface. Use your fingers to carefully pat the dough into an 8×12-inch rectangle. As you pat, gently press all over the surface to remove any large air pockets. This helps create a more even crumb structure in the finished bread. (Image 2: Dough being gently patted into a rectangle on a floured surface.)
Starting from one of the short ends of the rectangle, carefully roll up the dough into a tight cylinder. As you roll, pinch the seam closed along the bottom of the roll to seal it securely. This tight roll creates tension, which is crucial for a tall, symmetrical loaf. (Image 3: Dough being rolled tightly into a cylinder and pinched to seal.)
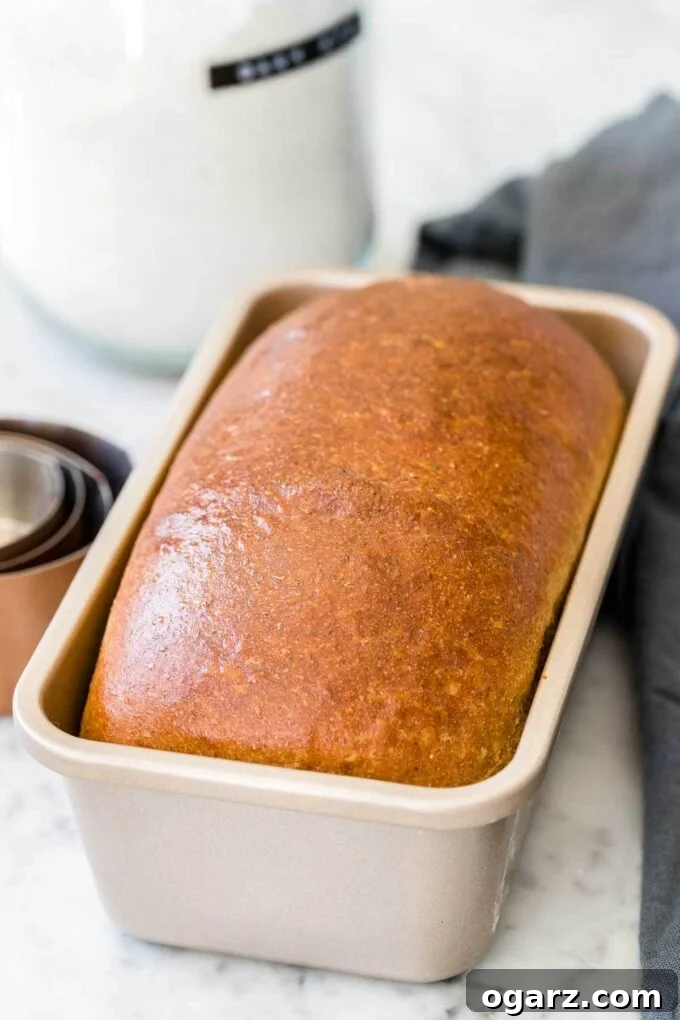
Gently tuck the ends of the roll slightly under the loaf. This step further creates surface tension and helps the loaf hold its shape during the second rise and baking. Place the shaped loaf, seam-side down and tucked ends underneath, into a greased 8×4-inch loaf pan. (Image 4: Shaped loaf placed seam-side down in a greased loaf pan.) -
Second Rise in the Pan (Final Proof for Loft):
Cover the loaf pan loosely with a piece of greased plastic wrap (greasing prevents it from sticking to the rising dough). Place the pan in a warm, draft-free spot for approximately 45 minutes to 1 hour, or until the dough has risen beautifully and crowned about 1 inch above the rim of the pan in the center. This second rise is essential for achieving a light and airy texture. -
Baking (The Transformation):
While your bread is undergoing its second rise, preheat your oven to 350°F (175°C). Adjust an oven rack to the lower-middle position. This placement helps prevent the top of the loaf from browning too quickly while ensuring the bottom bakes through.
Carefully remove the plastic wrap from the risen loaf and place the pan in the preheated oven. Bake for 35-40 minutes, or until the crust is a rich golden brown. To ensure it’s fully cooked, an instant-read thermometer inserted into the center of the loaf should register an internal temperature of 180-190°F (82-88°C). -
Cooling (The Essential Final Step):
Once baked, immediately invert the bread onto a wire cooling rack. Then, reinvert it so the loaf is right-side up. For an extra soft and flavorful crust, you can rub the top with a pat of butter while it’s still warm.
Allow the bread to cool completely on the rack before attempting to slice it. This step is crucial! Slicing hot bread can result in a gummy texture inside, as the internal structure is still setting. Patience here will yield a perfect slice every time.
Frequently Asked Questions About Whole Wheat Bread
Even with a clear recipe, questions can arise. Here are some common queries and detailed answers to help you troubleshoot and customize your whole wheat bread baking experience.
-
What if I don’t have a loaf pan?
No loaf pan? No problem! This versatile dough can easily be transformed into delicious dinner rolls. After the first rise, instead of shaping it into a loaf, divide the dough into eight equal portions. Gently shape each portion into a smooth ball. Arrange these dough balls in a greased 8×8-inch baking pan. Cover and let them rise as instructed for the second rise. The baking time will be significantly shorter for rolls, typically around 20-25 minutes, or until golden brown and cooked through. -
I’m not sure my yeast is still good, what should I do?
If you’re unsure about the viability of your instant yeast, or if you’re using active dry yeast, it’s always best to “proof” it first. Combine the yeast with the lukewarm water (and 1 teaspoon of sugar or honey from the recipe’s total amount) in a small bowl. Stir gently and let it sit for about 10-15 minutes. If the mixture becomes foamy and smells distinctly yeasty, your yeast is active and ready to use. If it remains flat and inactive, your yeast is likely expired, and you’ll need to use a fresh batch. -
What to do if the dough is too sticky?
It’s normal for whole wheat dough to be slightly sticky after kneading due to its high fiber content. However, if your dough is excessively sticky and difficult to handle, you can gradually add a very small amount (1 tablespoon at a time) of additional whole wheat flour. Knead it in thoroughly before adding more, until the dough reaches a manageable consistency that is still soft and pliable. Avoid adding too much flour, as this can result in a dry, dense loaf. -
Why did my bread collapse after the second rise or during baking?
A collapsed loaf can be disheartening, but it’s a common issue with a couple of main culprits:- Over-proving (Over-rising): If the dough rises for too long, the yeast produces too much carbon dioxide, and the gluten structure stretches to its maximum capacity. Once it exceeds this point, the gluten strands can break, causing the dough to deflate rapidly, often during the second rise or when introduced to the heat of the oven.
- Insufficient Kneading: If the dough was not kneaded long enough, the gluten network hasn’t developed sufficiently. Gluten is what gives bread its structure and elasticity. Without a strong gluten network, the dough cannot adequately trap the gases produced by the yeast, leading to large, unstable air bubbles that burst and cause the loaf to collapse. Aim for at least 8-10 minutes of machine kneading or 15-20 minutes by hand to ensure proper gluten development. The “windowpane test” is a great indicator of well-kneaded dough.
-
I don’t have a stand mixer, what else can I use?
While a stand mixer makes kneading much easier, it’s certainly not a requirement!- Hand-held Mixer with Dough Hooks: If your hand-held mixer comes with dough hook attachments, it can be used for kneading. Be mindful not to overheat the motor, and you might need to scrape down the sides of the bowl more often.
- Kneading by Hand: This is a traditional and highly effective method. Turn the dough out onto a lightly oiled or floured surface. Fold the dough over itself, press down with the heels of your hands, rotate, and repeat. Continue for 15-20 minutes until the dough is smooth and elastic. It’s a great workout and allows you to truly feel the dough’s development!
-
Can I freeze the dough before baking it?
Freezing bread dough is a convenient way to prepare ahead! I haven’t personally tested this specific dough recipe for freezing, but generally, here’s a reliable method:- Let the dough complete its first rise as instructed.
- Punch down the dough to release the air, then shape it into a loaf.
- Line your 8×4-inch loaf pan with greased plastic wrap, leaving plenty of overhang. Place the shaped loaf into the lined pan.
- Transfer the entire pan to the freezer and let the dough freeze solid, usually about 10 hours or overnight.
- Once frozen solid, remove the loaf from the pan (using the plastic wrap overhang) and transfer it to a freezer-safe ziplock bag. Squeeze out as much air as possible and seal tightly. Freeze for up to 2-3 weeks.
- To Thaw and Bake: The night before you plan to bake, remove the frozen loaf from the freezer. Remove it from the plastic wrap and place the still-frozen dough into a greased loaf pan. Cover the pan loosely with greased plastic wrap and let it thaw overnight in the refrigerator.
- In the morning, remove it from the refrigerator and let it come to room temperature and complete its second rise in a warm, draft-free place (this might take 2-4 hours, depending on your kitchen temperature).
- Once risen, bake according to the recipe instructions.
-
What alterations should be made when considering high altitudes?
Baking at high altitudes can be tricky due to lower atmospheric pressure and drier air. While I don’t have personal experience with high-altitude baking, it generally requires adjustments to yeast, liquid, and sugar amounts, and sometimes baking temperature. King Arthur Flour is an excellent resource for this specific challenge; I highly recommend consulting their comprehensive guide on high-altitude baking for detailed advice. Common adjustments include slightly reducing yeast and sugar, and sometimes increasing liquid.
How to Store Your Homemade Whole Wheat Bread
To keep your freshly baked whole wheat bread at its best, proper storage is essential. Once the loaf has completely cooled, store it in an airtight plastic bag or a dedicated bread box at room temperature. This method helps prevent it from drying out too quickly. Your homemade bread will remain wonderfully fresh and soft for about 3 days. After that, it might become a bit drier, but it will still taste fantastic when toasted – perfect for sandwiches, breakfast, or as a side with soup.
Looking for more delightful bread recipes?
- Brioche Bread
- Banana Nut Bread
- Cinnamon Swirl Bread
- Apple Cinnamon Bread
Whole Wheat Bread
By: Julia Foerster
This Whole Wheat Bread is made with 100% whole wheat flour and your favorite natural sweetener. A soft and fluffy sandwich bread that stays fresh for days!
Prep Time: 30 minutes
Cook Time: 35 minutes
Rising Time: 2 hours
Total Time: 3 hours 5 minutes
Servings: 1 loaf
Ingredients
- 1/2 cup lukewarm water
- 1/4 cup orange juice
- 1/4 cup milk (or more water for dairy-free)
- 1/4 cup vegetable oil
- 1/4 cup honey (or molasses or maple syrup)
- 3 1/2 cups whole wheat flour (spooned and leveled)
- 2 1/2 tsp instant yeast (see notes if using active dry yeast)
- 1 tsp salt
Instructions
- In the bowl of a stand mixer, combine all the ingredients. Mix until a dough forms. Let sit for 20 minutes (this makes kneading more effective). Then knead the dough for about 8-10 minutes until smooth and elastic; it will be slightly sticky. If kneading by hand, lightly oil your hands and working surface.
- Transfer the dough to a greased bowl, cover with plastic wrap or a tea towel, and let rise in a warm place for about 1 hour until it is puffy and nearly doubled in size.
- Transfer dough to a floured work surface. Use your fingers to gently pat it into an 8×12 inch rectangle, pressing all over to remove any air pockets. Starting at the short end, roll up the rectangle into a tight roll and pinch the seams to seal. Tuck the ends of the roll slightly under the roll to create some tension on the surface and place the loaf into a greased 8×4 inch loaf pan, tucked ends and seam side down. Cover with a greased piece of plastic wrap and let rise for about 45 minutes in a warm and draft-free place until the center has crowned about 1 inch above the rim of the pan.
- Preheat oven to 350°F (175°C) and adjust oven rack to the lower-middle position.
- Bake bread for 35-40 minutes until golden brown (and the loaf registers 180-190°F / 82-88°C inside).
- Invert bread onto a cooling rack. Reinvert the loaf and rub with butter if desired for a soft, flavorful crust. Let cool completely before slicing.
Notes
Important: If you’re not sure if your Instant yeast is still active or if you are using active dry yeast, start by dissolving the yeast in the lukewarm water combined with 1 tsp sugar (taken from the recipe’s total sweetener amount) before adding the other ingredients. It should smell yeasty and be bubbly after about 10-15 minutes.
Nutrition
- Calories: 2253 kcal
- Carbohydrates: 386g
- Protein: 62g
- Fat: 68g
- Saturated Fat: 47g
- Cholesterol: 6mg
- Sodium: 2375mg
- Potassium: 1869mg
- Fiber: 48g
- Sugar: 80g
- Vitamin A: 223 IU
- Vitamin C: 31mg
- Calcium: 212mg
- Iron: 16mg
We hope you love this whole wheat bread recipe! Please consider rating it and leaving a comment below to share your experience. Your feedback helps other bakers in our community!