
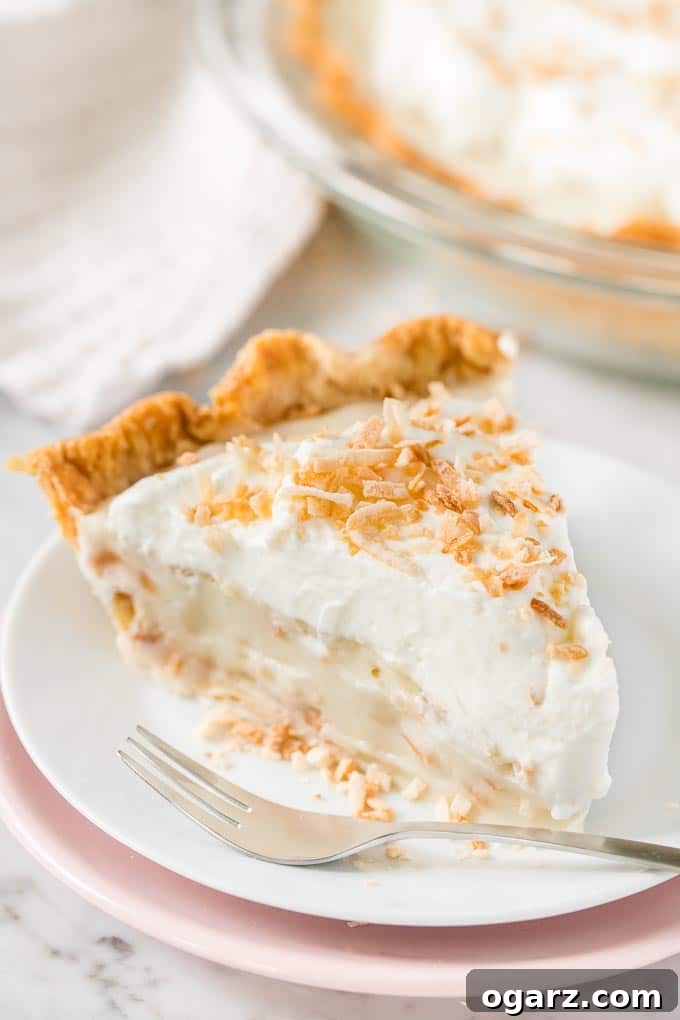
The Ultimate Guide to Making Decadent Homemade Coconut Cream Pie
Indulge in a slice of pure paradise with this classic American Coconut Cream Pie. Featuring a luscious, silky homemade coconut pudding filling, crowned with a generous layer of freshly whipped cream, and sprinkled with sweet, golden toasted coconut, this dessert is an absolute dream for any coconut enthusiast. It’s a showstopper that balances rich flavors with a delightfully light and airy texture, making it a perfect treat for any occasion.
Cream pies, much like our refreshing Lemon Cream Pie, the delightful Oreo Banana Cream Pie, or our vibrant No-Bake Key Lime Pie, are versatile desserts enjoyed throughout the year. But there’s something uniquely comforting and tropical about a homemade Coconut Cream Pie that sets it apart.
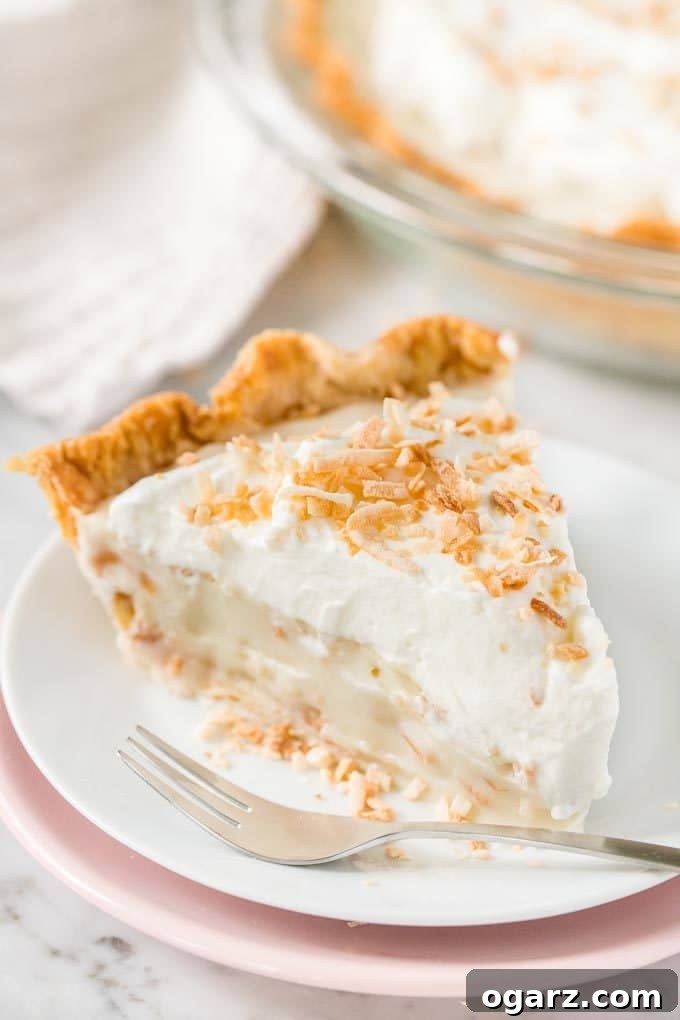
Crafting the Perfect Coconut Cream Pie from Scratch
There’s an undeniable charm to an old-fashioned Coconut Cream Pie, especially when it’s made from scratch. This recipe delivers a creamy, rich pudding filling nestled in a perfectly baked crust, making it an ideal dessert to share at a potluck, impress dinner guests, or simply savor at home. The beauty of this pie lies in its silky texture and profound coconut flavor, all while offering the convenience of being prepared ahead of time.
One of the great advantages of this recipe is its flexibility with the pie crust. Depending on your schedule and baking ambition, you can opt for a high-quality store-bought prebaked pie shell, use refrigerated pie dough for a quick start, or embark on the rewarding journey of making your own flaky pie crust from scratch. Whichever you choose, the key to success is allowing the homemade pudding filling ample time to set in the refrigerator – ideally for several hours, or even overnight. This crucial chilling period ensures a firm, sliceable pie. For optimal freshness and presentation, I always prepare the pie a day in advance and adorn it with a generous dollop of freshly whipped cream just before serving.
The Essential Art of Blind Baking Your Pie Crust
While the creamy coconut filling for this pie is no-bake, the foundation—the pie crust—demands a proper bake before it can embrace its delightful contents. Blind baking, or pre-baking, the crust is a vital step to ensure it remains crisp and flaky, preventing a soggy bottom once the rich pudding is added. It creates a robust base that holds up beautifully to the moist filling.
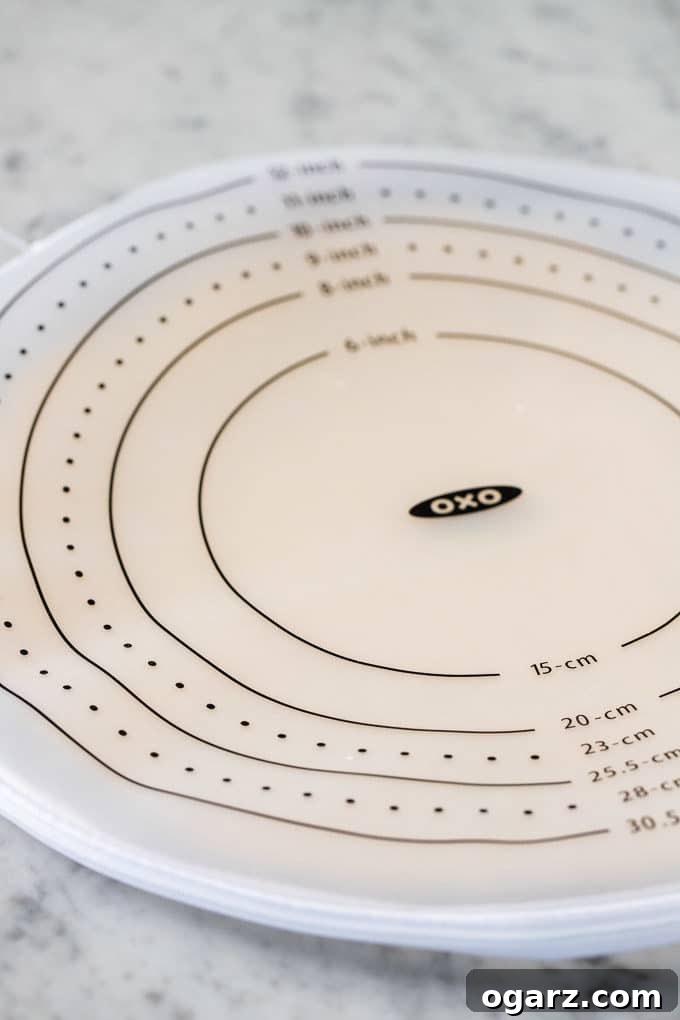
To begin, if you’re using refrigerated pie dough or homemade dough, you’ll need to roll it out. For a standard 9-inch pie plate, aim for a circular dough approximately 12 to 14 inches in diameter. I highly recommend using an OXO Pie Dough Rolling Bag for this task; it simplifies the rolling process, keeps your countertop clean, and ensures an even thickness.
Carefully transfer the rolled-out pie crust into a 9×2-inch round pie dish. Gently press the dough into the bottom and up the sides of the dish using your fingers, ensuring there are no air pockets. Trim any excess dough from the edges, leaving about a 1/2-inch overhang. Then, use your fingers or a fork to create a decorative fluted edge. This not only adds a beautiful, professional touch to your pie but also helps to hold the crust’s shape during baking. For a visual guide on fluting, check out this helpful video. To achieve an exceptionally flaky crust, I always chill the pie crust in the refrigerator for at least 30 minutes, or in the freezer for 10 minutes if I’m pressed for time. This helps to firm up the butter in the dough, preventing it from shrinking excessively in the oven.
Step-by-Step Guide to Blind Baking the Crust:
- Preheat Oven: While your pie crust is chilling, preheat your oven to 400°F (200°C).
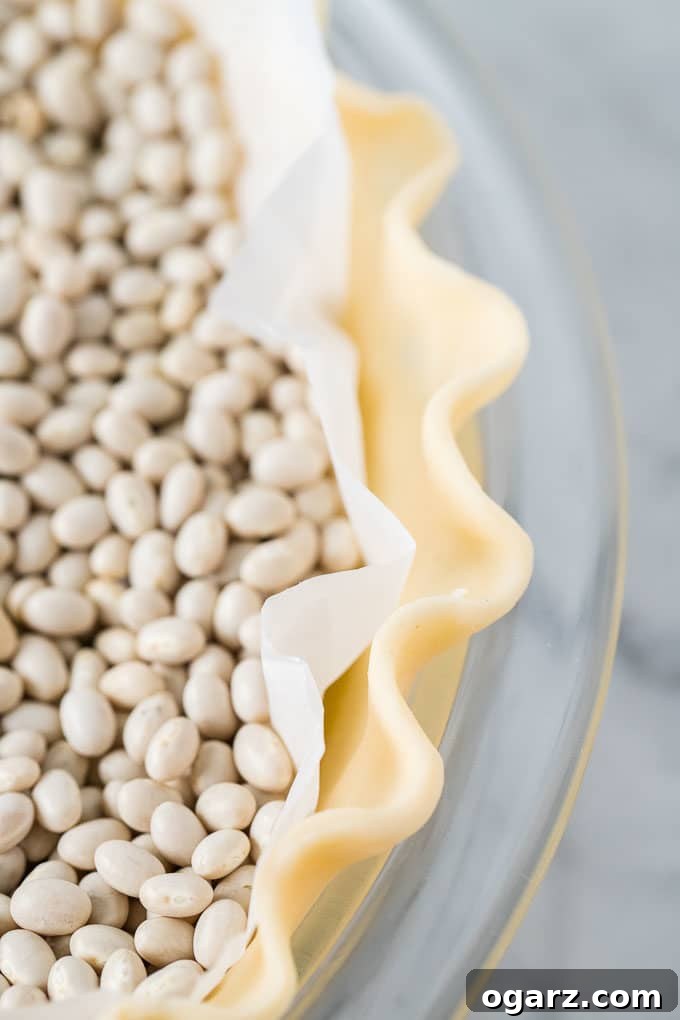
- Line the Crust: Line the chilled pie crust with a sheet of parchment paper. A useful tip: crumple the parchment paper first, then smooth it out to make it conform more easily to the pie dish’s shape.
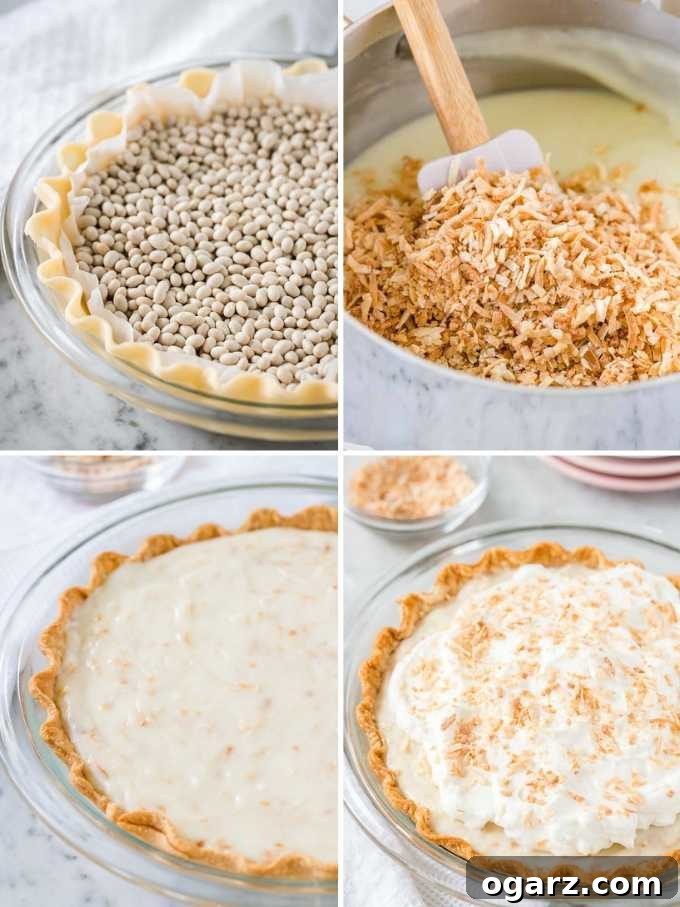
- Add Pie Weights: Fill the parchment-lined crust with ceramic pie weights or dried beans. These prevent the crust from puffing up and shrinking during baking.
- First Bake: Bake for approximately 15 minutes, or until the edges of the crust just begin to turn light golden brown.
- Remove Weights & Prick: Carefully remove the pie from the oven. Using the parchment paper, lift out the pie weights or dried beans. Then, use a fork to prick several holes in the bottom of the pie crust. This allows steam to escape, preventing the bottom from puffing up.
- Second Bake: Return the crust to the oven and bake for another 15 minutes, or until the entire bottom crust is beautifully golden brown and fully cooked.
- Cool Completely: Once baked, remove the crust from the oven and let it cool completely on a wire rack before adding the filling. A cool crust is crucial to prevent the filling from becoming soggy.
Assembling Your Dream Coconut Cream Pie: A Step-by-Step Guide
With your perfectly blind-baked crust ready, it’s time to bring all the delicious components together to create this heavenly pie. The process is straightforward, focusing on careful preparation and patience during chilling.
- Prepare the Crust: Begin by blind baking your 9-inch pie crust as outlined above. Ensure it is completely cooled before proceeding. A warm crust can affect the pudding’s texture and lead to a soggy bottom.
- Toast the Coconut: Preheat your oven to 350°F (180°C). Spread the sweetened flaked coconut evenly on a baking sheet. Toast in the oven for about 5 minutes, stirring occasionally, until it turns a beautiful golden brown. Watch it closely, as coconut can burn very quickly! This step is essential for enhancing the coconut flavor and adding a pleasant crunch.
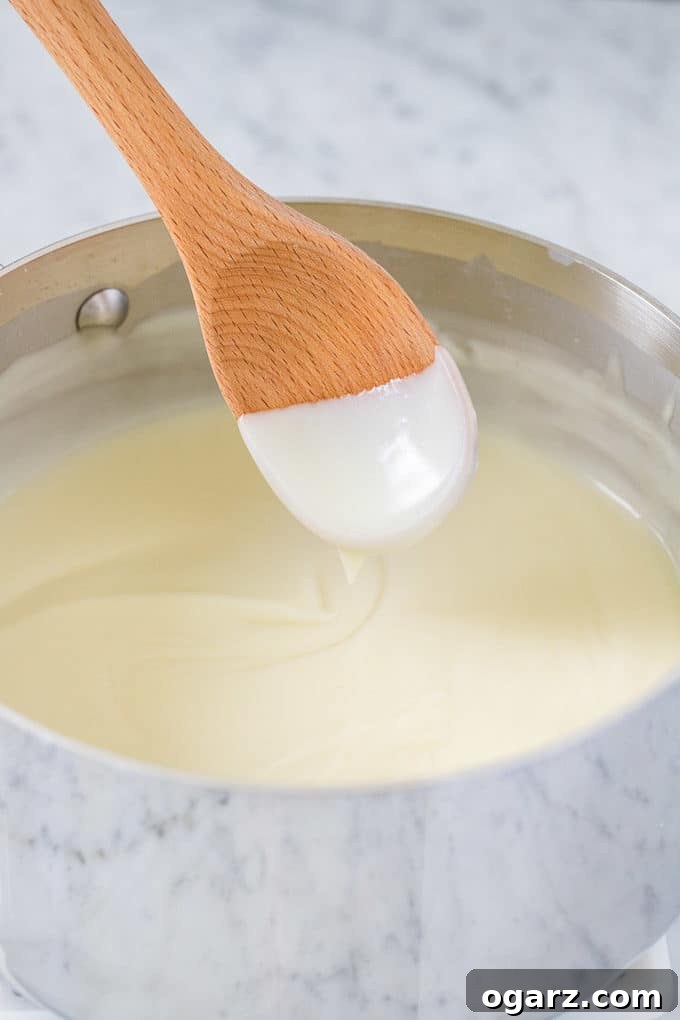
- Cook the Coconut Pudding: In a medium saucepan, combine the half-and-half, rich coconut cream (which adds incredible depth), beaten eggs, granulated sugar, corn starch (our thickening agent), a pinch of salt, and the optional coconut extract for an extra burst of flavor. Whisk all these ingredients together until the mixture is smooth and thoroughly combined. Place the saucepan over low heat and cook, stirring constantly with a whisk or wooden spoon, until the mixture thickens significantly and coats the back of a spoon. This typically takes about 8-10 minutes. The constant stirring prevents lumps and ensures even cooking. Remember, the pudding will continue to thicken as it cools.
- Incorporate Toasted Coconut: Once the pudding has reached the desired consistency, remove the pan from the heat. Stir in approximately three-quarters of your freshly toasted coconut. This infuses the filling with texture and an even deeper coconut taste. Reserve the remaining toasted coconut for garnishing the top of the pie.
- Fill and Chill: Carefully pour the warm coconut pudding filling into your cooled, blind-baked pie shell. Use a spatula to smooth out the top, ensuring an even layer. Allow the pie to sit on a cooling rack at room temperature for about 30 minutes before transferring it to the refrigerator. Chill the pie for a minimum of 4 hours, or ideally overnight, until the filling is completely firm and set. This is a critical step for a pie that slices cleanly and holds its shape.
- Top with Whipped Cream: Just before serving, whip up a batch of fresh homemade whipped cream (instructions below) or use your preferred whipped topping. Generously spread the whipped cream over the chilled pie, creating a beautiful, cloud-like crown.
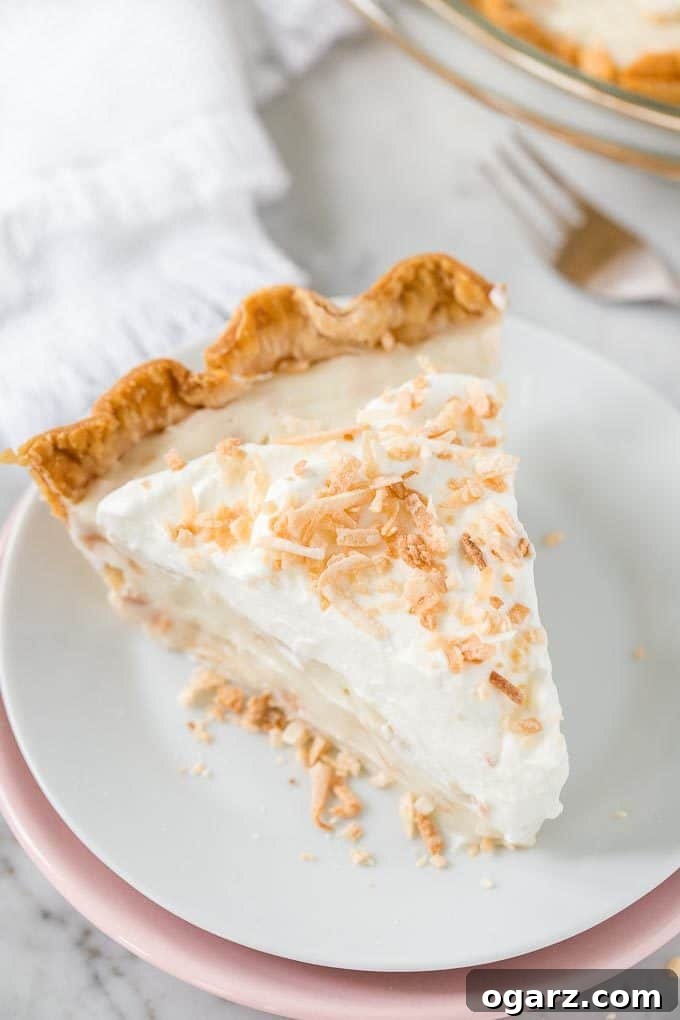
- Garnish and Serve: Finally, sprinkle the remaining toasted coconut over the whipped cream for a stunning finish and an extra layer of flavor and texture. Slice and serve this delightful pie cold, savoring every creamy, coconut-infused bite!
Creating the Perfect Cloud-Like Homemade Whipped Cream
A truly spectacular Coconut Cream Pie isn’t complete without a topping of light, airy, and incredibly fresh homemade whipped cream. While store-bought options exist, making your own is surprisingly simple and yields a far superior taste and texture that perfectly complements the rich pudding filling. To make the most delicious whipped cream, you will need just a few key ingredients and some simple techniques.
For this recipe, you’ll need 1 cup of very cold heavy cream and 2 tablespoons of powdered sugar (also known as confectioners’ sugar). The powdered sugar not only adds sweetness but also helps stabilize the cream. For an extra boost of complementary flavor in your Coconut Cream Pie, I highly recommend adding 1 teaspoon of coconut extract to the cream. If coconut extract isn’t available, vanilla extract can be used as a classic alternative.
To ensure your whipped cream achieves maximum volume and stiffness, a little preparation goes a long way. Place a metal mixing bowl and the metal whisk attachment (if using a stand mixer) or a handheld whisk into the freezer for 10 to 15 minutes before you begin. The colder your equipment and ingredients are, the quicker and more successfully your cream will whip.
Once your bowl and whisk are chilled, pour the cold heavy cream into the mixing bowl. Add the powdered sugar and the coconut extract (if using). Begin beating the mixture on medium-high speed (or whisk vigorously by hand). Continue to beat just until the cream reaches stiff peaks – this means that when you lift the whisk, the peaks of cream stand upright firmly without collapsing. This usually takes about 1-2 minutes with an electric mixer. Be vigilant and watch closely! The transition from perfectly whipped cream to overwhipped cream (which turns into butter) happens quickly. Stop beating as soon as stiff peaks form to maintain that light, ethereal texture. Your homemade whipped cream is now ready to crown your magnificent Coconut Cream Pie!
Expert Tips for Baking the BEST Coconut Cream Pie
- Pie Crust Pointers: If you’re using a homemade pie crust recipe, always follow its specific instructions for preparation and chilling. If opting for a refrigerated pie crust, take it out of the fridge and let it rest on the counter for about 15 minutes before unrolling. This makes it more pliable and easier to shape without cracking.
- Fluting for Flair: Don’t skip fluting the edges of your pie crust! It not only gives your pie a beautiful, artisanal look but also creates a sturdy rim that helps contain the filling and allows you to pile the whipped cream higher for an even more impressive presentation.
- Cool Crust is Key: Ensure your blind-baked pie crust has cooled completely to room temperature before pouring in the pudding filling. Pouring warm filling into a warm crust can result in a soggy bottom, compromising the delightful texture of your pie.
- Watch Your Coconut: Toasted coconut adds incredible depth of flavor and a lovely texture, but it burns very easily! Every oven behaves differently, so keep a very close eye on it while it’s toasting. Remove it from the oven as soon as it turns golden brown to avoid a bitter, burnt taste.
- Coconut Cream vs. Coconut Milk: For this recipe, coconut cream is highly recommended over coconut milk. Coconut cream is much thicker and richer, contributing to a wonderfully decadent and silky pudding. You can typically find it canned alongside coconut milk in most grocery stores. The thick cream that naturally rises to the top of a can of full-fat coconut milk can also be used as coconut cream. While you *can* use coconut milk, be aware that the pudding will be less rich and silky in consistency.
- Constant Stirring for Pudding Perfection: While cooking the pudding filling, constant stirring over low heat is absolutely crucial. This prevents the eggs from scrambling, the starch from clumping, and the bottom from scorching. If the mixture starts to bubble too vigorously, turn the heat down immediately. The pudding is properly cooked when it thickens enough to coat the back of a spoon with a creamy consistency. It will continue to firm up as it chills.
- Chill Before Topping: Never put the whipped cream on top of the pie while the filling is still warm! This will cause the whipped cream to melt and ruin the presentation and texture. Always wait until the filling is completely chilled and firm.
- Flavor Boost: For an enhanced coconut flavor experience, add 1 teaspoon of coconut extract to your homemade whipping cream. It ties the whole pie together beautifully.
- Alternative Topping: If you’re short on time or prefer a different option, a high-quality whipped topping can be used instead of homemade whipped cream, though the homemade version offers superior taste and freshness.
Storing Your Delightful Coconut Cream Pie
Due to the inclusion of fresh dairy ingredients in both the pudding filling and the whipped cream topping, proper storage of your Coconut Cream Pie is essential to maintain its freshness, safety, and delicious taste. This pie is a perishable dessert and should be handled accordingly.
Because of the fresh cream, this pie should not be left out on the counter at room temperature for longer than one hour. Prolonged exposure to warmth can lead to bacterial growth and diminish the pie’s quality. For the best flavor and texture, Coconut Cream Pie tastes unequivocally best when served cold, directly from the refrigerator.
To store, cover the pie tightly with plastic wrap or aluminum foil, ensuring it’s sealed well to prevent it from absorbing odors from other foods in the refrigerator and to keep it from drying out. When stored correctly, your homemade Coconut Cream Pie will remain fresh and delicious for 2 to 3 days in the refrigerator. After this period, its quality may start to decline.
It’s important to note that cream pies, including this Coconut Cream Pie, generally do not freeze well. The delicate texture of the pudding filling and the whipped cream can become grainy or watery upon thawing, losing their desirable smooth consistency. Therefore, I would not recommend freezing this recipe. It’s always best to enjoy this pie fresh within a few days of preparation.
Essential Tools and Ingredients for Making this Recipe
Having the right tools and quality ingredients can make all the difference in the success and enjoyment of your baking. For this Coconut Cream Pie, here’s a list of recommended items:
Recommended Tools:
- OXO Pie Dough Rolling Bag: This silicone bag is a game-changer for rolling out pie dough evenly and cleanly. It’s also fantastic for pizza dough!
- 9-inch Pie Plate: A sturdy pie plate is essential. Consider one made from borosilicate glass, as it allows for direct transfer from freezer to oven without the risk of shattering, offering great versatility.
- Medium Saucepan: For cooking the pudding filling. Choose one with a heavy bottom to ensure even heat distribution and prevent scorching.
- Whisk: Both a balloon whisk for combining ingredients and a smaller whisk for constant stirring of the pudding are invaluable.
- Rubber Spatula: Perfect for scraping down the sides of the saucepan and smoothing out the filling.
- Baking Sheet: For toasting the coconut.
- Parchment Paper: Crucial for blind baking the crust and preventing sticking.
- Pie Weights or Dried Beans: To keep your crust from shrinking or puffing during blind baking.
- Mixing Bowls: A large, preferably metal, mixing bowl for whipping cream.
- Electric Mixer (Stand or Handheld): While a whisk works, an electric mixer makes whipping cream much faster and easier.
- Wire Cooling Rack: For cooling the pie crust and allowing the assembled pie to cool before chilling.
Key Ingredients:
- Coconut Cream: Crucial for the rich, silky pudding. Ensure you get full-fat coconut cream, not just coconut milk.
- Sweetened Flaked Coconut: For toasting and incorporating into the filling and topping. Its natural sweetness and texture are perfect.
- Half-and-Half: Contributes to the creamy base of the pudding.
- Fresh Eggs: Act as a binder and enrich the pudding.
- Granulated Sugar: For sweetness in both the pudding and whipped cream.
- Corn Starch: The primary thickening agent for the pudding, ensuring a smooth, firm set.
- Salt: A pinch enhances all the other flavors.
- Heavy Cream: For making the freshest, most delicious whipped cream topping.
- Powdered Sugar: Sweetens and stabilizes the whipped cream.
- Coconut Extract (Optional but Recommended): For an intensified coconut flavor throughout the pie. Vanilla extract is a good substitute.
Frequently Asked Questions About Coconut Cream Pie
Can I use coconut milk instead of coconut cream in the pudding?
While you technically *can* use full-fat coconut milk, we highly recommend using coconut cream for a truly rich and silky pudding. Coconut cream has a higher fat content, resulting in a more decadent and thicker filling. If using coconut milk, the pudding may be slightly less rich and may require a bit more cornstarch to reach the desired consistency.
How can I prevent a soggy pie crust?
The key to preventing a soggy crust is thorough blind baking. Ensure your crust is fully baked until golden brown on the bottom, not just the edges. Also, make sure the crust is completely cooled to room temperature before pouring in the warm pudding filling. The contrast in temperatures helps the crust maintain its crispness.
Can this pie be made ahead of time?
Absolutely! This Coconut Cream Pie is an excellent make-ahead dessert. The pudding filling needs at least 4 hours to set (preferably overnight) in the refrigerator. You can prepare the pie entirely, except for the whipped cream topping, the day before serving. Add the freshly whipped cream and toasted coconut garnish just before serving for the best results.
What type of coconut should I use for toasting?
Sweetened flaked coconut is ideal for toasting. Its flakes are larger and sweeter, providing a wonderful texture and flavor when lightly browned. Unsweetened shredded coconut can also be used, but you might want to adjust the sugar content in the pudding or add a touch more sugar to the toasted coconut itself.
How do I know when the pudding is fully cooked?
The pudding is fully cooked when it has visibly thickened and coats the back of a spoon. If you run your finger across the coated spoon, the line should hold without the pudding flowing back together. It will still seem a bit loose, but it will continue to firm up considerably as it cools and chills in the refrigerator.
Armed with these tips and a passion for delicious homemade desserts, you’re now ready to create a truly unforgettable Coconut Cream Pie. Enjoy the process and, most importantly, savor every blissful bite!

Coconut Cream Pie
Ingredients
- 1 9-inch pie crust, baked
- 1 cup sweetened flaked coconut
- 1 1/2 cups half-and-half
- 1 1/2 cup coconut cream, 1 can
- 2 eggs, beaten
- 3/4 cup granulated sugar
- 1/3 cup corn starch
- 1/4 teaspoon salt
- 1 tsp coconut extract, optional (or vanilla extract)
- 2 cups homemade whipped cream, (see instructions above)
Instructions
-
Preheat oven to 350 degrees F (180 degrees C).
-
Spread the coconut evenly out on a baking sheet. Transfer to the oven and bake for about 5 minutes until golden brown, stirring occasionally.
-
In a medium saucepan, combine the half-and-half, coconut cream, eggs, sugar, corn starch, salt, and coconut extract.
-
Whisk until smooth then bring to a boil over low heat, stirring constantly. Cook, stirring constantly, for 2 more minutes until mixture resembles pudding and coats a spoon. The mixture will thicken more while it cools.
-
Remove the pan from the heat, and stir in 3/4 of the toasted coconut (reserve remaining coconut to top the pie).
-
Pour the filling into the pie shell, smooth out with a spatula, and let sit on a cooling rack until it has room temperature. Then transfer to the fridge and chill until firm, about 4 hours.
-
Top with whipped cream and sprinkle remaining coconut over the top.
Nutrition
Like this recipe? Rate and comment below!