
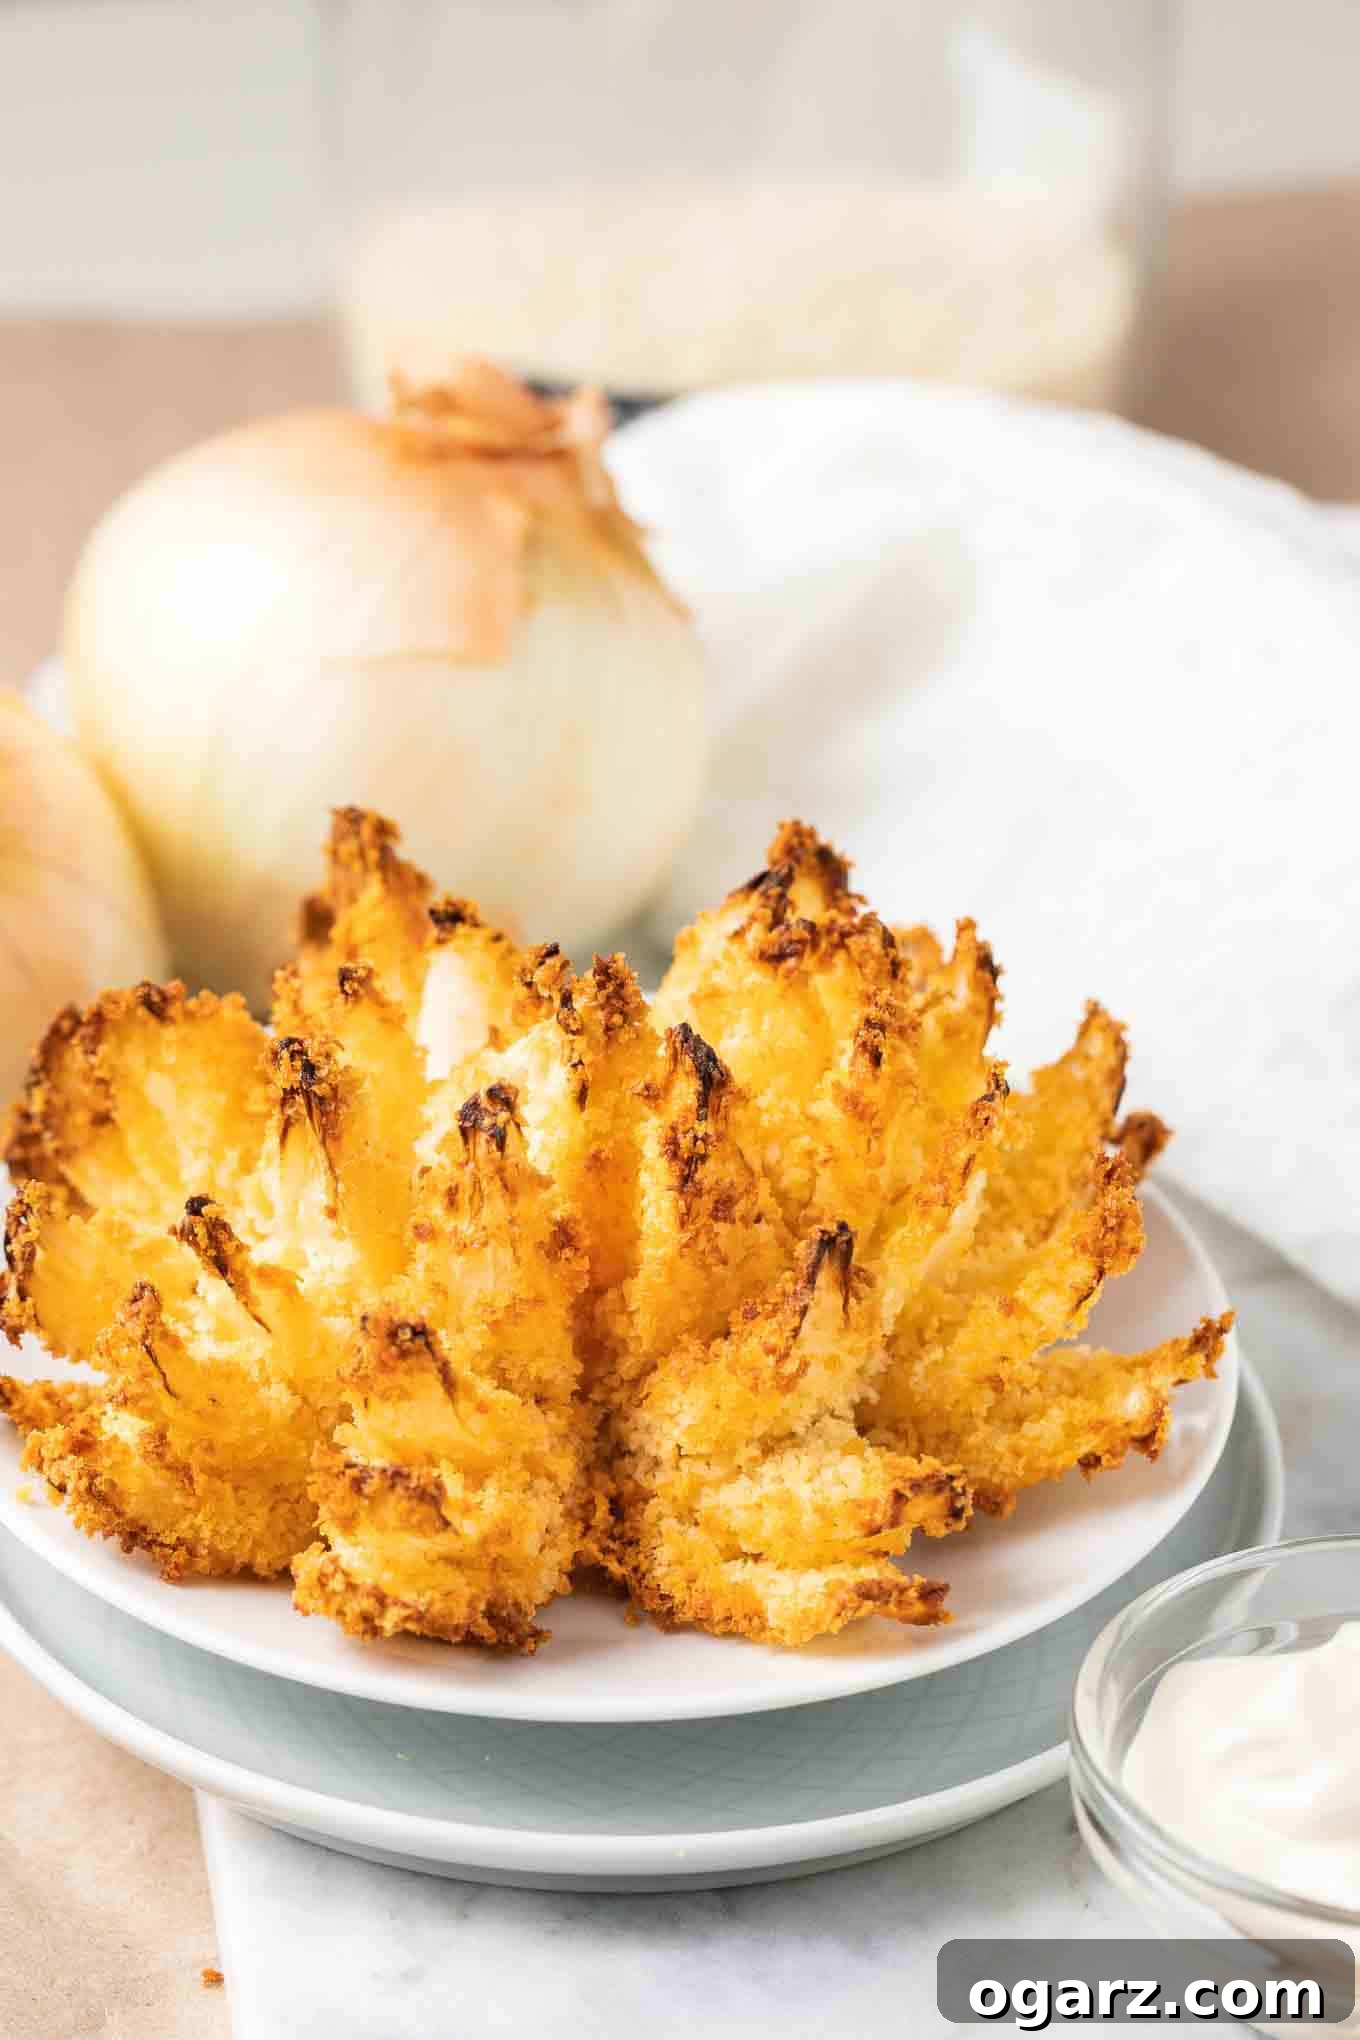
Are you craving that iconic, restaurant-style blooming onion but wishing for a healthier alternative? Your search ends here! This **Air Fryer Blooming Onion** recipe brings you all the irresistible flavor and remarkably crispy texture you adore, without the excessive oil and calories traditionally found in its deep-fried counterpart. Air-fried until golden and perfectly crunchy, this easy-to-make appetizer is guaranteed to be a spectacular hit at any game day, party, or family gathering. Prepare to impress everyone with this delightfully healthier, homemade version!
The air fryer has revolutionized how we enjoy our favorite indulgent snacks, transforming them into guilt-free pleasures. If you’re eager to explore more ways to create healthier, yet equally delicious, party foods, be sure to check out our other popular air fryer recipes. Enhance your appetizer repertoire with our Air Fryer Chicken Wings, enjoy the savory crunch of Air Fryer Onion Rings, or try the tangy delight of Air Fryer Fried Pickles. These recipes are testament that you never have to compromise on taste to make healthier choices!
Why the Air Fryer is Your Secret Weapon for a Healthier Blooming Onion
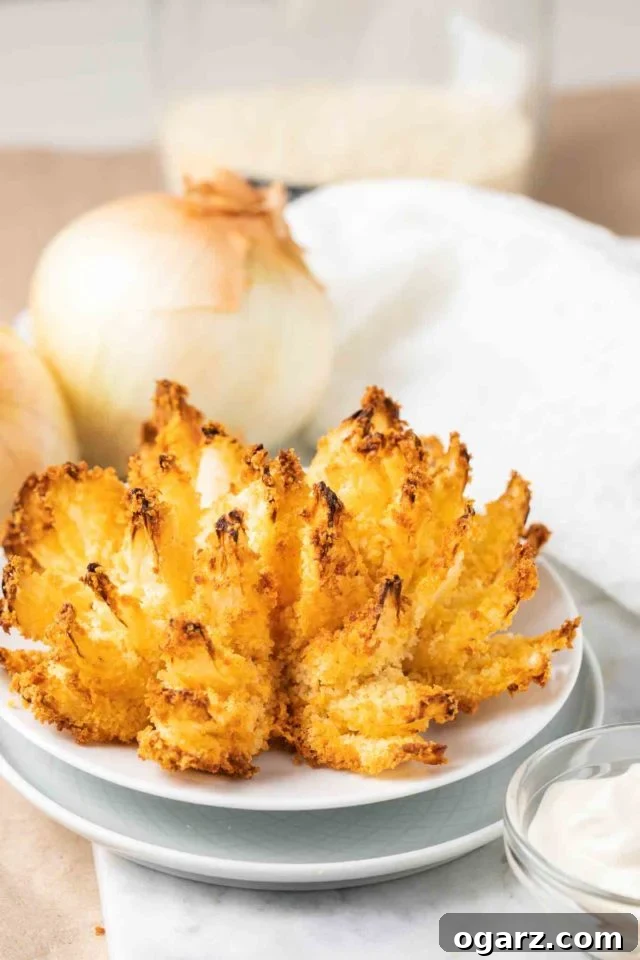
While the prospect of making a blooming onion from scratch at home is incredibly rewarding, the traditional deep-frying method often comes with considerable mess and an abundance of hot oil. This is precisely where the air fryer steps in as a culinary hero! Our **Air Fryer Blooming Onion** yields perfectly crispy, golden petals, bursting with an unbelievably delicious and flavorful taste, all while dramatically cutting down on unwanted fat and calories.
Consider the significant health benefits: a classic deep-fried bloomin’ onion from a popular steakhouse chain can contain approximately 1954 calories and a staggering 134 grams of fat. By preparing it in the air fryer, you slash these numbers, bringing the calorie count down to roughly 840 and fat to just 36 grams. This substantial reduction means you can savor this fun, crowd-pleasing dish more frequently, enjoying every bite without the heavy, greasy aftermath. The air fryer utilizes rapid air circulation to create an exterior that is often crispier and more satisfying than oven-baked versions, mimicking the desirable crunch of deep-fried food but without the immersion in oil.
Beyond the impressive nutritional advantages, the air fryer simplifies the entire cooking process. Say goodbye to cumbersome vats of hot oil, messy splatters, and extensive cleanup. It’s a convenient, efficient, and exceptionally delicious method to achieve that sought-after blooming onion perfection directly in your own kitchen. Serve these delightful, crispy petals with a generous side of homemade dipping sauce, and watch them vanish in record time!
The Irresistible Allure of a Homemade Blooming Onion
The blooming onion has long held a cherished spot as a globally beloved appetizer, celebrated for its spectacular presentation and utterly irresistible flavor. But why limit enjoying this culinary marvel to restaurant visits when you can effortlessly recreate it in the comfort of your own home? Crafting your own blooming onion isn’t just about saving calories; it’s an immersive experience that embodies the joy of cooking, the deep satisfaction of creating something truly impressive from scratch, and the freedom to customize every aspect to your precise taste preferences. Our air fryer recipe guarantees a consistently crispy and tender result every single time, making it an ideal culinary project for home cooks of all experience levels. It’s more than just a dish; it’s a conversation starter that brings a vibrant, festive atmosphere to any meal, transforming ordinary occasions into memorable feasts.
Mastering the Air Fryer Blooming Onion: A Step-by-Step Culinary Journey
Creating this impressive appetizer might seem intricate, but the process is surprisingly straightforward. Here’s a detailed breakdown of the essential steps, ensuring a perfect bloom every time:
- **Prepare Your Onion with Precision:** Begin by carefully cutting the onion to form its signature “petals.” A brief soak in ice water afterwards will encourage these petals to “blossom” beautifully, enhancing its visual appeal.
- **Crafting the Flavorful Flour Coating:** In a shallow bowl, meticulously combine all-purpose flour with a blend of essential spices, creating the foundational layer of flavor and crispiness for your onion.
- **Whipping Up the Rich Buttermilk Batter:** In a separate bowl, whisk together creamy buttermilk and a fresh egg. Then, integrate a portion of the seasoned flour mixture to create a smooth, luscious batter that adheres perfectly to the onion.
- **Assembling the Ultimate Panko & Spice Mixture:** Prepare a third bowl dedicated to panko breadcrumbs, seasoned with the remaining salt and a touch of olive oil. This mixture is crucial for achieving that superior, airy crispiness.
- **The Triple-Coating Technique (Dredge & Bathe):** First, thoroughly dredge the cut onion in the dry flour mixture, ensuring every crevice and petal is evenly coated. Gently shake off any excess. Next, immerse the onion in the buttermilk batter, using a spoon or your fingers to ensure complete and uniform coverage.
- **The Final Crispness Layer (Panko Press):** Carefully transfer the battered onion into the panko breadcrumb mixture. Press the panko firmly onto all sides and in between the petals, ensuring a generous and even coating that promises an irresistible crunch. Shake off any loose breadcrumbs.
- **Air Frying to Golden Perfection:** Place the fully coated onion into your air fryer basket. Cook at the specified temperature and time until it achieves a stunning golden-brown hue and an irresistibly crispy texture.
For precise ingredient quantities and comprehensive cooking timings, refer to the detailed recipe card conveniently located below this section!
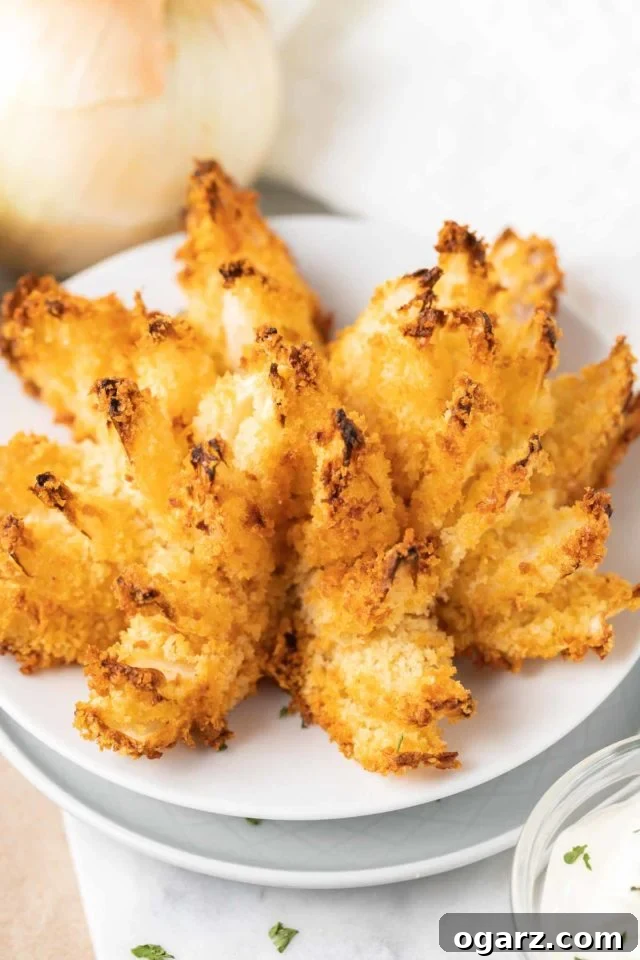
Essential Tips for Crafting the Ultimate Air Fryer Blooming Onion
Achieving blooming onion perfection in your air fryer is simple when armed with these expert tips and tricks:
- **Prioritize Sweet Onions:** Always select a sweet onion variety, such as Vidalia, Walla Walla, or Imperial Valley Sweets. These onions possess a naturally mild and sweet flavor profile that prevents them from becoming overly pungent when cooked, making them ideal for a balanced and delicious appetizer. Stronger onions can overpower the delicate breading.
- **Embrace Room Temperature Onions:** Ensure your onion has been allowed to sit at room temperature for at least an hour before you begin preparing it. A room temperature onion facilitates more even cooking throughout, preventing some petals from being undercooked while others are perfectly crisp.
- **Maximize Your Petal Cuts:** The more precise cuts you make, the more individual petals your blooming onion will boast. This leads to a more dramatic “bloom” and ensures each segment cooks thoroughly to a delightful crispness. Aim for as many thin petals as possible, always ensuring the root remains firmly attached.
- **The Magical Ice Water Soak:** After completing your cuts, submerge the prepared onion in a bowl of ice water for approximately 10-15 minutes. This simple yet effective step encourages the onion petals to naturally expand and “blossom” outwards, creating that iconic flower-like appearance even before it touches the air fryer. It also helps to mellow any residual onion sharpness.
- **Effortless Homemade Buttermilk:** If you find yourself without buttermilk, creating a substitute is incredibly easy. Simply add 1 tablespoon of white vinegar or fresh lemon/lime juice to a ½ cup of regular milk. Stir gently and let it sit for 5-10 minutes until it visibly curdles. This acidity is key, as it helps tenderize the onion and promotes better adhesion of the batter.
- **Panko Breadcrumbs for Supreme Crispiness:** For the absolute best and crispiest coating, panko breadcrumbs are unequivocally recommended. Their unique, larger, and flakier texture delivers a superior crunch compared to traditional finely ground breadcrumbs, elevating your blooming onion to gourmet status.
- **Standard Breadcrumb Alternative:** While panko offers the best texture, if it’s unavailable, standard breadcrumbs can certainly be used. Your blooming onion will still be delicious, though the texture might be slightly denser rather than airy-crisp.
- **The Importance of “Shake Off Excess”:** This step is critical for achieving a light, airy, and crispy coating, and for preventing a gummy or clumpy texture. After each coating stage (flour, batter, panko), gently shake off any surplus ingredients to ensure a thin, even layer adheres to the onion.
- **Preheat Your Air Fryer (When Needed):** Many air fryer models perform best when preheated to their optimal cooking temperature. Consult your specific appliance’s manual. While some, like certain Philips models, may not require preheating, it’s often a good practice to ensure instant crisping upon placing the onion inside.
- **Vigilant Monitoring of Cooking Time:** Air fryers exhibit significant variations in power and efficiency. Therefore, it’s essential to keep a close eye on your blooming onion, especially during its initial cook. Be prepared to adjust the cooking time as necessary, as your particular appliance might cook faster or slower than typical recommendations.
- **Aluminum Foil to Prevent Burnt Tips:** The delicate tips of the onion petals are prone to browning too quickly or even burning. To safeguard against this, loosely drape aluminum foil over the top of the onion for the first 15-20 minutes of air frying. Remove the foil for the final few minutes to allow for perfect browning and ultimate crisping.
- **Confirm Doneness with a Gentle Test:** Once the suggested cooking time has elapsed, gently test a petal to assess its doneness. It should be tender on the inside with a beautifully crispy exterior. If it’s not quite to your liking, continue air frying for a few additional minutes, checking frequently to prevent overcooking.
Selecting the Ideal Onion for Your Blooming Onion
The choice of onion is paramount to the overall success and flavor profile of your blooming onion. For the absolute finest results, **sweet onions** are unequivocally the best option. Their inherently mild, sweet flavor ensures that, once cooked, they remain deliciously palatable without any harsh pungency, making them superb for both raw consumption and as the star of an appetizer. While multiple varieties exist, each with slight variations in sweetness, all sweet onions are excellent candidates for this recipe.
Here are some premier sweet onion varieties that are perfect for crafting a delectable blooming onion:
- **Vidalia:** Hailing from Georgia, Vidalia onions are perhaps the most renowned sweet onion, celebrated for their exceptional sweetness and succulent, juicy texture.
- **Walla Walla:** Grown in Washington state, these are another highly popular sweet onion, characterized by their large, round shape and high water content, which makes them incredibly tender and mild.
- **Imperial Valley Sweets:** Known for their impressive size and consistently sweet, gentle flavor, making them a reliable choice.
- **The Carzalia Sweet onion:** A modern hybrid variety, prized for its uniform shape and beautifully mild taste.
- **The Sunbrero:** A versatile and excellent all-purpose sweet onion that performs wonderfully in various culinary applications.
What if Sweet Onions Aren’t Readily Available?
Should a dedicated sweet onion variety be out of reach, you can still craft a delightful blooming onion using common alternatives:
- **Yellow Onion:** These onions typically possess a subtle sweetness, though their flavor is generally more robust and assertive than that of true sweet onions. If opting for a yellow onion, it is highly advisable to extend the ice water soak duration to help temper its natural sharpness.
- **Red Onion:** Often milder than yellow onions, red onions present another viable alternative. They also offer a visually appealing color contrast if some of the red skin remains after preparation. Similar to yellow onions, a good ice water soak will significantly improve their suitability.
It’s generally recommended to steer clear of very strong, pungent onions like white onions for this recipe, unless you specifically desire a very sharp and intense onion flavor in your appetizer.
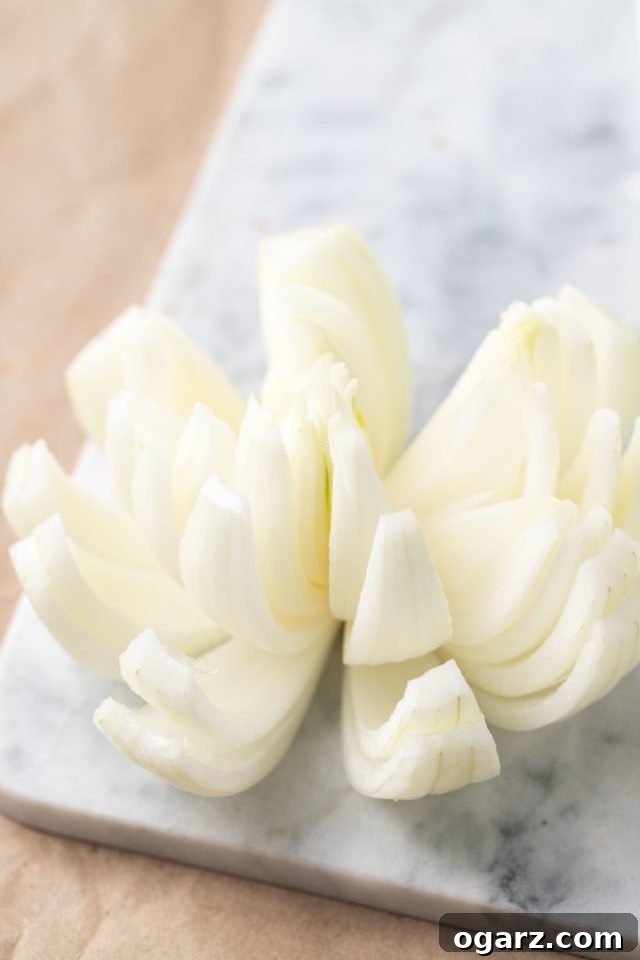
Mastering the Art of Cutting a Blooming Onion
The signature “bloom” of this onion appetizer is entirely dependent on the precision and technique of your cuts. While it might appear daunting, with a bit of care and attention, you’ll achieve the perfect effect.
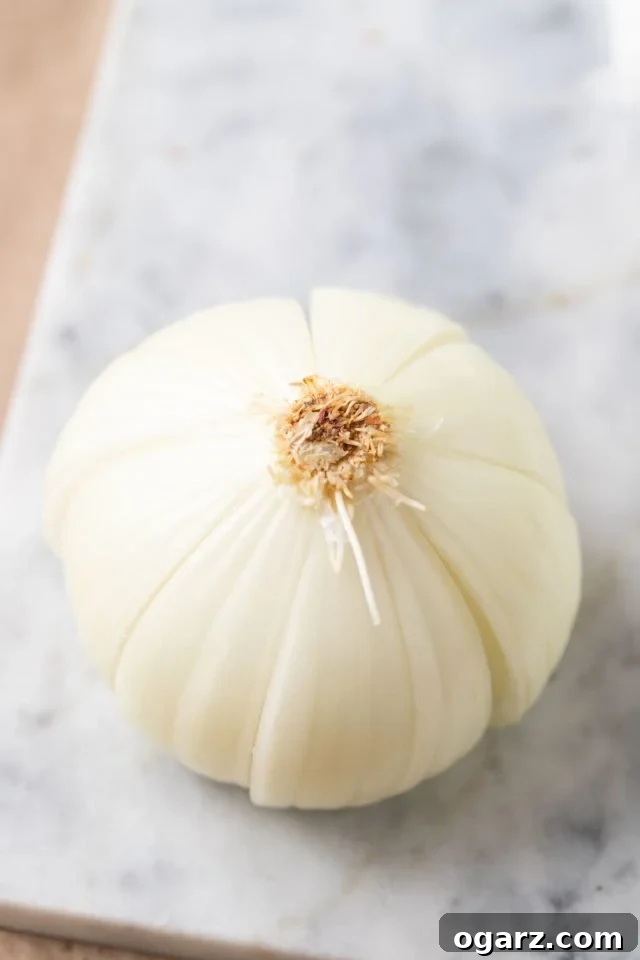
- **Initial Preparation:** Begin by carefully slicing off the very top tip of the onion. Then, meticulously peel away all the papery outer layers of skin until you reach the smooth, firm, and clean flesh of the onion.
- **Stabilize Your Cutting Surface:** Flip the prepared onion so that the previously cut tip side is now facing down onto a sturdy, stable cutting board. This creates a secure flat base, preventing the onion from wobbling during the intricate cutting process.
- **Begin the Incisions (Root Intact!):** Starting approximately 1/4 inch (about 0.6 cm) away from the root end, begin making precise, downward slices through the onion. **It is absolutely crucial that you do NOT cut all the way through the root!** The root must remain fully intact, as it acts as the central anchor, holding all the individual petals together in their blooming formation.
- **Creating the Quadrants:** Initiate your cuts by making four evenly spaced incisions from the top of the onion down towards the root, effectively dividing the onion into four equal quarters. Visualize cutting an “X” through the center of the onion.
- **Developing the Petals:** Now, take each of these quarters and make an additional 3 to 4 more slices within each section, radiating outwards from the center. This technique will create your individual petals. The primary objective is to make as many thin, uniform cuts as possible without inadvertently detaching any of the petals from the central root. The overall size of your onion will naturally dictate the optimal number of slices you can safely make. Remember, smaller, thinner petals tend to cook more evenly and crisp up more effectively.
- **Revealing the Dramatic Bloom:** Once all your cuts are meticulously made, gently flip the onion back over. With careful precision, use your fingers to delicately spread out the newly formed petals, encouraging them to open up gracefully, much like a blossoming flower.
- **The Ice Water “Blossom Boost”:** For an even more dramatic and wide-open bloom, place the entirely sliced onion into a bowl filled with ice water for a few minutes. This clever trick aids in the expansion of the onion cells and further encourages the petals to spread out, lending that truly magnificent, wide-open presentation.
The Ultimate Blooming Onion Dipping Sauce
A phenomenal blooming onion simply isn’t complete without a perfectly paired, creamy, and tangy dipping sauce! This homemade sauce is designed to impeccably complement the crispy, subtly sweet onion petals. It’s not only incredibly simple to prepare but can also be conveniently made in advance.
Here’s what you’ll need to create this irresistible accompaniment, along with straightforward instructions:
- 1/2 cup mayonnaise
- 2 tablespoons ketchup
- 2 tablespoons creamed horseradish
- 1/4 teaspoon paprika
**Instructions:** Simply combine all the listed ingredients in a small mixing bowl. Whisk them together until the mixture is completely smooth and uniformly blended. Taste the sauce and adjust the seasonings to your personal preference; you might add a touch more paprika, a pinch of salt, or a dash of black pepper. For those who enjoy a bit of heat, consider incorporating a small pinch of cayenne pepper or a dash of your favorite hot sauce. A squeeze of fresh lemon juice can also add a bright, zesty note. Once mixed, cover the bowl and refrigerate the sauce until you are ready to serve. This versatile sauce isn’t just fantastic with blooming onions; it’s also superb with French fries, chicken tenders, or a variety of other air-fried appetizers!
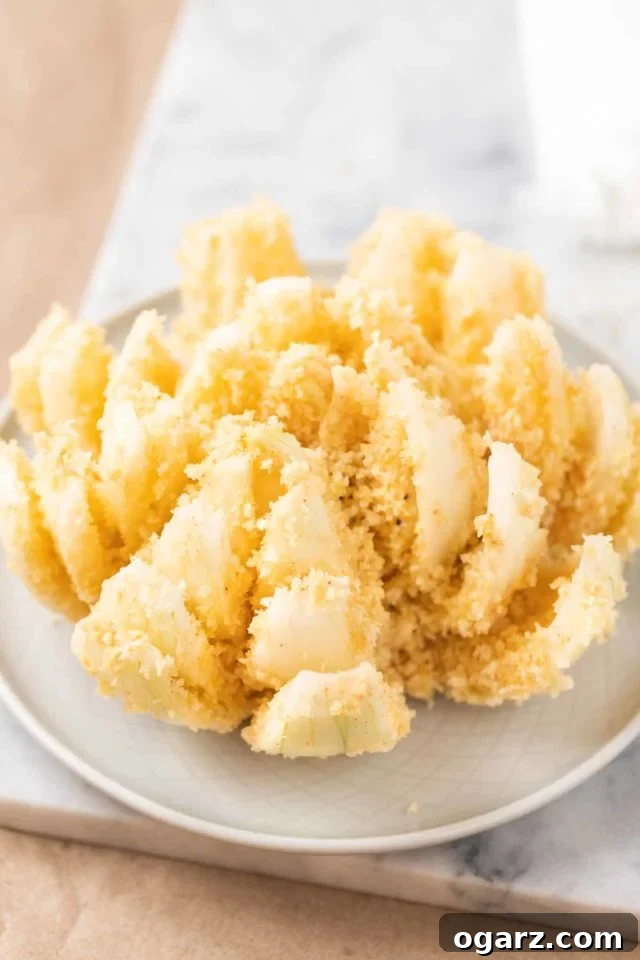
Serving Suggestions and Perfect Pairings
While an Air Fryer Blooming Onion is undoubtedly a star appetizer that can stand proudly on its own, its crispy texture and savory flavor make it incredibly versatile and an excellent accompaniment to a variety of dishes and occasions.
- **Ultimate Game Day Spread:** Elevate your game day feast by serving this blooming onion alongside other air fryer favorites, such as spicy chicken wings, crispy French fries, and gooey jalapeño poppers. It creates an unbeatable snack platter!
- **Delightful BBQ Side Dish:** The crunchy texture and rich flavor of the blooming onion make it an outstanding complement to grilled classics like juicy burgers, savory hot dogs, or tender BBQ ribs. It adds a gourmet touch to any backyard cookout.
- **Casual Dinner Appetizer:** Start off a relaxed family dinner or a cozy meal with friends with this visually impressive yet easy-to-make appetizer. It pairs beautifully with classic comfort foods like meatloaf, roasted chicken, or pasta dishes.
- **Light and Satisfying Lunch:** For a more substantial lunch option, consider pairing a blooming onion (perhaps a smaller one) with a fresh, crisp green salad dressed with a light vinaigrette, or a warm bowl of your favorite soup.
Storage and Reheating Instructions for Leftovers
For the optimal culinary experience, a blooming onion is best enjoyed immediately after it emerges from the air fryer, when its petals are at their absolute crispiest and most flavorful. However, if you find yourself with any delicious leftovers, here’s the best approach to store and reheat them:
- **Storage:** Any leftover air fryer blooming onion should be stored in an airtight container and placed in the refrigerator. Consume within 1 to 2 days for the best quality. Please be aware that the crispy coating will inevitably soften over time once refrigerated.
- **Reheating:** To revive some of that wonderful crispiness, the most effective method is to reheat the blooming onion in your air fryer. Preheat your air fryer to 350°F (175°C) and cook for approximately 5-8 minutes, or until the onion is thoroughly heated through and its coating has re-crisped to your satisfaction. Avoid reheating in the microwave, as this method will regrettably render the onion soggy and diminish its desirable texture.
Frequently Asked Questions (FAQs) About Air Fryer Blooming Onions
Q: Can I prepare the blooming onion ahead of time?
A: While the freshest and crispiest results are achieved when preparing and cooking just before serving, you can certainly cut the onion and soak it in ice water a few hours in advance. Store the cut onion submerged in ice water in the refrigerator. The breading process, however, is best done right before air frying to ensure maximum adhesion and crispiness.
Q: What should I do if my blooming onion isn’t getting crispy?
A: Several factors can affect crispiness. First, ensure you are not overcrowding the air fryer basket; if necessary, cook in batches to allow for optimal air circulation. Also, double-check that you’ve thoroughly shaken off any excess batter or breadcrumbs after each coating step. Consider giving the onion an additional light spray of oil before the final few minutes of cooking. If you used foil, remove it for at least the last 5-7 minutes to facilitate proper browning and crisping.
Q: Can I use gluten-free ingredients for this recipe?
A: Absolutely! This recipe is highly adaptable. You can easily substitute regular all-purpose flour with gluten-free all-purpose flour and conventional panko breadcrumbs with gluten-free panko breadcrumbs. The resulting blooming onion should still be wonderfully crispy and delicious.
Q: How do I know when the onion is fully cooked through?
A: A perfectly cooked blooming onion will have petals that are tender when pierced with a fork, and the outer coating will be a rich, golden brown and delightfully crispy. If you notice the outside browning too rapidly before the inside is tender, you can loosely cover the onion with aluminum foil for a portion of the cooking time to prevent scorching.
Q: Can this recipe be adapted for deep frying instead of air frying?
A: Yes, while this recipe is specifically optimized for the air fryer’s health benefits and convenience, you can certainly adapt it for traditional deep frying. To do so, heat cooking oil in a large pot or deep fryer to 350°F (175°C). Carefully lower the fully coated onion into the hot oil. Fry for approximately 8-10 minutes, or until it’s beautifully golden brown and cooked through, flipping it once halfway through for even cooking. Once done, remove and drain on a wire rack placed over paper towels to remove excess oil.
Print Recipe
Air Fryer Blooming Onion
Julia Foerster
10 minutes
25 minutes
35 minutes
6
Ingredients
- 1 large sweet onion, at room temperature
- 1/2 cup all-purpose flour
- 1 tsp paprika
- 1 tsp salt, divided
- 1/2 cup buttermilk (refer to tips above for a homemade alternative)
- 1 large egg
- 3/4 cup panko breadcrumbs
- 2 Tbsp olive oil
- Oil Spray, optional (for air fryer basket and onion)
Instructions
- Cut off the very top tip of the onion and peel all outer layers of skin. Place the onion cut-side down on a cutting board. Make precise slices, approximately 1/4 inch (0.6 cm) away from the root, cutting downwards but ensuring the root remains fully intact to hold the petals together. Start with four even quarter slices, then slice each quarter 3-4 more times to create similarly sized petals. Set the cut onion aside.
- In a shallow bowl, combine the all-purpose flour, 1 teaspoon of paprika, and ½ teaspoon of salt. Whisk these dry ingredients together until they are thoroughly mixed.
- In a second shallow bowl, whisk together the buttermilk (or homemade substitute) and the large egg until well combined. Then, add ¼ cup of the seasoned flour mixture from the first bowl and whisk again until you have a smooth, consistent batter.
- In a third shallow bowl, combine the panko breadcrumbs, the remaining ½ teaspoon of salt, and 2 tablespoons of olive oil. Use a fork to mix these ingredients thoroughly until the olive oil is evenly distributed and the panko is lightly coated.
- Dredge the cut onion generously in the seasoned flour mixture. Ensure that the flour coats every part of the onion, including in between the petals. Gently shake off any excess flour to ensure a thin, even layer.
- Next, immerse the flour-coated onion into the buttermilk batter. Use a spoon or your fingers to help coat all the petals evenly and thoroughly. Allow any excess batter to drip off before proceeding.
- Carefully transfer the battered onion into the panko breadcrumb mixture. Use your hands or a spoon to press the panko firmly onto all sides and in between the petals, ensuring a robust and even coating for maximum crispiness. Shake off any loose panko.
- Place the fully coated onion into the air fryer basket. Lightly spray the entire onion with oil spray. If you are concerned about the petal tips burning, you can loosely cover the top of the onion with aluminum foil for the initial cooking phase, making sure air can still circulate around it.
- Air fry the onion at 375°F (190°C) for 15-20 minutes. If you used foil, remove it at this point. Continue to air fry for an additional 3-7 minutes, or until the blooming onion achieves a beautiful golden-brown color and is wonderfully crispy to your desired texture.
- Once cooked, carefully remove the air-fried blooming onion from the basket. Serve it immediately with your homemade dipping sauce and enjoy this perfectly crispy, healthier appetizer!
Nutrition (per serving, estimated)
Carbohydrates: 16g |
Protein: 3g |
Fat: 6g |
Saturated Fat: 1g |
Cholesterol: 29mg |
Sodium: 460mg |
Potassium: 132mg |
Fiber: 1g |
Sugar: 4g |
Vitamin A: 260IU |
Vitamin C: 2.6mg |
Calcium: 47mg |
Iron: 1.1mg
Tried this delicious Air Fryer Blooming Onion recipe? We’d love to hear about your experience!
Please share your thoughts and rate the recipe below! Your valuable feedback not only inspires us but also helps other home cooks discover and enjoy amazing dishes.
NEVER MISS A RECIPE!
If you’ve tried this delightful Air Fryer Blooming Onion or any other of our mouth-watering recipes, we encourage you to rate the recipe and leave us a comment. Your feedback is truly invaluable, and we absolutely love hearing from you!
PINTEREST /
FACEBOOK /
INSTAGRAM /
TWITTER