
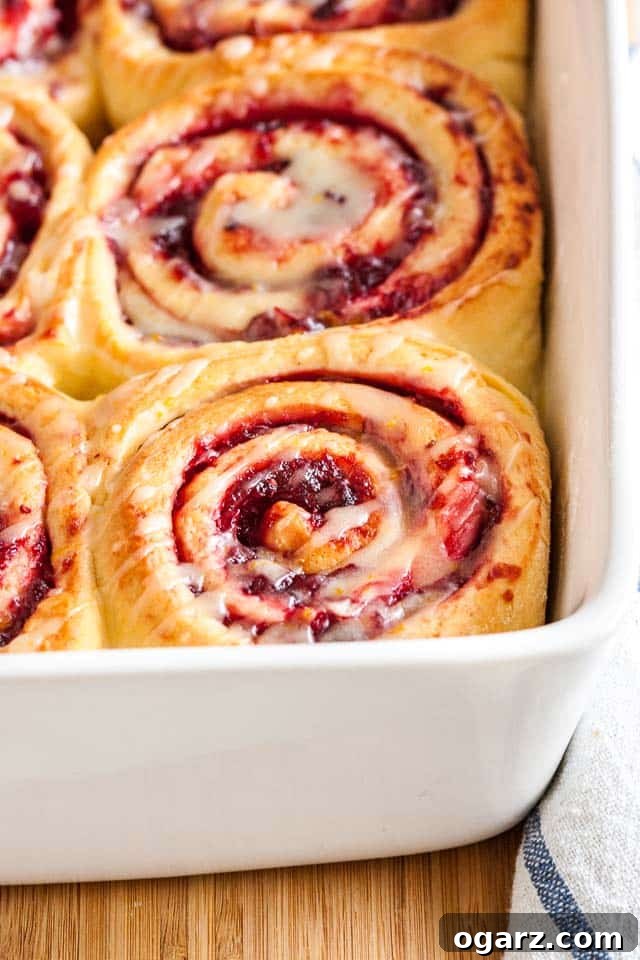
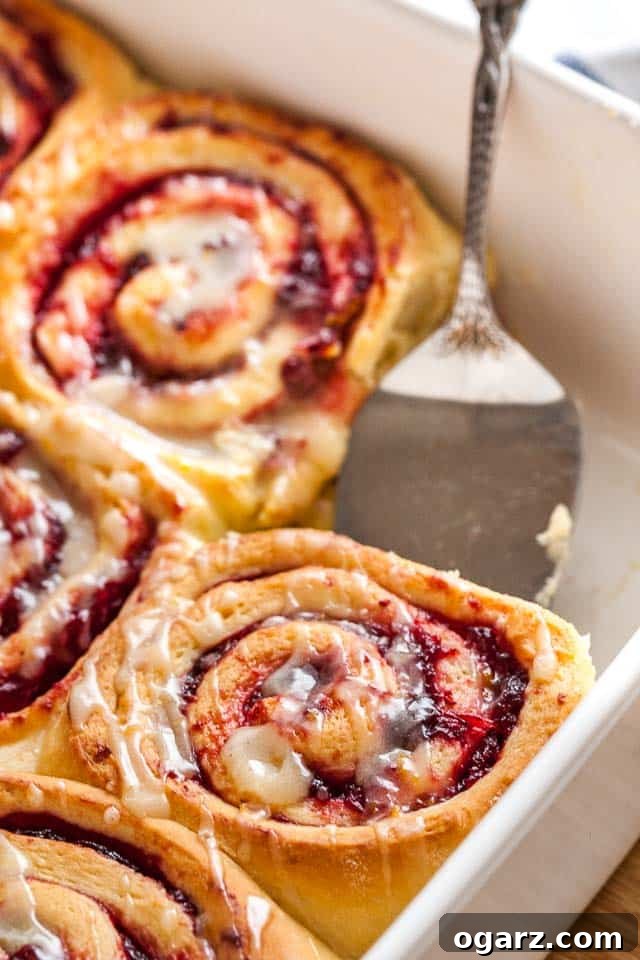
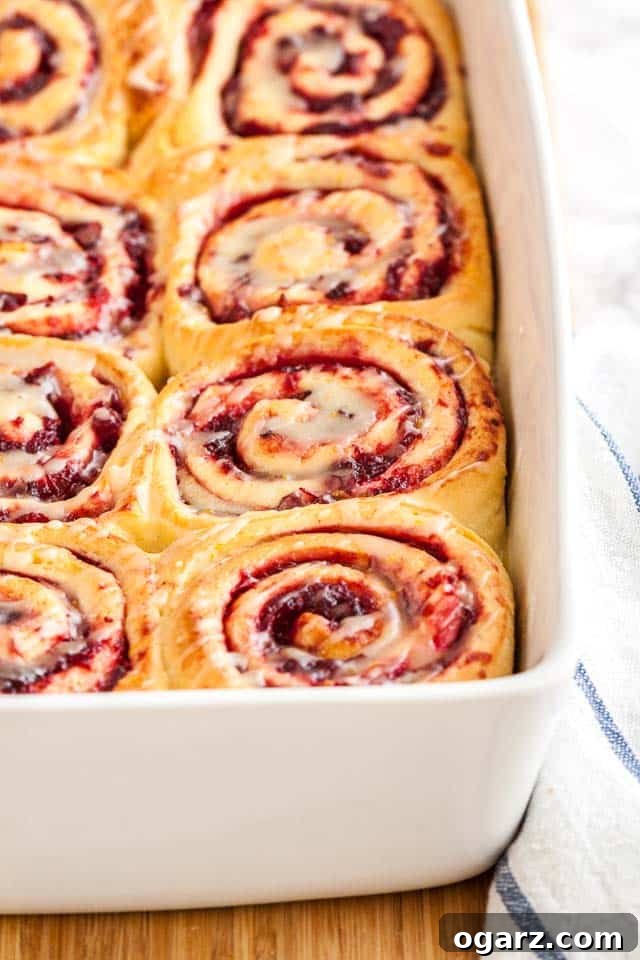
Cranberry Orange Rolls are more than just a breakfast item; they are a delightful holiday tradition, a festive centerpiece, and a true family favorite. Imagine waking up to the irresistible aroma of freshly baked sweet rolls, brimming with a vibrant, tart cranberry jam and crowned with a luscious, sweet orange icing. These perfectly gooey and tender Orange Sweet Rolls are designed to bring warmth and joy to any special occasion, especially during the festive season.
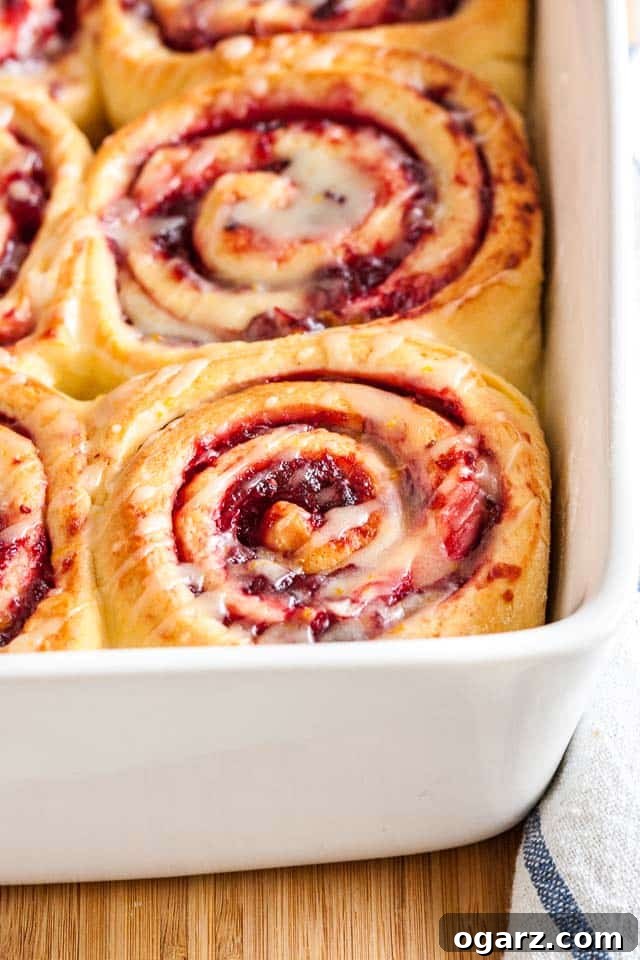
Ditch the ordinary this holiday season and elevate your brunch game with these spectacular homemade Cranberry Orange Rolls. Drizzled generously with the most exquisite sweet orange glaze, they offer a refreshing and captivating alternative to classic cinnamon rolls. While cinnamon rolls are undoubtedly delicious, these cranberry orange delights boast a unique flavor profile that is both brighter and more festive, making them incredibly appealing to the eye and the palate. Their soft, tender texture is simply divine, a testament to a well-crafted yeasted sweet roll. My husband, for one, can never get enough of them when I bake a batch, and I’m confident they’ll become a beloved staple in your home too.
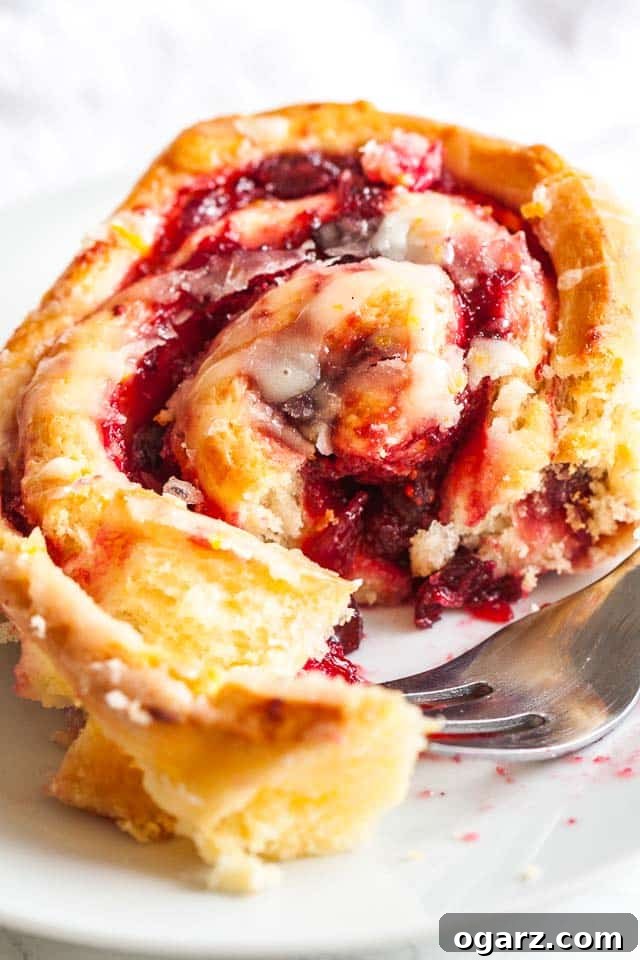
Achieving that coveted soft, gooey, and tender texture in homemade sweet rolls can often feel like a culinary challenge. Many recipes unfortunately yield dry or lean buns, leaving bakers feeling disappointed. The secret to our Cranberry Orange Rolls lies in a rich, buttery, almost brioche-like dough. This isn’t a shortcut recipe; it’s an invitation to embrace the art of baking with yeast, where patience and quality ingredients are paramount. By allowing the dough ample time to rise and using the best possible ingredients, you’ll be rewarded with rolls that are truly exceptional. Expect a soft, ethereal crumb, a delightful chewiness, and an absence of any unpleasant yeasty aftertaste – a common pitfall in recipes that rush the proofing process.
These rolls are perfect for a festive Christmas morning, a cozy New Year’s Day brunch, or any time you want to add a special touch to your breakfast table. The combination of tangy cranberries and bright orange zest creates a symphony of flavors that is both comforting and invigorating. Every bite reveals layers of flavor and texture, from the sticky-sweet glaze to the fruit-filled center and the pillowy soft dough. Prepare to impress your family and guests with these visually stunning and incredibly delicious homemade treats.
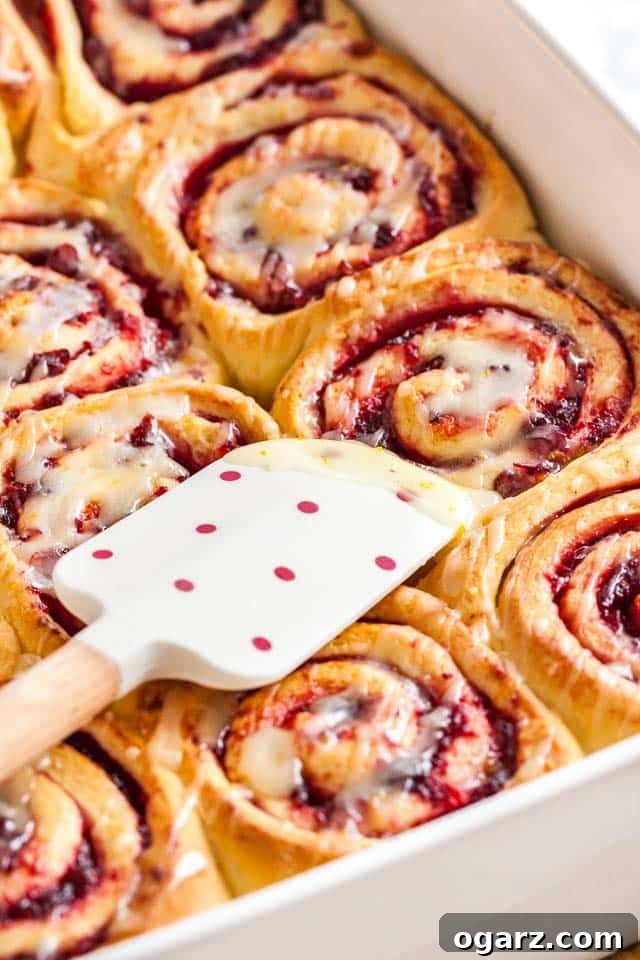
Mastering Your Cranberry Orange Rolls: Essential Tips and Tricks
Baking these Cranberry Orange Rolls to perfection is a rewarding experience, and these tips will guide you every step of the way, ensuring glorious results that will have everyone asking for your recipe:
- Follow the Recipe Precisely: Baking is often a science, especially when it comes to yeasted dough. Pay close attention to details such as the temperature of your milk – it should be warm, not hot, to activate the yeast without killing it. Measure your flour correctly, preferably by weight if possible, to avoid a dense or dry dough. Most importantly, allow the dough to rise as instructed. Patience is a virtue in yeast baking, and sufficient proofing time is crucial for developing flavor and achieving that wonderfully tender texture. Rushing this process will compromise the final product, so resist the urge to cut corners.
- Strategic Make-Ahead Preparation: Holidays can be hectic, but your breakfast doesn’t have to be. This recipe is wonderfully adaptable for making ahead. You can prepare the rolls up to the point of their second rise, arrange them in your baking dish, cover them tightly with plastic wrap, and refrigerate them overnight. This allows for a leisurely morning; simply remove them from the fridge about an hour before baking to let them come to room temperature, then bake as usual. This method ensures fresh, warm rolls without the early morning rush.
- Cranberry Filling Options: While making homemade cranberry jam from scratch is highly recommended for its superior flavor and freshness, you can certainly use shortcuts. If you have leftover cranberry sauce from your holiday dinner, it’s an excellent option. Just ensure it’s not too watery; if it is, you might want to gently simmer it down a bit to thicken it. Canned cranberry sauce (whole berry, not jellied) can also work in a pinch. You’ll need approximately 2 cups of cranberry filling for this recipe.
- Baking Dish and Oven Variations: Every oven has its quirks, and even your choice of baking dish can influence baking time. A darker pan might bake faster than a lighter one. To ensure your rolls are perfectly cooked through without being overdone, test them for doneness. Gently insert a small fork or knife between two rolls and carefully tear off a tiny piece of dough from the center. If it’s still raw or gummy, return the pan to the oven for another 5-10 minutes, checking periodically. The rolls should be golden brown on top and cooked through in the middle.
- Room Temperature Ingredients for Dough: For the best results with yeast dough, ensure your eggs and butter are at room temperature. This helps them incorporate more smoothly into the dough, leading to a more consistent and well-hydrated mixture. Cold ingredients can cause the butter to solidify or the dough to struggle in rising.
Common Questions About Making Orange Sweet Rolls with Cranberry Filling
Here are answers to some frequently asked questions to help you bake these delightful Cranberry Orange Rolls with confidence:
Can these rolls be made ahead of time?
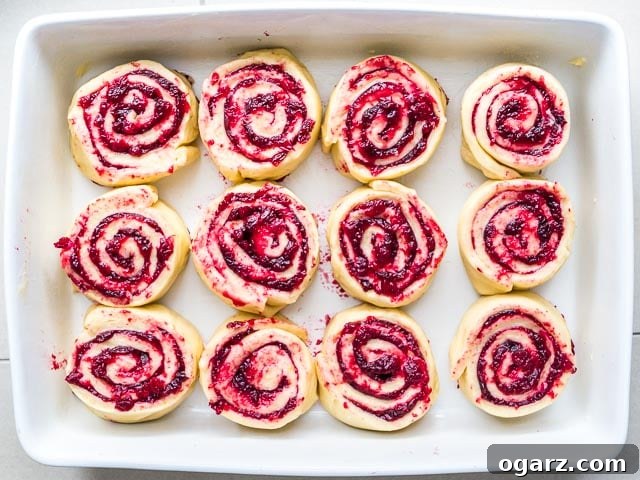
Absolutely! These Cranberry Orange Rolls are excellent candidates for make-ahead preparation, which is a fantastic strategy for holiday mornings or when you simply want to streamline your baking process. After you’ve shaped the filled rolls and placed them into your prepared baking pan, cover the pan securely with plastic wrap. Ensure it’s airtight to prevent the dough from drying out. Then, transfer the covered pan to your refrigerator. The slow, cold fermentation overnight will actually enhance the flavor of the dough. The next morning, remove the pan from the fridge and allow the rolls to sit at room temperature for approximately 1 to 1.5 hours. This crucial step lets the dough warm up and complete its final rise before baking. Once they’ve visibly puffed up, they’re ready for the oven.
What if I don’t own a stand mixer?
While a stand mixer with a dough hook certainly makes the kneading process much easier and quicker, it’s by no means a necessity. You can absolutely knead the dough by hand! This method requires a bit more time and elbow grease, but it offers a wonderful tactile experience and a great arm workout. Begin by combining the wet and dry ingredients in a large bowl with a sturdy spoon until a shaggy dough forms. Then, turn the dough out onto a lightly floured surface and begin kneading. This brioche-style dough is inherently sticky, so you may need to lightly flour your hands and the work surface periodically to prevent excessive sticking. Knead for about 15-20 minutes, or until the dough becomes smooth, elastic, and passes the windowpane test (where you can stretch a small piece of dough thin enough to see light through it without tearing). Don’t be discouraged by the initial stickiness; it’s a sign of a rich, well-hydrated dough that will result in wonderfully tender rolls.
Can I use fresh or frozen cranberries for the jam?
Both fresh and frozen cranberries work beautifully for the homemade jam filling. If using frozen cranberries, there’s no need to thaw them beforehand. Simply add them directly to the saucepan with the sugar, orange juice, and zest, and proceed with the recipe instructions. They will thaw and burst as they cook. The key is to simmer the mixture until most of the cranberries have burst and the jam has thickened to a spreadable consistency. If you have extra fresh cranberries, you can always make a larger batch of jam and store the remainder in the refrigerator for up to a week or freeze it for future use.
How should I store leftover Cranberry Orange Rolls?
If by some miracle you have any leftovers, these rolls are best enjoyed fresh and warm. However, you can store them in an airtight container at room temperature for 1-2 days, or in the refrigerator for up to 3-4 days. To reheat, place them in a preheated oven (around 300°F/150°C) for 10-15 minutes, or microwave for 15-30 seconds until warmed through. Covering them loosely with foil during oven reheating can help keep them moist.
Can these rolls be frozen?
Yes, these rolls freeze wonderfully! There are two main ways to freeze them:
Unbaked: After placing the shaped rolls in the baking pan, cover them very tightly with plastic wrap, then with aluminum foil, and freeze for up to 2-3 weeks. When ready to bake, transfer the frozen rolls to the refrigerator overnight to thaw. The next morning, remove them from the fridge and let them rise at room temperature for 1-2 hours until doubled in size, then bake as directed.
Baked: Once baked and cooled (before glazing), wrap individual rolls tightly in plastic wrap and then aluminum foil, or place them in a freezer-safe bag. Freeze for up to 1-2 months. Thaw at room temperature and then reheat as described above, adding the glaze after reheating.
Essential Tips for Success When Working with Yeasted Dough
Working with yeast might seem intimidating, but understanding a few key principles will turn you into a confident bread and roll baker. Here are vital tips to ensure your dough rises perfectly every time:
- Milk Temperature is Crucial: This is arguably the most critical factor when activating yeast. The milk should be warm to the touch, ideally between 95°F (35°C) and 105°F (40°C). Using a food thermometer to check the temperature is highly recommended for accuracy. If the milk is too cold, the yeast will not activate, and your dough won’t rise. If the milk is too hot (above 120°F/49°C, and definitely above 130°F/54°C), it will kill the yeast, rendering it inactive, and again, your baked goods will not rise. Think of it like a warm bath for the yeast – just right, not scalding.
- Understanding Yeast Types: I consistently use Instant Dry Yeast for its convenience and reliability. This type of yeast can be added directly to your dry ingredients without prior proofing. However, I still prefer to dissolve it in a warm liquid (like milk) with a pinch of sugar before combining it with other ingredients. This step serves two purposes: first, it kickstarts the yeast, making it very active for a more vigorous rise; second, and perhaps more importantly, it allows you to verify that your yeast is still viable. If, after 5-10 minutes, your milk mixture doesn’t become foamy and bubbly, your yeast is likely too old, or your liquid was too hot/cold, and it’s best to start over with fresh yeast. Active Dry Yeast works similarly but typically requires proofing in warm liquid before being added to dry ingredients, and it may need a slightly longer rise time compared to instant yeast.
- The Art of Rising (Proofing): The rising process, also known as proofing, is where the magic happens. During this time, the yeast ferments the sugars in the dough, producing carbon dioxide gas which causes the dough to expand and develop its characteristic texture. This fermentation also plays a pivotal role in developing the complex flavors of the baked goods. It is paramount to give your dough adequate time to rise. An under-proved dough will result in dense, heavy rolls with a distinctly yeasty or raw flour aftertaste. Conversely, over-proved dough can collapse in the oven or have a coarse, crumbly texture. Look for the dough to visibly double in size and be soft and airy when gently poked. Finding a warm, draft-free spot (like a slightly warmed oven or a sunny kitchen counter) will encourage an even rise.
- Kneading for Gluten Development: Kneading, whether by hand or with a stand mixer, is essential for developing the gluten structure in the dough. Gluten is the protein network that gives bread and rolls their elasticity and chewiness, allowing them to trap the gases produced by the yeast. Proper kneading results in a smooth, elastic dough that can hold its shape and expand beautifully during rising and baking. Undernixed dough will be difficult to work with and produce a dense product, while overmixing can make the dough tough.
- Room Temperature for a Consistent Rise: Ensure all your cold ingredients, such as eggs and butter, are at room temperature before incorporating them into the dough. This allows for a smoother mixing process and helps maintain a consistent dough temperature, which is beneficial for yeast activity and a uniform rise.
Homemade Cranberry Orange Rolls Recipe
Get ready to bake the most incredible Cranberry Orange Rolls. This detailed recipe ensures perfect results every time, delivering tender, flavorful rolls that are truly special.
Yields: 12 servings
Prep Time: 3 hours
Cook Time: 35 minutes
Total Time: 3 hours 35 minutes
Ingredients
For the Rolls:
- 3/4 cup (180ml) whole milk, heated to 95°F/35°C
- 1/2 cup (100g) granulated sugar
- 2 1/4 tsp instant dry yeast
- 4 1/4 cups (530g) all-purpose flour
- 1/2 cup (120g) cornstarch
- 3/4 tsp salt
- 3 large eggs, room temperature
- 3/4 cup (180g) unsalted butter, cut into 12 pieces and softened
- 2 tsp orange zest
For the Cranberry Orange Jam:
- 4 cups (400g) cranberries, fresh or frozen
- 1 cup (200g) granulated sugar
- 1/4 cup (60ml) fresh orange juice
- 2 tsp orange zest
For the Orange Glaze:
- 1 cup (120g) powdered sugar
- 3 Tbsp fresh orange juice
- 2 tsp orange zest
Instructions
- Prepare the Yeast Mixture: In the bowl of a stand mixer fitted with the dough hook attachment, combine the warm milk, 1/2 cup granulated sugar, and instant dry yeast. Whisk these ingredients gently until well combined. Let the mixture sit undisturbed for about 5 to 10 minutes until it becomes visibly foamy and bubbly. This indicates the yeast is active and alive.
- Combine Dry Ingredients: While the yeast is proofing, in a separate medium bowl, whisk together the all-purpose flour, cornstarch, and salt. Set this dry mixture aside.
- Add Eggs to Milk Mixture: Once the yeast mixture is foamy, add the three room-temperature eggs to the stand mixer bowl. Whisk everything together until thoroughly combined.
- Incorporate Flour Mixture: With the stand mixer running on its lowest speed, gradually add the reserved flour mixture to the wet ingredients. Continue mixing until the dough starts to come together and forms a shaggy mass, which should take approximately 1 minute.
- Add Butter and Orange Zest: Increase the mixer speed to medium. Begin adding the softened unsalted butter, one piece at a time, allowing each piece to be partially incorporated before adding the next. Once all the butter has been added, stir in the 2 teaspoons of orange zest for the dough.
- Knead the Dough: Continue mixing the dough on medium speed for a full 10 minutes. The dough should transform into a smooth, elastic consistency and pull away cleanly from the sides of the bowl. If, after 10 minutes, the dough still feels excessively wet or sticky, add one or two tablespoons of additional flour, one at a time, until it reaches the desired smooth, slightly sticky but manageable texture.
- First Rise (Bulk Fermentation): Lightly flour a clean work surface. Turn the dough out and briefly knead it into a smooth ball. Transfer the dough ball to a lightly greased large bowl, turning it once to coat. Cover the bowl tightly with plastic wrap to prevent a crust from forming. Place the bowl in a warm, draft-free spot in your kitchen and let the dough rise until it has visibly doubled in size. This typically takes about 1.5 to 2 hours, depending on the warmth of your environment.
- Prepare the Cranberry Orange Jam: While the dough is undergoing its first rise, prepare the delicious cranberry jam. In a medium saucepan, combine the 4 cups of cranberries (fresh or frozen), 1 cup granulated sugar, 1/4 cup fresh orange juice, and 2 teaspoons of orange zest. Bring the mixture to a boil over medium-high heat. Once boiling, reduce the heat to medium-low and let it simmer gently for about 15 minutes, stirring occasionally. The cranberries should burst open, and the mixture will thicken into a jam-like consistency. Remove from heat and allow the jam to cool completely to room temperature before using.
- Shape the Rolls: Once the dough has doubled in size, gently punch it down to release the air. Lightly flour your work surface and a rolling pin. Roll the dough out into a large rectangle, approximately 18×18 inches (or 45×45 cm). Evenly spread the cooled cranberry orange jam over the entire surface of the dough, leaving a 1-inch border along one of the longer edges.
- Roll and Cut: Starting from the longer edge nearest to you (the one without the border), carefully and tightly roll the dough into a cylinder. Pinch the seam lightly to seal it securely. Using a very sharp knife or unflavored dental floss, cut the cylinder into 12 equal-sized pieces.
- Second Rise (Proofing in Pan): Arrange the cut rolls in a lightly greased 13×9-inch baking pan, leaving a little space between each roll as they will expand. Cover the baking pan loosely with plastic wrap. Place it in a warm, draft-free spot and let the rolls rise again until they have doubled in size and look puffy, which usually takes about 1 hour. (Alternatively, for make-ahead, refrigerate overnight as per the instructions in the FAQ section).
- Preheat Oven: While the rolls are completing their second rise, preheat your oven to 350°F (180°C).
- Bake the Rolls: Once the oven is preheated and the rolls have fully risen, discard the plastic wrap. Bake the rolls in the preheated oven for approximately 35 to 40 minutes, or until they are beautifully golden brown on top and cooked through in the center. Transfer the pan to a wire rack to cool slightly.
- Prepare and Drizzle Glaze: While the rolls are still warm, prepare the orange glaze. In a small bowl, whisk together the powdered sugar, 3 tablespoons of fresh orange juice, and 2 teaspoons of orange zest until the mixture is completely smooth and free of lumps. Drizzle or spread the vibrant orange glaze generously over the warm rolls. Serve immediately and enjoy!
Notes
The dough used in this recipe has been adapted from a reliable source (Cook’s Country) for its exceptional richness and texture.
Nutrition Information (per serving)
Approximate values based on recipe ingredients:
- Calories: 472 kcal
- Carbohydrates: 81g
- Protein: 8g
- Fat: 14g
- Saturated Fat: 8g
- Polyunsaturated Fat: 1g
- Monounsaturated Fat: 4g
- Trans Fat: 1g
- Cholesterol: 73mg
- Sodium: 173mg
- Potassium: 158mg
- Fiber: 4g
- Sugar: 38g
- Vitamin A: 482 IU
- Vitamin C: 11mg
- Calcium: 40mg
- Iron: 2mg
Explore More Delicious Breakfast and Brunch Recipes
If you loved these Cranberry Orange Rolls, you might be interested in trying some of our other delightful breakfast and brunch recipes. Perfect for gatherings or simply treating yourself!
- Ham and Cheese Breakfast Casserole
- Spinach Tomato Quiche
- Banana Muffins with Cinnamon Streusel
- Italian Baked Eggs and Meatballs
- Cranberry Upside Down Cake
Recommended Tools and Ingredients for this Recipe
To ensure the best results and make your baking experience as enjoyable as possible, here are a couple of essential tools and ingredients I highly recommend:
Instant Dry Yeast: High-quality yeast is paramount for consistent and successful rises. Investing in a reliable brand ensures your dough will be lively and robust, leading to perfectly fluffy rolls every time. A good quality instant dry yeast is a baker’s best friend.
Stand Mixer: While not strictly necessary (as demonstrated in our FAQs), a stand mixer, especially one fitted with a dough hook, is an invaluable asset for making rich, yeasted doughs like this one. It significantly reduces the effort and time required for kneading, ensuring optimal gluten development without tiring your arms. Plus, many models are so aesthetically pleasing they double as kitchen decor!
We hope you enjoy baking and savoring these Homemade Cranberry Orange Rolls as much as we do. They truly embody the spirit of festive indulgence and make any meal feel like a special occasion. Happy baking!