The Ultimate Guide to Making Perfect Homemade Creme Brulee: A Decadent French Classic
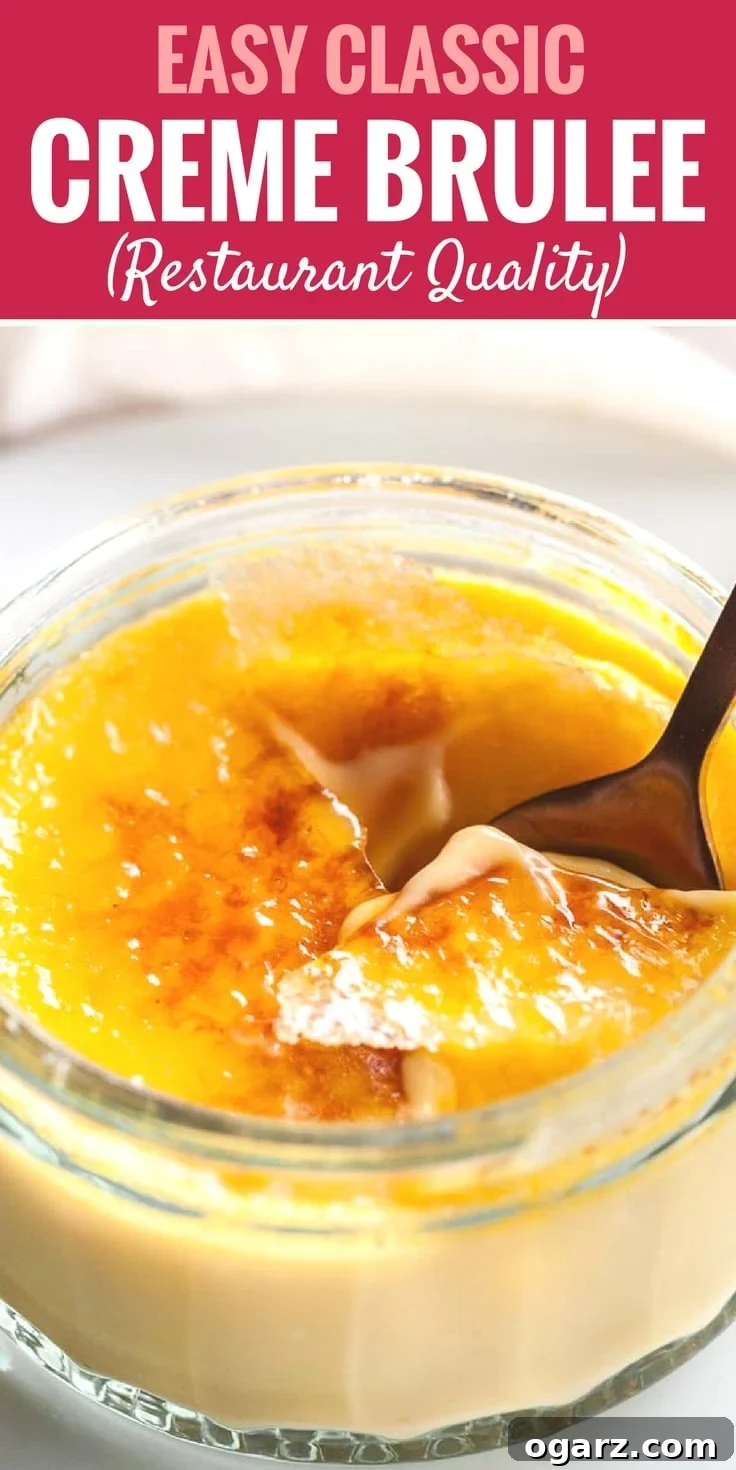
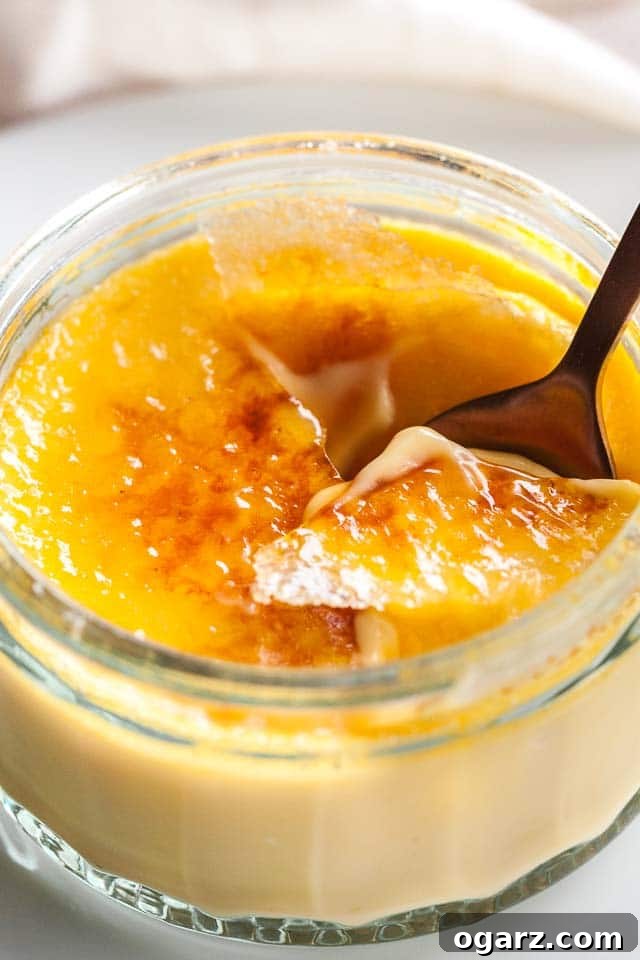
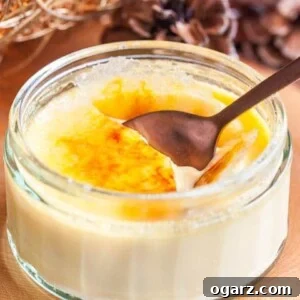
Prepare to impress your guests with a dessert that’s both effortlessly elegant and surprisingly simple to master at home: Classic Creme Brulee. This iconic French delight features a luxuriously smooth, rich vanilla custard, crowned with a thin, brittle layer of caramelized sugar that shatters with a satisfying crack at the touch of a spoon. Often perceived as a complex restaurant-only treat, this recipe proves that creating a gourmet Creme Brulee in your own kitchen is entirely achievable, even for novice bakers. It’s not just a dessert; it’s an experience—a symphony of textures and flavors that will leave a lasting impression.
Why Homemade Creme Brulee is an Absolute Must-Try
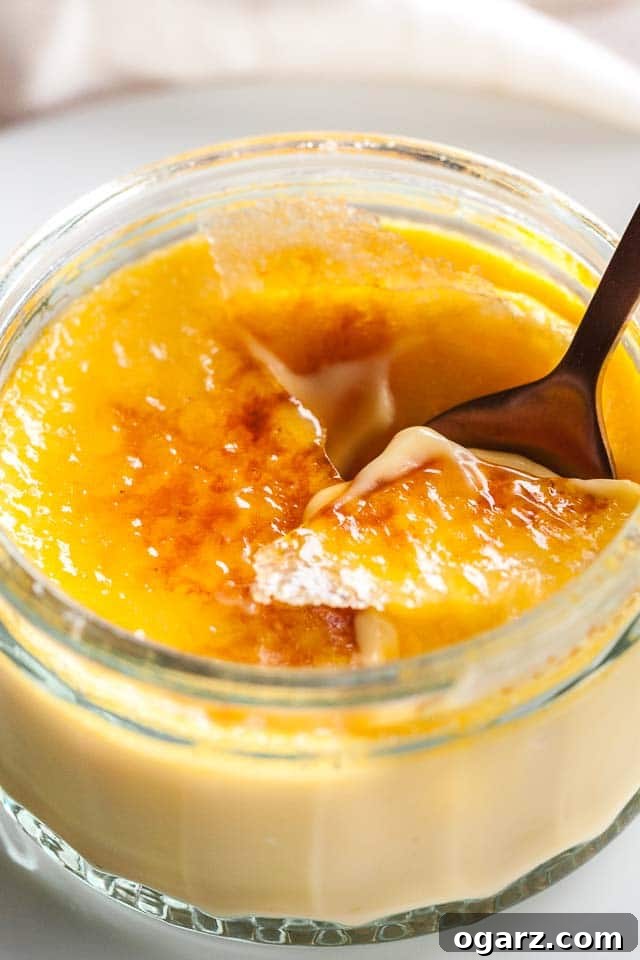
For many, Creme Brulee holds a special place in their hearts—it’s certainly my personal favorite! There’s an undeniable allure to this decadent sweet that makes you want to indulge daily. What truly elevates this “burnt cream” dessert beyond ordinary sweets is the exquisite contrast it offers. Imagine the crisp, almost glassy texture of the caramelized sugar topping giving way to the velvety, melt-in-your-mouth vanilla custard beneath. This delightful interplay of hard and smooth, sweet and creamy, is what makes each spoonful so incredibly special and utterly delicious.
Every time I prepare this classic Creme Brulee recipe, it garners rave reviews and disappears almost instantly. It genuinely tastes like something you’d savor in a high-end restaurant, yet the process of making it from scratch at home is surprisingly straightforward. This makes it an ideal choice for special occasions, dinner parties, or any gathering where you want to serve an unforgettable dessert without last-minute stress. Its remarkable make-ahead quality means you can prepare the custards days in advance, chill them, and then add the final flourish—the irresistible caramelized sugar crust—just before serving. This convenience ensures you can relax and enjoy your company, knowing a show-stopping dessert is ready to dazzle.
And yes, for that truly authentic and perfect caramelized topping, a kitchen blowtorch is, in my opinion, an indispensable tool. While some methods suggest using a broiler, this often leads to uneven browning, runs the risk of burning your carefully prepared custard, and warms the chilled dessert, compromising its ideal temperature and texture. Investing in a small culinary torch dedicated to desserts like Creme Brulee is a game-changer, ensuring that beautiful, consistent, and satisfyingly crisp sugar crust every single time.

Expert Tips & Tricks for Achieving Creme Brulee Perfection at Home
Making Creme Brulee from scratch might seem intimidating, especially with the mention of a water bath, but with these pro tips, you’ll achieve flawless results every time:
- Mastering the Water Bath (Bain-Marie): The water bath is crucial for even cooking and preventing the custard from curdling or cracking. For ease and safety, always place your filled ramekins into the larger baking dish *before* transferring the dish to the oven. Once in the oven, carefully pour hot water into the baking dish, reaching about two-thirds up the sides of the ramekins. This technique minimizes spills and makes handling much easier.
- Temperature is Key: Don’t guess when it comes to custard doneness. An instant-read thermometer is your best friend here. You want the custard to reach a temperature of approximately 150-155°F (65-70°C). At this point, the edges will be set, but the center will still have a slight jiggle, similar to Jello. Overcooking the custard is a common pitfall that can result in an undesirable “eggy” texture or a grainy consistency. My preferred instant-read thermometer makes this step foolproof.
- Preventing Condensation: After baking and allowing the ramekins to cool slightly at room temperature, transfer them to the refrigerator. For the first hour of chilling, leave them uncovered. This allows any residual steam to dissipate, preventing condensation from forming and dripping onto the delicate custard surface, which could lead to a watery or sticky top. After this initial hour, you can loosely cover them with plastic wrap to prevent them from absorbing odors from the fridge and to keep them fresh for up to three days.
- The Unrivaled Kitchen Torch: As mentioned, a small kitchen torch is truly the superior method for caramelizing the sugar topping. Unlike a broiler, which offers inconsistent heat and makes it easy to overheat the custard or burn the sugar, a torch provides precise, controlled heat. This allows you to achieve that perfect deep golden-brown, crisp caramel layer without compromising the cool, creamy custard beneath. It’s a worthwhile investment for any dessert enthusiast.
- Customize Your Caramel Crust: The amount of sugar you sprinkle on top determines the thickness and intensity of your caramel crust. I personally adore a thicker, more robust caramel layer, so I typically use 2 teaspoons of granulated sugar per ramekin. However, if you prefer a more delicate, thinner crust, 1 teaspoon will suffice. Experiment to find your perfect balance!
Creative Uses for Leftover Egg Whites
Since this Creme Brulee recipe only calls for egg yolks, you’ll find yourself with leftover egg whites. Don’t let them go to waste! They are incredibly versatile. A classic use is for light and airy Coconut Macaroons, or you could explore other delicious options like meringues, angel food cake, or even savory dishes like frittatas. For more fantastic ideas, check out this helpful article from The Kitchn.
How to Master Making Classic Creme Brulee: A Step-by-Step Guide
Crafting authentic Creme Brulee from scratch is a rewarding experience that’s simpler than you might imagine. The key is understanding each step, especially the gentle cooking in a water bath (bain-marie), which ensures that coveted silky texture.
Step 1: Prepare Your Oven and Ramekins
Begin by preheating your oven to a gentle 300°F (150°C). Position an oven rack in the center to ensure even heat distribution. Next, arrange four small (approximately 5-ounce) ramekins in a larger baking dish. Make sure the baking dish is deep enough so that its sides are at least as tall as the ramekins.
Step 2: Infuse the Cream
In a small saucepan over medium heat, gently bring the heavy cream to a simmer. Watch closely; you’ll see small bubbles forming around the edges, but don’t let it boil vigorously. Remove the saucepan from the heat, cover it, and let it steep for about 10 minutes. This allows the cream to cool slightly to an ideal temperature (no higher than 165°F or 73°C) and, if you’re using a vanilla pod instead of extract, for its flavor to infuse deeply.
Step 3: Whisk Egg Yolks and Sugar
While the cream is infusing, combine the egg yolks, granulated sugar, and a pinch of salt in a medium-sized bowl. Whisk these ingredients together until they are well combined, and the mixture becomes pale yellow and slightly thick. You want it smooth, not frothy.
Step 4: Temper the Eggs
This is a critical step to prevent scrambling the egg yolks. Slowly and gradually pour about half a cup of the warm cream into the sugar-egg yolk mixture while continuously whisking. Continue to whisk for about 30 seconds. This process, known as tempering, gently brings the temperature of the egg yolks up without cooking them, preparing them for the rest of the warm cream.
Step 5: Combine All Ingredients
With a light hand and slow, steady stirring, incorporate the remaining warm cream into the tempered egg mixture. Avoid vigorous whisking at this stage, as you don’t want to create excessive froth or air bubbles, which can lead to an uneven texture in your final custard. Stir in the vanilla extract and, if using, the orange liqueur (like Grand Marnier) until just combined.
Step 6: Strain and Divide
To ensure an impeccably smooth and silky custard, pour the entire mixture through a fine-mesh sieve into a measuring cup with a spout. This step removes any tiny bits of cooked egg or undissolved sugar, guaranteeing a flawless texture. Then, divide the custard evenly among your prepared ramekins.
Step 7: Bake in a Water Bath
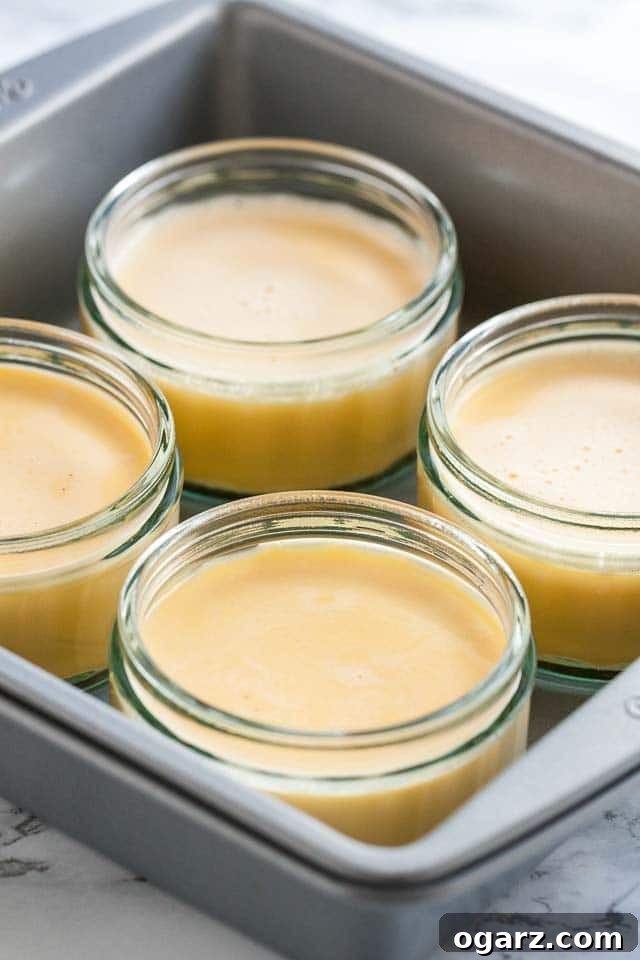
Carefully transfer the baking dish, with the ramekins inside, to the preheated oven. Once in the oven, slowly and cautiously pour hot (ideally boiling) water into the baking pan until the water level reaches approximately two-thirds up the sides of the ramekins. Be extremely careful not to splash any water into the custards themselves. Loosely cover the entire baking pan with aluminum foil. This helps to maintain an even temperature and prevents the tops of the custards from drying out.
Step 8: Baking and Doneness
Bake the custards for about 50-55 minutes. You’ll know they’re ready when the edges appear set, but the center still has a slight, delicate jiggle. For precise results, use an instant-read thermometer inserted into the center of one ramekin; it should register between 150° to 155°F (65° to 70°C). This temperature range ensures a perfectly set, yet creamy, custard.
Step 9: Cool and Chill
Once baked, carefully remove the baking pan from the oven. Using a folded tea towel or oven mitts, gently lift the ramekins out of the hot water bath and place them on a wire rack to cool at room temperature for about 30 minutes. After this initial cooling period, transfer the uncovered ramekins to the refrigerator to chill. Leave them uncovered for at least an hour to prevent condensation. Once they are refrigerator-cold, typically after an hour or more, wrap each ramekin tightly with plastic wrap. Chill for at least 4 hours, or ideally, overnight, and up to 3 days. This extended chilling time allows the flavors to meld and the custards to fully set.
Step 10: The Grand Finale – Torching the Sugar!
This is arguably the most exciting part! Just before serving, take your chilled vanilla custards from the fridge. Sprinkle 1 to 2 teaspoons of granulated sugar evenly over the top of each custard. I typically use 2 teaspoons for a thicker crust, but my husband prefers 1 teaspoon for a more delicate crunch. Gently tilt and tap the ramekin to ensure the sugar forms an even layer across the surface.
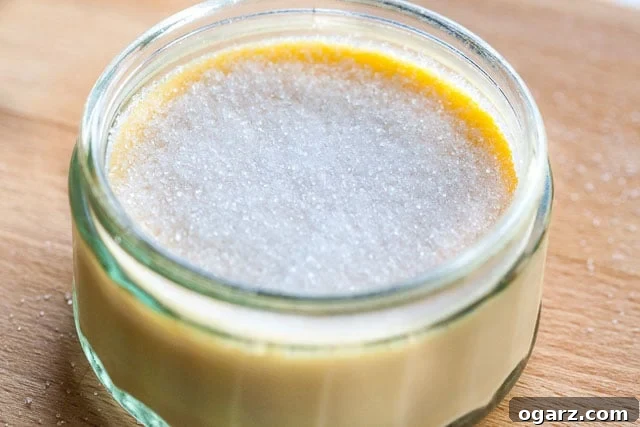
Now, for the “burnt cream” magic. Hold the flame of your kitchen torch about 2-3 inches above the sugar layer. Slowly and continuously glide the flame back and forth across the surface. You’ll witness the sugar melting, bubbling, and transforming into a beautiful, deep golden-brown caramel. The key is consistent movement to prevent burning any single spot.
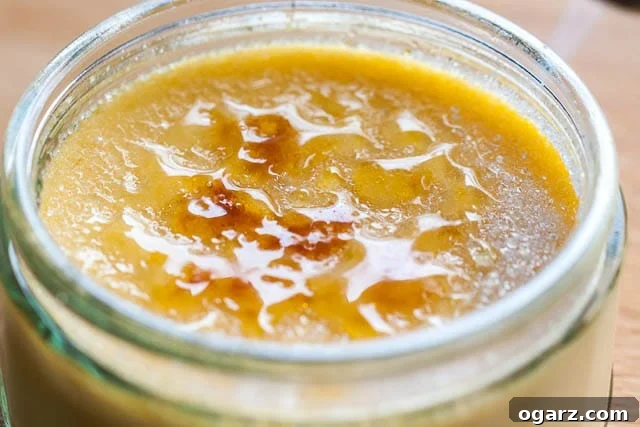
Continue torching until all the sugar has caramelized and achieved that rich amber hue. Be mindful not to torch for too long, as you want to avoid warming up the perfectly chilled custard underneath. The goal is a quick, efficient caramelization.
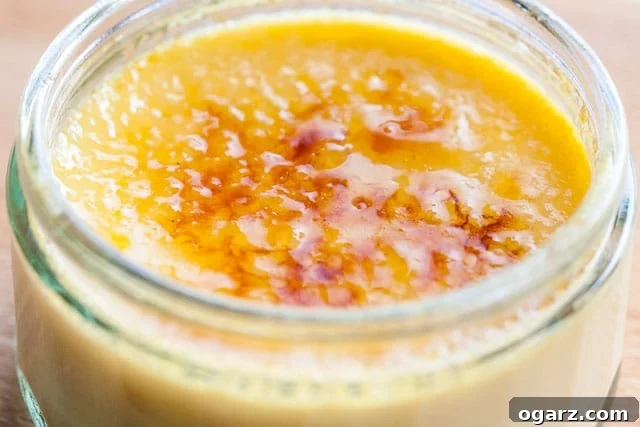
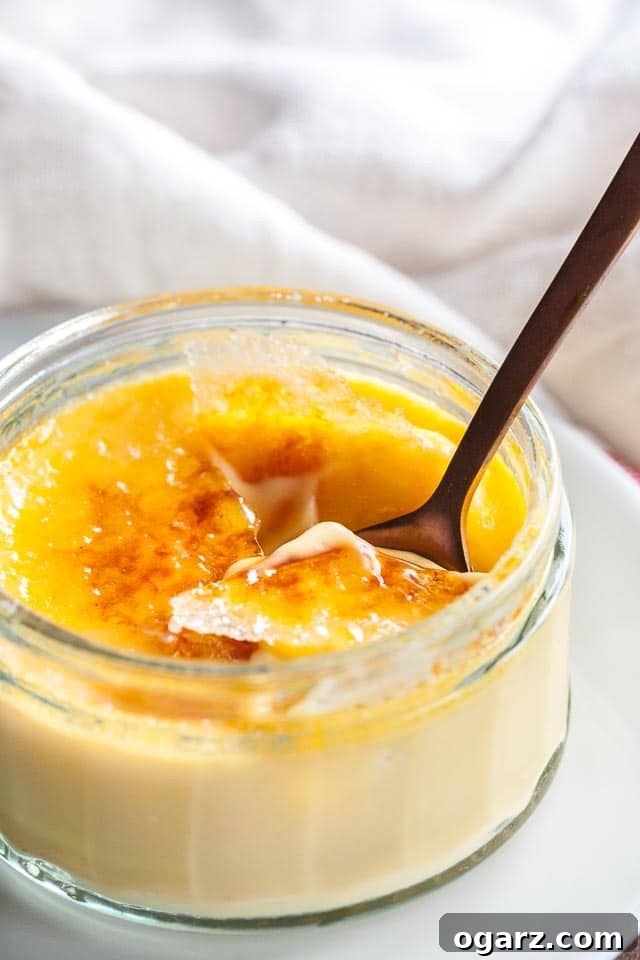
Once caramelized, allow the sugar to cool and harden for approximately 30 to 60 seconds. You’ll hear a slight crackling sound as it solidifies into that signature brittle crust. Serve your exquisite Creme Brulee immediately! This ensures the delightful contrast between the warm, crisp topping and the cold, creamy custard is at its peak. For an added touch of drama and guest interaction, I often perform the torching right in front of my guests, making it a memorable part of the dining experience.
Looking for More Impressive Yet Easy-to-Make Desserts?
If you loved creating this elegant Creme Brulee, you might enjoy these other equally delicious and approachable dessert recipes:
- Easy Lemon Curd Mousse
- Chocolate Mousse Cake
- No Bake Oreo Cheesecake Parfaits
- Cranberry Upside Down Cake
Essential Tools for Your Creme Brulee Success
Having the right equipment makes all the difference when crafting perfect Creme Brulee. Here are my top recommendations:
- Kitchen Torch: Absolutely indispensable for that signature crackly topping! A culinary torch allows for precise caramelization, ensuring an even, golden-brown crust without heating the custard. It’s a small investment that elevates this dessert to professional standards.
- Ramekins: Standard 4 to 5-ounce ramekins are ideal for individual servings of Creme Brulee. While specialty ceramic ramekins can be pricey, you might find many suitable small glass dishes that come with store-bought desserts or at thrift stores which work perfectly. Just ensure they are oven-safe.
- Instant-Read Thermometer: A true kitchen workhorse, this thermometer is crucial for accurately gauging the custard’s doneness, preventing overcooking and that dreaded “eggy” texture. It’s a versatile tool that you’ll use for everything from roasts and turkeys to delicate chocolate work and, of course, your exquisite Creme Brulee. Every home cook should have one!
Classic Creme Brulee Recipe
By: Julia Foerster
This easy classic French Creme Brulee recipe is so easy to make and perfect for parties because it can be made a few days ahead!
Prep Time: 20 minutes
Cook Time: 50 minutes
Total Time: 1 hour 10 minutes
Servings: 4
Ingredients
- 1 1/2 cups heavy cream (360ml)
- 3 large egg yolks
- 1/4 cup granulated sugar (50g)
- 1 Pinch salt
- 1 tsp vanilla extract
- 1 tsp Grand Marnier (optional)
For serving:
- 3 Tbsp granulated sugar
Instructions
- Preheat oven to 300°F (150°C) and position the rack in the center.
- Put four small (5oz.) ramekins in a baking dish that’s at least as deep as the ramekins.
- In a small saucepan over medium heat, bring the cream to a simmer then remove it from the heat, cover, and let cool for 10 minutes (the temperature should be no higher than 165°F or 73°C).
- In the meantime, combine egg yolks, 1/4 cup sugar, and a pinch of salt in a medium bowl. Whisk until combined.
- Then slowly add 1/2 cup of the warm cream to the sugar-egg-mixture while stirring constantly. Stir for 30 seconds with a whisk.
- Then slowly, with a light hand stir in the remaining cream. You don’t want the mixture to be frothy!
- Add the vanilla extract and orange liqueur (if using) to the bowl and stir lightly until combined.
- Pour the mixture through a fine sieve into a measuring cup with a spout then divide it evenly between the ramekins.
- In a large pot or teakettle bring water to a boil. Transfer the baking dish with the ramekins to the oven. Then slowly pour hot water into the baking pan until the water comes about 2/3 up the sides of the ramekins. Be careful not to get any water in the ramekins.
- Cover the baking pan loosely with aluminum foil.
- Bake the custards for about 50-55 minutes, until the edges are set and the center is slightly jiggly. If you have an instant thermometer stick it in the center of a ramekin, it should register between 150° to 155°F (65° to 70°C).
- Remove the baking pan from the oven and carefully take the ramekins out of the water bath. Let them cool at room temperature for 30 minutes then transfer them to the fridge (don’t cover them). Once they are refrigerator-cold wrap them with plastic wrap. Refrigerate for at least 4 hours or up to 3 days before proceeding.
- Prior to serving, sprinkle 1 tsp sugar over each custard, one at a time. Tilt and tap the ramekin to even out the layer of sugar.
- Hold a torch flame 2-3 inches from the top of the custard and slowly glide it back and forth over the surface until the sugar caramelizes and turns a deep golden brown.
- Allow the sugar to cool and harden for 30 to 60 seconds, and then serve immediately.
Nutrition
Calories: 296 kcal