
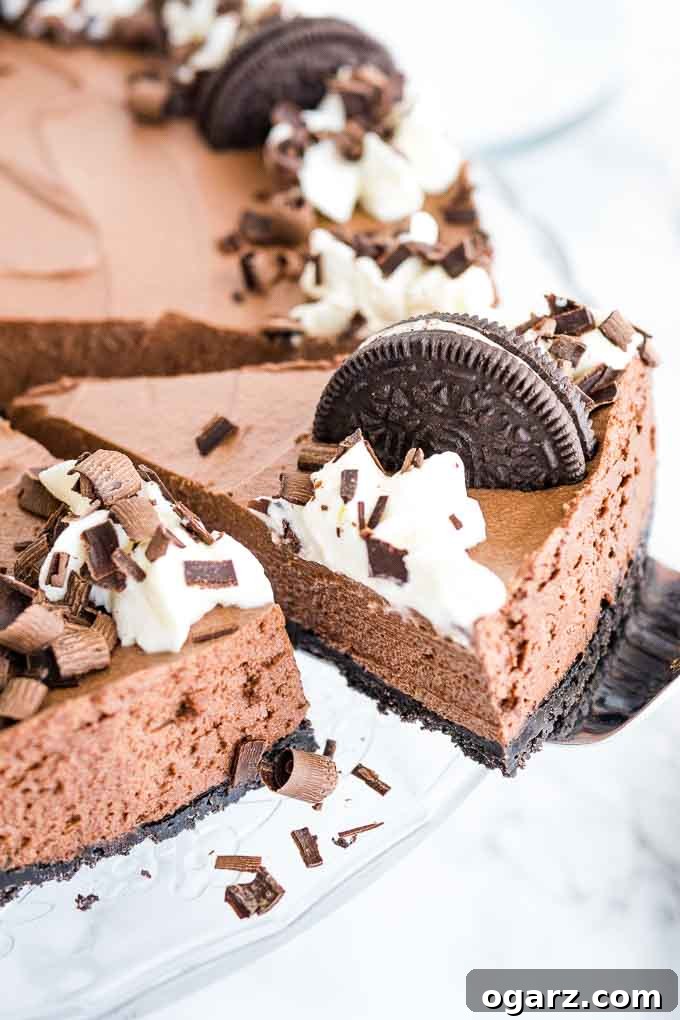
Indulge in the ultimate chocolate experience with our incredibly easy No-Bake Chocolate Mousse Cake. This dessert is a dream come true for any chocolate lover, combining rich flavors with a delightfully simple preparation. Perfect for impressing guests or treating yourself, this cake delivers pure decadence without ever needing to turn on your oven.
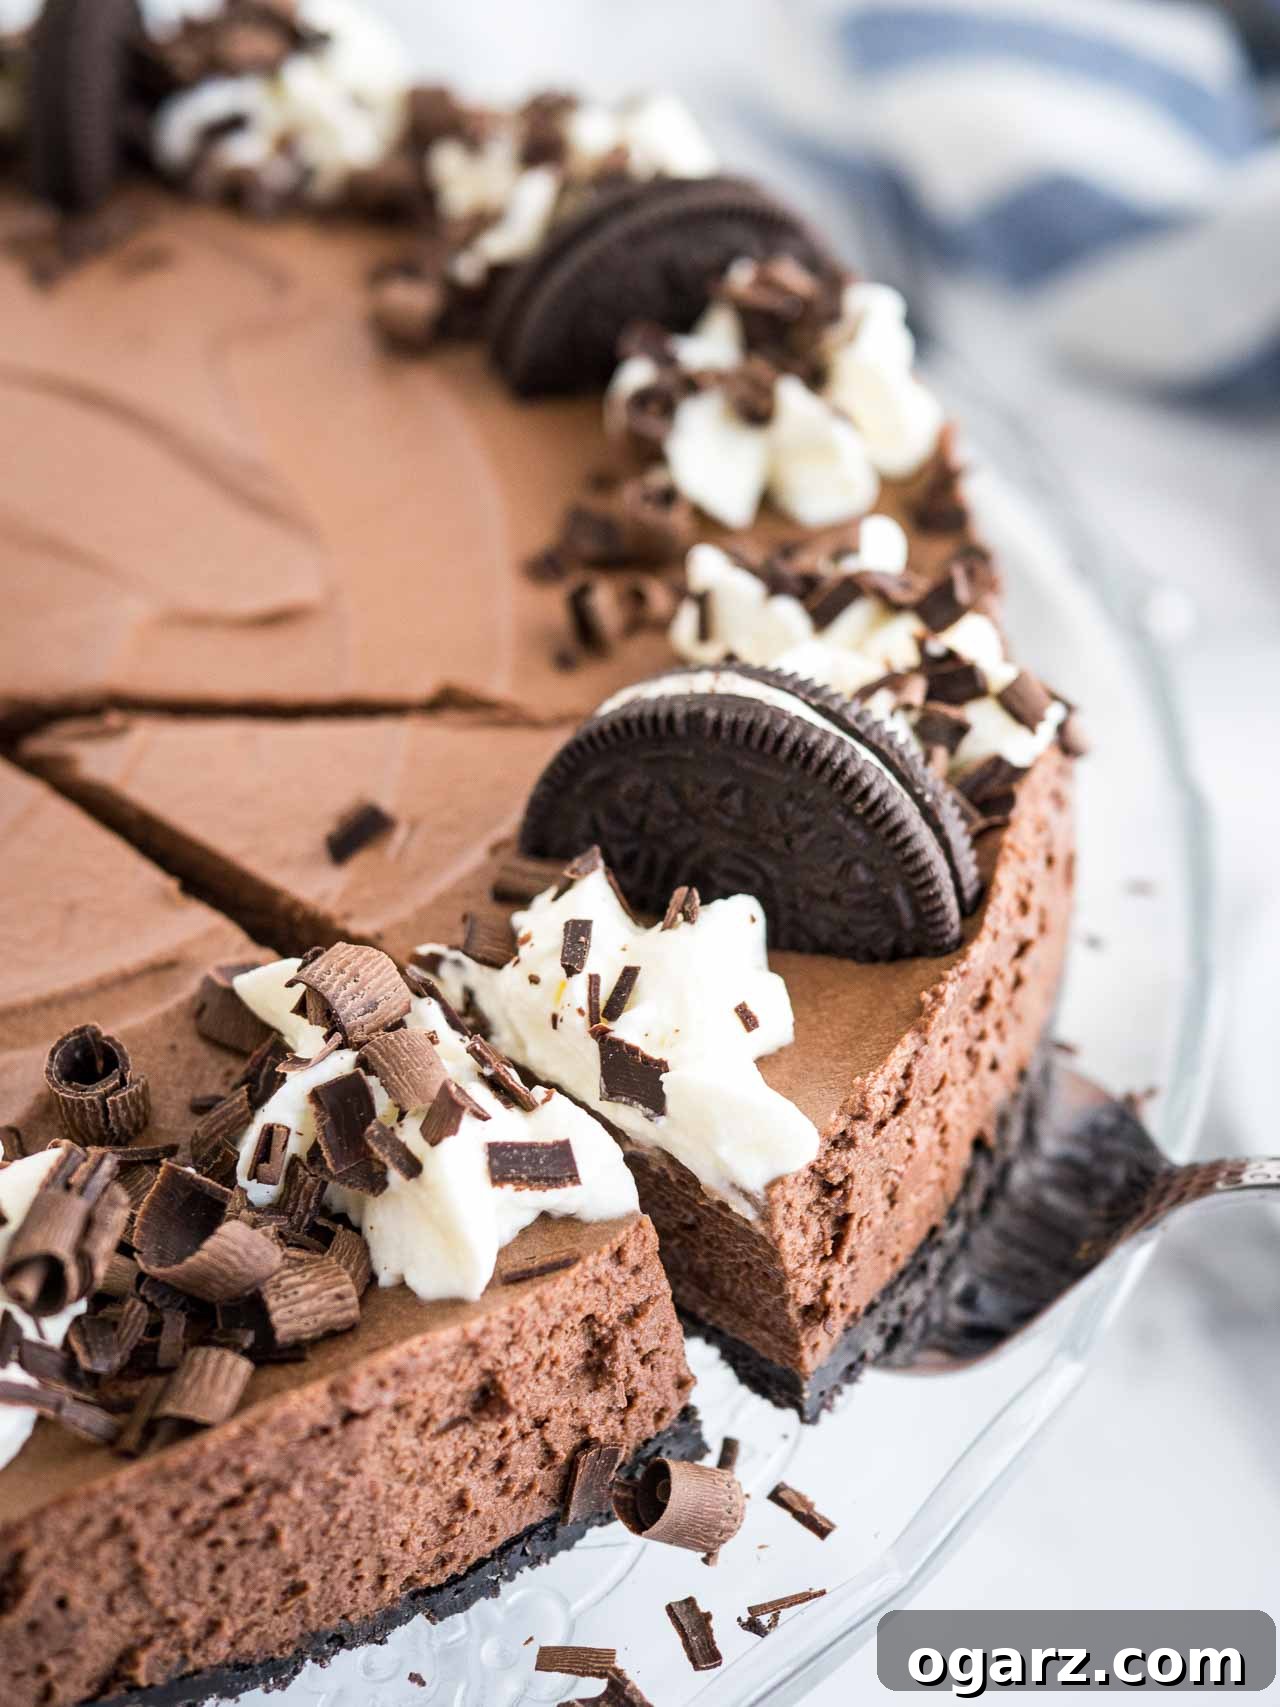
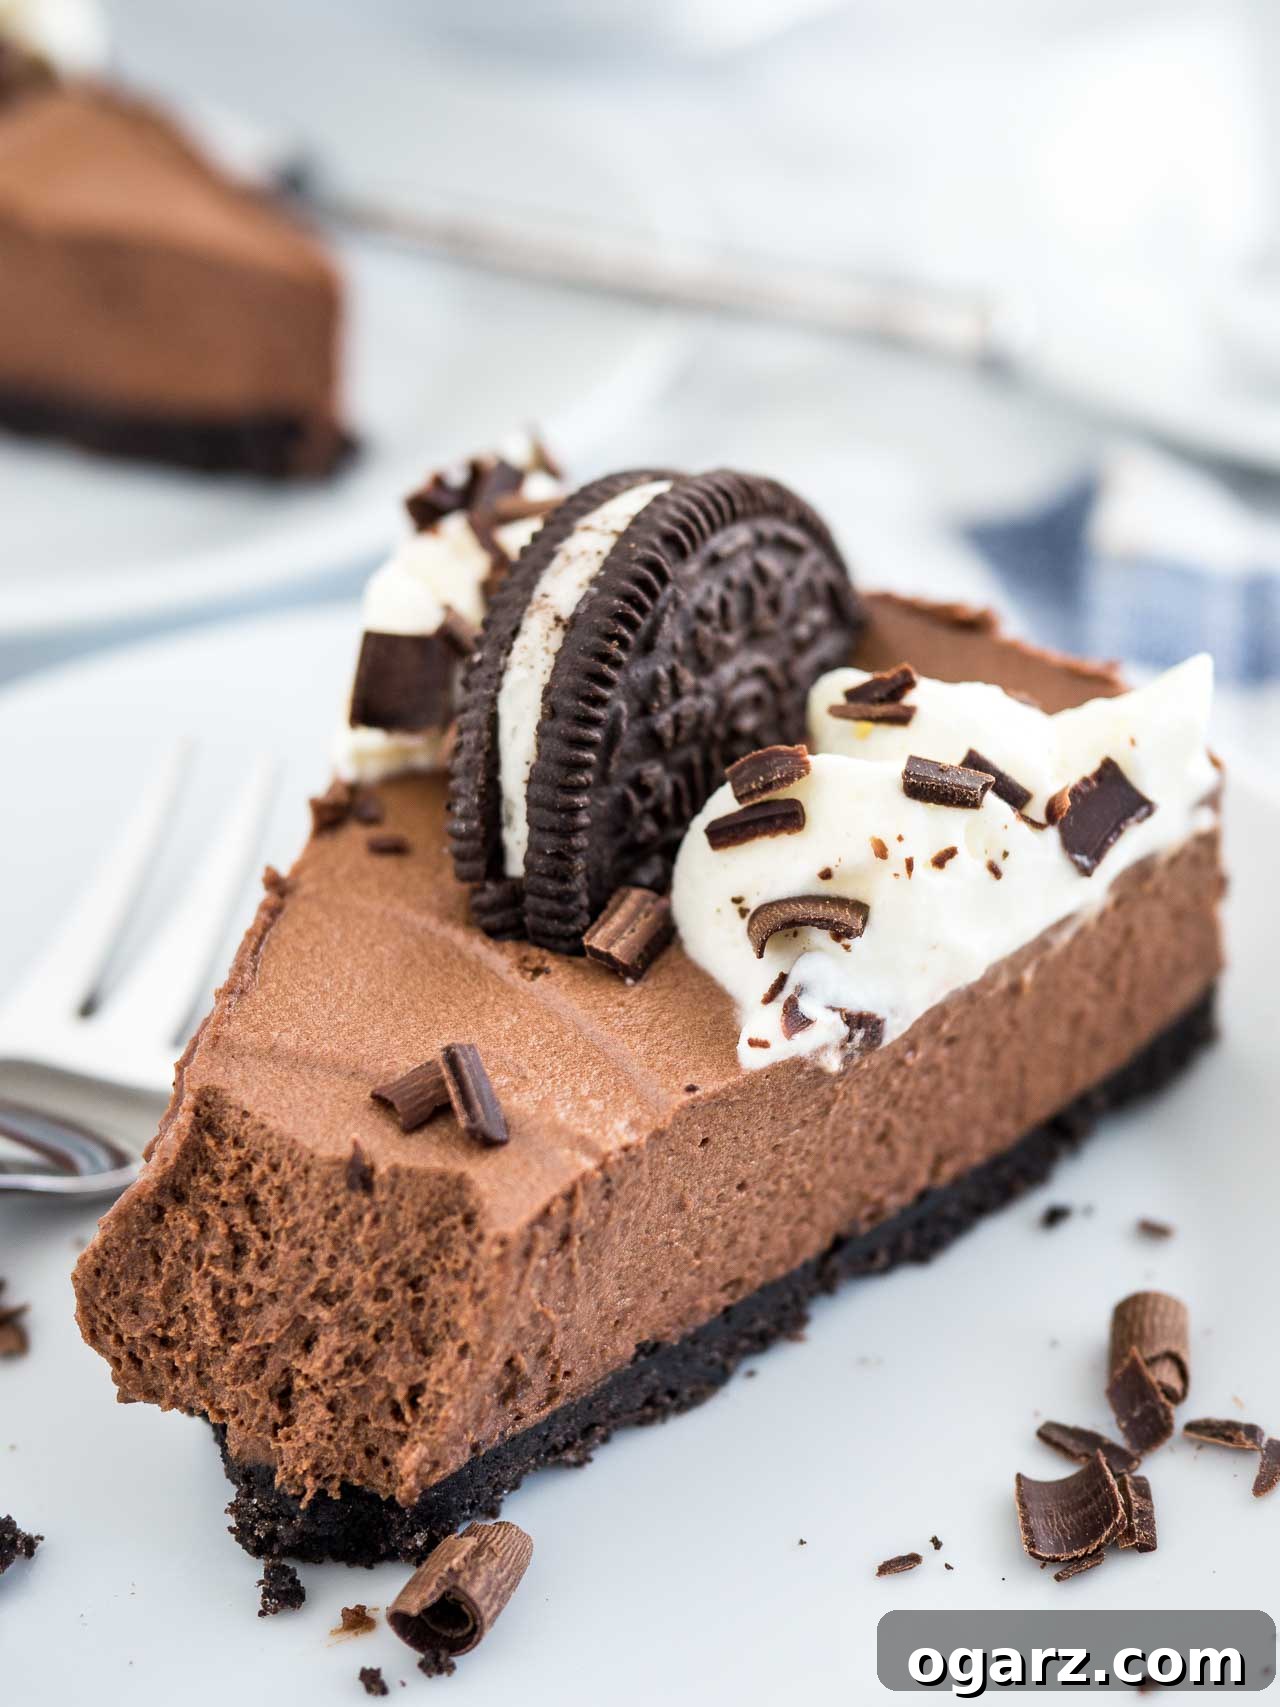
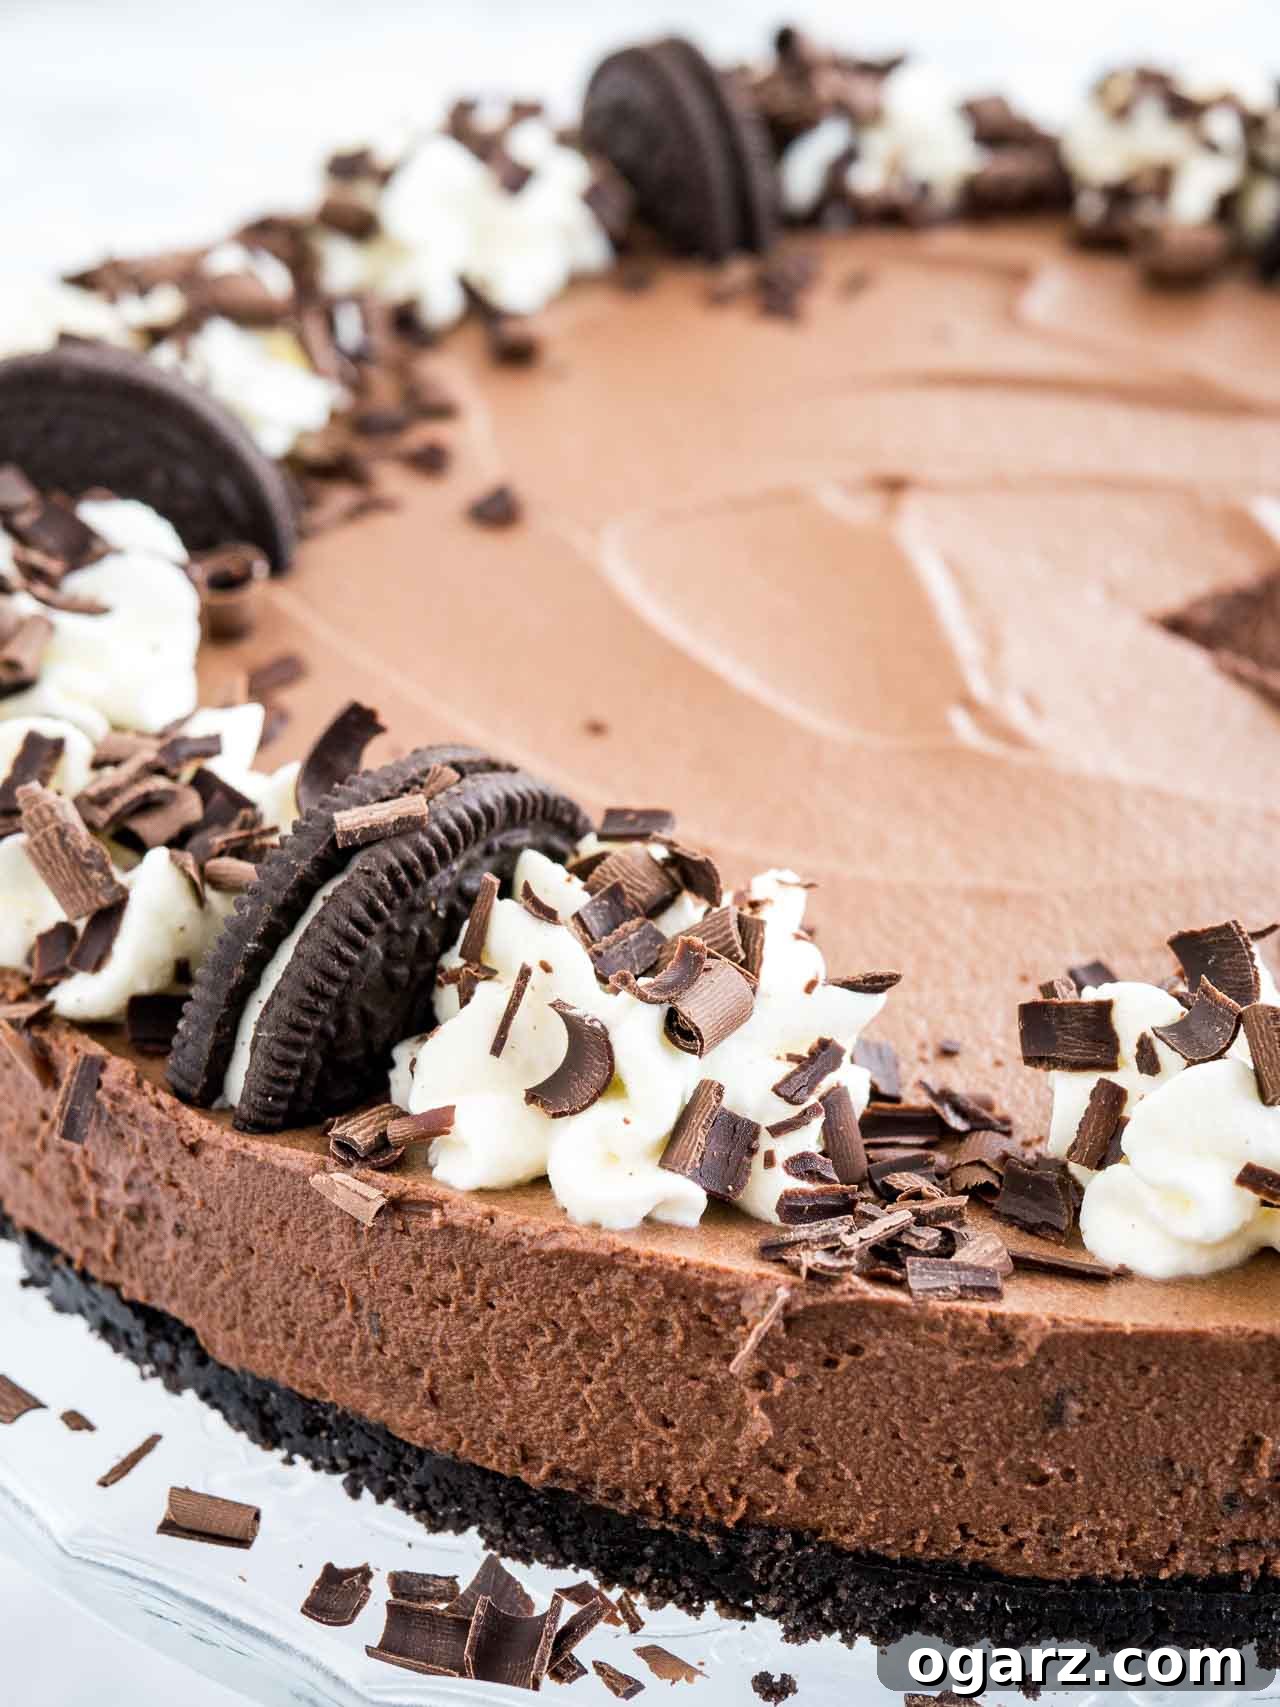
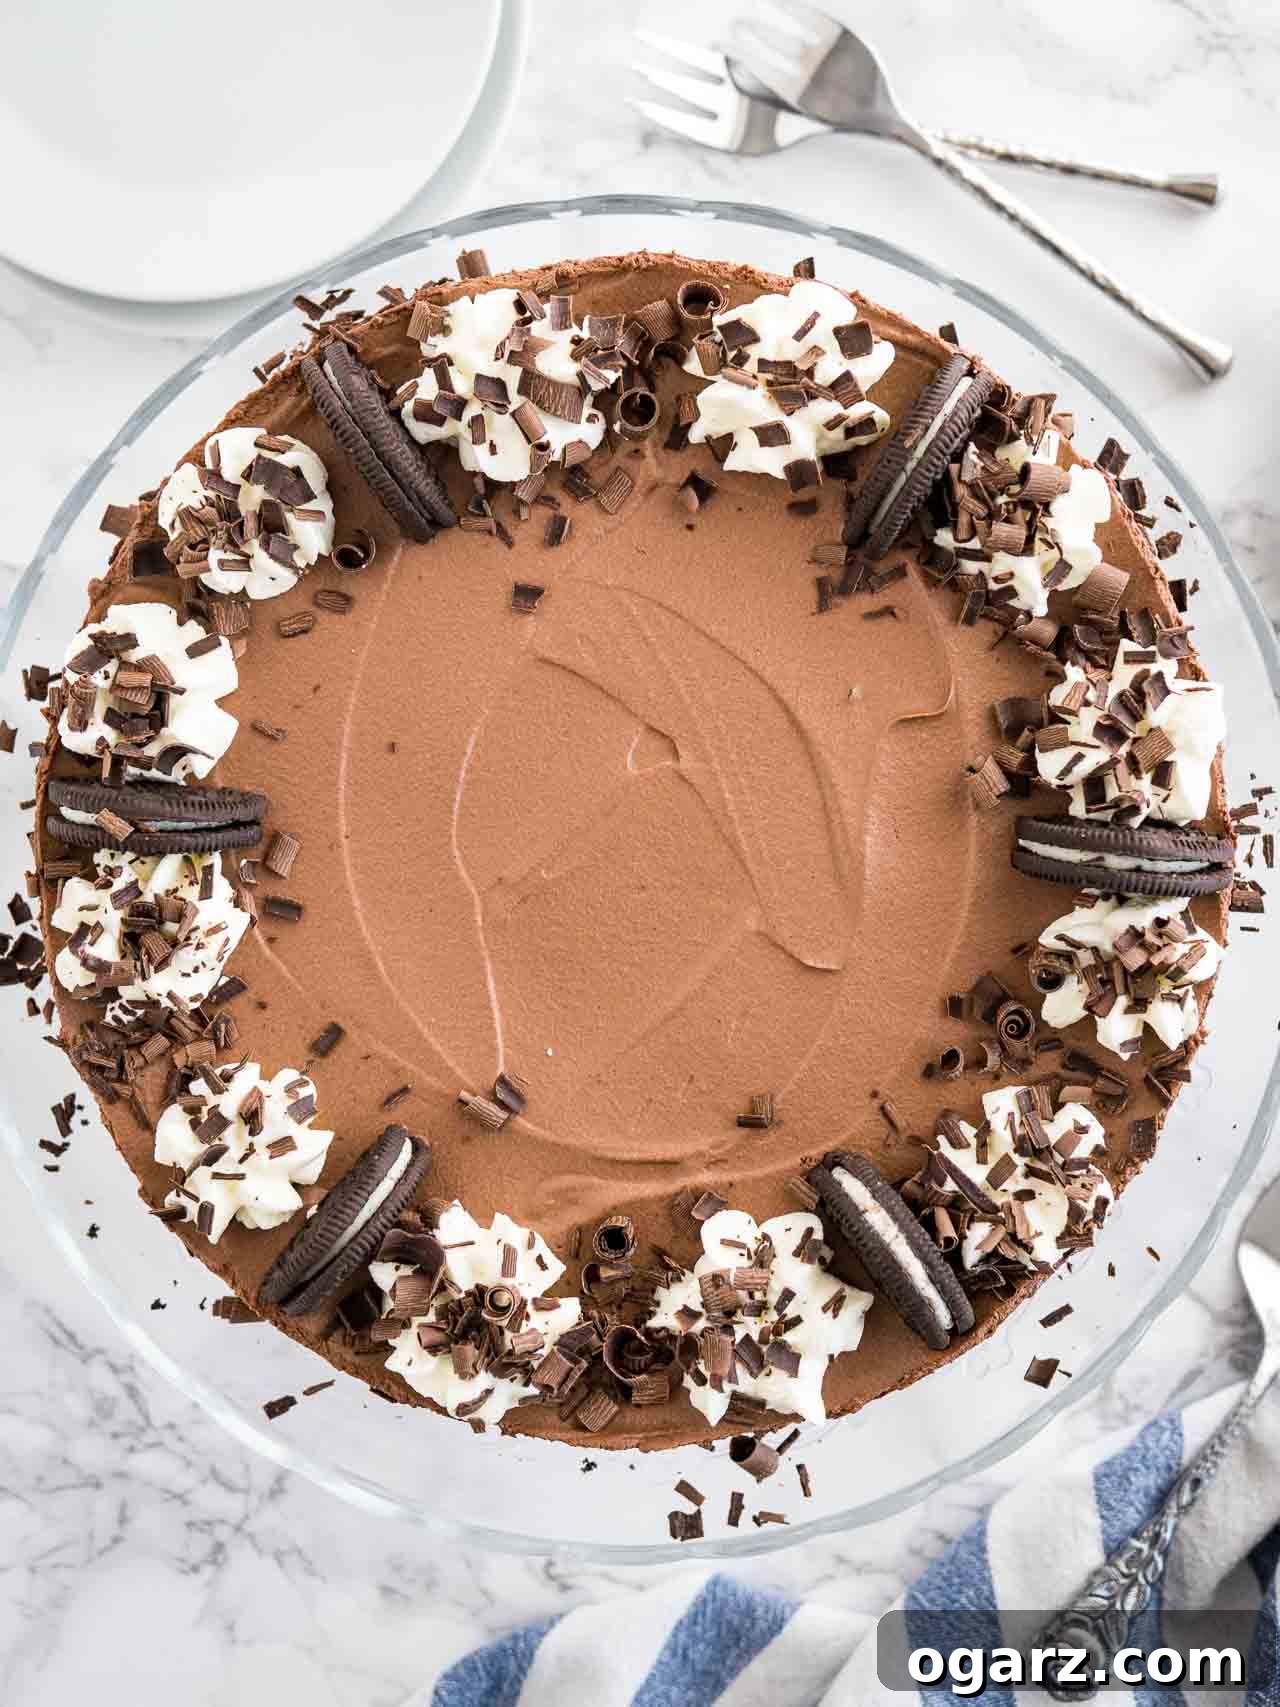
Our effortless Chocolate Mousse Cake recipe is crafted with just a handful of quality ingredients, yet it tastes like a dessert from a gourmet patisserie. It features a crunchy Oreo cookie crust, a luxuriously rich and airy chocolate mousse filling, all generously topped with more crushed Oreos, fluffy homemade whipped cream, and elegant chocolate shavings. Prepare for this easy mousse cake to become your absolute favorite chocolate indulgence!
The star of this dessert is undoubtedly the perfectly light and airy chocolate mousse. It’s absolutely divine – not overly sweet, but profoundly decadent, melting delicately in your mouth with every spoonful. This mousse offers a texture reminiscent of a French Silk pie but is notably lighter and, importantly, made without raw eggs. This makes it a safe and delightful treat for everyone to enjoy, much like our popular Eggless Chocolate Mousse and our refreshing Lemon Mousse recipes.
If you’re a fan of fuss-free desserts, be sure to explore our other fantastic no-bake creations, including our vibrant No-Bake Strawberry Cheesecake, tangy No-Bake Key Lime Pie, and the delightfully simple Easy Lemon Cream Pie Recipe. These recipes prove that you don’t need an oven to create truly spectacular treats.
Why This No-Bake Chocolate Mousse Cake is Your New Favorite
There are countless reasons to fall in love with this incredible chocolate mousse cake. It’s not just a dessert; it’s an experience that combines ease of preparation with breathtaking results. Here’s what makes our recipe truly stand out:
- Effortless Elegance: This no-bake cake requires minimal effort and simple ingredients (no gelatin, no egg whites needed!), yet it consistently looks incredibly impressive and tastes astonishingly delicious. It’s perfect for those moments when you want to dazzle without the stress.
- Safe for Everyone: Our mousse layer is crafted entirely without raw eggs, ensuring that everyone can safely enjoy a slice of this heavenly dessert, including children, pregnant women, and those with dietary concerns.
- Perfect for Planning Ahead: Most of this dessert can be prepared in advance, making it an ideal choice for busy hosts. Whether you’re planning a holiday dinner, a Mother’s Day brunch, or a Valentine’s Day celebration, you can assemble it a day or two before, freeing up your time for other preparations.
- Rich, Yet Light: Unlike some heavy chocolate desserts, our mousse is wonderfully airy and light, providing a satisfying chocolate fix without feeling overly rich. It strikes the perfect balance between indulgence and refreshment.
- Customizable Fun: Easily adapt this recipe to suit your taste. Add a hint of coffee for depth, a touch of mint for a refreshing twist, or experiment with different cookie crusts. The possibilities are endless!
Essential Ingredients for Your Decadent Chocolate Mousse Cake
Creating an exceptional chocolate mousse cake starts with selecting the right ingredients. Each component plays a vital role in achieving that perfect texture and unforgettable flavor. Here’s a closer look at what you’ll need and why quality matters:
- Oreo Cookies for the Crust: You’ll need one 14.3-ounce package of Oreo cookies. This amount typically leaves you with a few extra for snacking or additional decoration. The Oreos create a sturdy, chocolatey base that beautifully complements the creamy mousse. For an alternative flavor profile, feel free to experiment with coffee-flavored cookies or classic chocolate wafer cookies for the crust.
- Unsalted Butter: As with most baking (and no-bake) recipes, unsalted butter is my preference. It allows you to control the overall saltiness of the dessert, ensuring the chocolate flavors truly shine without interference. Melted butter helps bind the cookie crumbs into a firm, delicious crust.
- Quality Semi-Sweet Chocolate: This is arguably the most crucial ingredient for your mousse. I highly recommend using semi-sweet chocolate with a cacao percentage between 50% and 60%. This range strikes a beautiful balance between sweetness and deep chocolate flavor. Remember, the higher the cacao percentage, the less sweet the chocolate will be. My go-to brands for quality chocolate include Lindt, Moser-Roth (from Aldi), and Guittard. I advise against using milk chocolate, as it would make the cake overly sweet, or dark chocolate (above 70%), which might result in a bitter mousse. Using good quality chocolate chips (like these specified brands) can also make preparation easier, eliminating the need for chopping. You will need approximately 1 1/2 cups of standard-sized chocolate chips.
- Vanilla Extract: Vanilla is a flavor enhancer that brings out the best in chocolate. You can use either high-quality vanilla extract or, for an extra special touch, homemade vanilla sugar if you have it on hand.
- Heavy Cream (36% Fat or More): For the best results in whipping and achieving a stable mousse, use heavy cream with at least 36% fat. While whipping cream (around 30% fat) can work, heavy cream provides superior stability, which is essential for a firm, airy mousse that holds its shape. Avoid using half-and-half, as it lacks the necessary fat content to whip properly.
Expert Tips for a Flawless No-Bake Chocolate Mousse Cake
Achieving a perfectly set, airy, and utterly delicious chocolate mousse cake is simpler than you might think, especially with these insider tips and tricks:
- Choosing Your Chocolate Wisely: As mentioned, quality semi-sweet chocolate with approximately 50-60% cacao is your best friend here. It provides that ideal balance of sweetness and rich chocolate depth, creating a truly luxurious mousse that isn’t cloying.
- The Secret to Perfect Whipped Cream: To ensure your heavy cream whips up beautifully into stiff peaks, a little chill goes a long way. Before you begin, place your mixing bowl and whisk (or stand mixer attachment) in the refrigerator or freezer for 10-15 minutes. This simple step helps the cream emulsify faster and maintain its volume, especially beneficial on warmer days. Keep your heavy cream in the fridge until the very last minute before whipping. For more detailed guidance, check out my comprehensive homemade whipped cream recipe.
- Enhance Your Mousse with Flavorful Add-ins: While delicious on its own, you can elevate your chocolate mousse with subtle additions. For a deeper, more intense chocolate flavor, stir in 1 teaspoon of instant coffee (or espresso powder) into the warm chocolate ganache. The coffee won’t make your cake taste like coffee but will dramatically enhance the chocolate notes. Alternatively, for a delightful twist, add a 1/4 teaspoon of mint extract to create a refreshing chocolate mint mousse cake.
- Crucial Temperature Control for the Ganache: This is perhaps the most critical tip for a successful mousse. It is absolutely essential that your chocolate ganache has cooled down completely to room temperature (or slightly cooler, but still pourable) before you gently fold in the whipped cream. If the ganache is still warm, it will melt the delicate whipped cream, preventing the mousse from solidifying properly during chilling, and could result in a grainy texture. Conversely, avoid chilling the chocolate mixture in the fridge for longer than 20 minutes, as it can become too firm and difficult to incorporate smoothly with the whipped cream.
- Patience is Key for Chilling: For the mousse to set perfectly and achieve its ideal texture, this cake requires adequate chilling time. Aim for at least 6 hours in the refrigerator, but for the very best results, I highly recommend making it one day ahead and chilling it overnight. This allows the mousse to firm up completely and the flavors to meld beautifully.
- Choosing the Right Cake Pan: A springform pan is highly recommended for this recipe. Its removable sides make it incredibly easy to unmold and serve your beautiful cake without damaging its delicate structure. If you prefer, you can also transform this recipe into a chocolate mousse pie by using a pie dish. In this case, press the Oreo cookie mixture all the way up the sides of the pan to create a full crust, or opt for a premade Oreo crust to save time.
Frequently Asked Questions About Chocolate Mousse Cake
Here are answers to some common questions about making and enjoying this delightful no-bake chocolate mousse cake:
Can I make this cake in a 10-inch springform pan?
Yes, you absolutely can! If you wish to make this mousse pie in a larger 10-inch springform pan, I recommend increasing all ingredient quantities by 1.5 times. Due to the larger volume of ingredients, it’s even more crucial to allow sufficient chilling time. Therefore, I highly recommend chilling the cake overnight to ensure it sets perfectly.
How do I make elegant chocolate curls or shavings?
Creating your own chocolate curls or shavings at home is surprisingly simple and adds a professional touch to your desserts. I achieve this using a simple vegetable peeler. To make curls, hold a block or bar of chocolate firmly and scrape the blade lengthwise across the surface. This technique works wonderfully for decorating cakes (like our beautiful Black Forest Cake) or even for garnishing a cup of hot chocolate.
Why is my chocolate mousse not setting properly?
There are a few common culprits when chocolate mousse fails to set:
- Warm Chocolate Mixture: The most frequent reason is that the chocolate mixture (ganache) was still too warm when you folded it into the whipped cream. Whipped cream is delicate and will melt and lose its structure if exposed to too much heat. This prevents the mousse from solidifying and can also make the chocolate grainy. Ensure the chocolate ganache is completely cooled to room temperature before combining it with the cold whipped cream.
- Over-chilling the Ganache: While it needs to be cool, the chocolate mixture should not sit in the fridge for longer than 20 minutes or it might become too firm and difficult to incorporate smoothly with the whipped cream. It should be cooled but still soft enough to whisk to loosen before folding.
- Improper Folding Technique: It’s crucial to be gentle when combining the chocolate and whipped cream. Do not use a hand mixer or a whisk for this step, as it will deflate the air from the whipped cream. Instead, carefully fold them together using a silicone spatula, using a light, circular motion from the bottom up. Go slowly and stop as soon as no streaks of white cream remain, ensuring the mousse retains its airy texture.
Can I add different flavors to the mousse?
Absolutely! This recipe is a fantastic base for flavor experimentation. Consider adding a tablespoon of orange zest for a chocolate-orange mousse, a few drops of almond extract for a nutty depth, or a splash of your favorite liqueur like Grand Marnier or Kahlúa for an adult twist. Just be mindful of liquid quantities; a little goes a long way!
What if I don’t have Oreo cookies?
No problem! While Oreos provide a classic chocolatey crust, you can certainly substitute them. Chocolate graham crackers, digestive biscuits mixed with cocoa powder, or even other chocolate sandwich cookies would work wonderfully. Just ensure you have the correct weight of crushed cookies (about 1.5 cups) and adjust melted butter if needed for proper binding.
Serving and Storage Instructions for Your Chocolate Mousse Cake
To ensure your chocolate mousse cake remains a delightful experience from the first slice to the last, follow these serving and storage guidelines:
Serving Your Chilled Masterpiece
This cake is undeniably at its best when thoroughly chilled. The mousse achieves its optimal firm-yet-creamy texture when cold. Avoid letting it sit at room temperature for an extended period, as the delicate mousse will begin to soften and melt, altering its intended consistency and overall enjoyment. To effortlessly remove the springform ring, gently run a thin, sharp knife around the edges of the cake before carefully releasing the spring. This ensures a clean, beautiful presentation.
Proper Storage for Leftovers
Any leftover chocolate mousse cake will keep beautifully in the refrigerator for 2 to 3 days. To maintain its freshness and prevent it from absorbing refrigerator odors, make sure to cover it tightly with plastic wrap or store it in an airtight container. This will help preserve its delicious taste and texture.
Make-Ahead Convenience
One of the fantastic advantages of this no-bake recipe is its make-ahead potential! You can prepare the Oreo crust and fill it with the luscious chocolate mousse up to 2 days in advance. Simply refrigerate the cake, covered tightly. For the freshest appearance, it’s best to decorate the cake with whipped cream, Oreo halves, and chocolate shavings just before you plan to serve it.
Can You Freeze Chocolate Mousse Cake?
Yes, you can! This chocolate mousse cake freezes well. Wrap the entire cake (without decoration) tightly in several layers of plastic wrap, then an additional layer of aluminum foil. Freeze for up to 1 month. When ready to serve, thaw the cake in the refrigerator overnight. Decorate once thawed and serve chilled.
More Irresistible Chocolate Desserts to Explore
If you’ve enjoyed the rich flavors of this chocolate mousse cake, you’ll love these other fantastic chocolate-infused recipes:
Cookies, Brownies & Bars
Oreo Brownies
Bread & Muffins
Chocolate Zucchini Bread Recipe
Cookies, Brownies & Bars
Chocolate Sugar Cookies
Bread & Muffins
Banana Chocolate Chip Muffins
Average Rating: 4.91 from 32 votes
Chocolate Mousse Cake
By: Julia Foerster
Chocolate Mousse Cake is every chocolate lover’s dream! This decadent no-bake dessert is perfect for special occasions, but so easy to make from scratch. Read the tips above before making this recipe!
Prep Time: 30 minutes
Chill Time: 6 hours
Total Time: 30 minutes
Servings: 12
Ingredients
For the Oreo Crust
- 25 Oreo cookies, finely crushed (from one 14.3-ounce package)
- 5 tablespoons unsalted butter, melted
For the Chocolate Mousse Filling
- 8 ounces semisweet chocolate, chopped (about 1 ½ cups, 50-60% cacao)
- 1 teaspoon vanilla extract
- 1 pinch of salt
- 2 ¼ cups heavy cream, divided (36% fat or more)
For the Decoration
- ¾ cup heavy cream
- 2 tablespoons granulated sugar
- 3 Oreo cookies, cut in half
- ⅓ cup chocolate shavings
Instructions
-
Grease a 9-inch springform pan with butter.
-
Combine finely crushed Oreo cookies and melted butter. Press firmly into the bottom of the springform pan using a flat measuring cup or the back of a spoon to create a compact crust. Chill in the refrigerator for at least 30 minutes while you prepare the mousse.
-
Meanwhile, in a medium heatproof bowl, combine the chopped semisweet chocolate, vanilla extract, and the pinch of salt.
-
In a small saucepan, bring ¾ cup of the heavy cream to a bare simmer over medium heat (do not boil). Immediately pour the hot heavy cream over the chocolate mixture. Cover the bowl and let it sit undisturbed for 1 minute to allow the chocolate to melt. Then, whisk gently until the mixture is completely smooth and glossy. Cover and chill the chocolate ganache in the refrigerator for about 20 minutes, or until it has cooled to room temperature but is still fluid. It’s crucial not to let it get too firm.
-
In a separate large, chilled bowl, beat 1 ½ cups of heavy cream with a hand mixer or stand mixer on medium-high speed until soft peaks form, approximately 2 minutes. Whisk the cooled chocolate mixture briefly to loosen it if it has thickened slightly. Then, using a silicone spatula, gently fold the chocolate ganache into the whipped cream until no streaks of white cream remain and the mixture is uniformly combined. Be careful not to deflate the air from the whipped cream.
-
Pour the prepared chocolate mousse evenly over the chilled Oreo crust in the springform pan. Gently spread it to the edges, ensuring a smooth, level surface. Cover the pan tightly with plastic wrap and refrigerate for a minimum of 6 hours, or ideally, overnight, to allow the mousse to set completely.
-
Just before serving, prepare the topping. In a clean, chilled bowl, beat the remaining ¾ cup of heavy cream and 2 tablespoons of granulated sugar with a hand mixer or stand mixer until stiff peaks form. Pipe the whipped cream around the border of the cake using a large open star tip for an elegant finish, or simply spread it on top. Garnish with the halved Oreo cookies and chocolate shavings. This cake must be kept refrigerated until serving.
Nutrition
Calories: 530kcal | Carbohydrates: 37g | Protein: 5g | Fat: 41g | Saturated Fat: 24g | Polyunsaturated Fat: 2g | Monounsaturated Fat: 12g | Trans Fat: 0.2g | Cholesterol: 81mg | Sodium: 128mg | Potassium: 268mg | Fiber: 3g | Sugar: 25g | Vitamin A: 1034IU | Vitamin C: 0.4mg | Calcium: 62mg | Iron: 5mg