
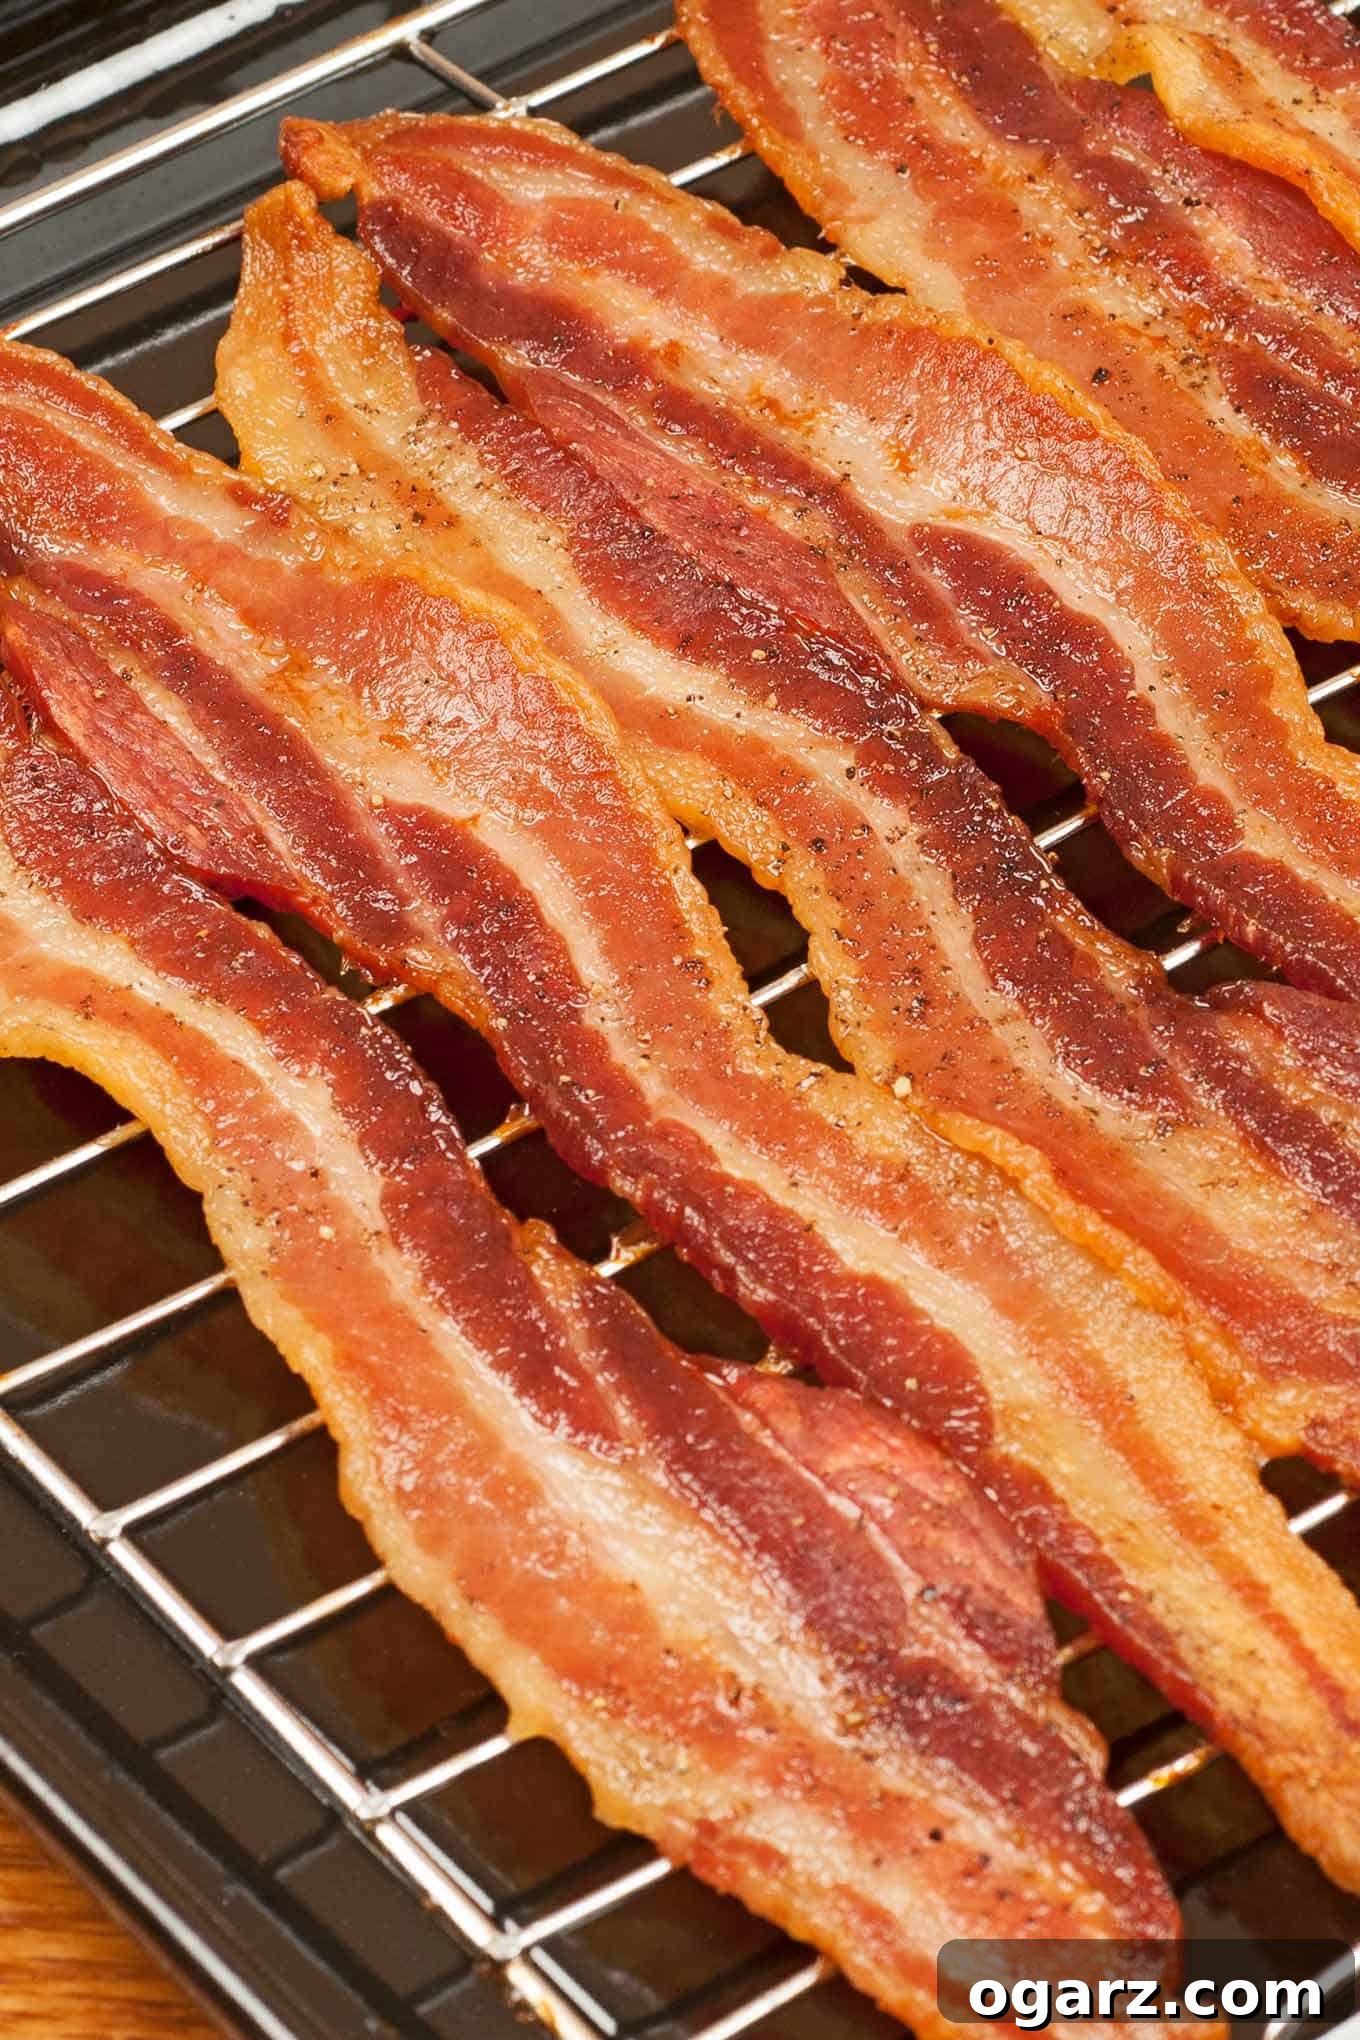

How to Make Perfect Oven-Baked Bacon: The Ultimate Guide to Crispy Perfection
Say goodbye to greasy splatters and unevenly cooked strips! Oven baking is by far the easiest and most foolproof method to achieve perfectly crisp, evenly browned bacon every single time. Whether you’re making a small batch for breakfast or a large quantity for meal prep, cooking bacon in the oven offers superior results with minimal effort and cleanup. This comprehensive guide will walk you through the simple steps, essential tips, and creative ways to use your delicious oven-baked bacon.
Cooked bacon is a culinary superpower, adding irresistible smoky, salty flavor and satisfying crunch to an incredible array of dishes. From breakfast classics to savory snacks and sophisticated main courses, having a stash of perfectly cooked bacon on hand is a game-changer for any home cook. Discover how to master this simple technique and elevate your everyday cooking.
Why Oven Baking is the Best Way to Cook Bacon
While pan-frying bacon is a traditional method, it often comes with a host of inconveniences: constant flipping, grease splatters, and inconsistent results. Oven baking eliminates these frustrations, providing a superior cooking experience and outcome. Here’s why you should make the switch:
- Less Mess, Virtually No Splatter: The enclosed environment of the oven means no more grease splatters all over your stovetop and kitchen surfaces. Cleanup becomes a breeze.
- Hands-Off Cooking: Once the bacon is in the oven, you’re free to prepare other components of your meal or simply relax. No more standing over a hot pan, constantly monitoring and flipping.
- Evenly Cooked and Crispy: The consistent heat distribution in the oven ensures that every strip of bacon cooks uniformly, leading to perfectly golden-brown and consistently crisp results from end to end.
- Ideal for Batches: Need to cook a pound or more of bacon? The oven allows you to cook large quantities simultaneously, making it perfect for family breakfasts, entertaining, or meal prepping for the week.
- Consistent Results: With a few simple steps, you can achieve the same delicious, perfectly cooked bacon every time, eliminating the guesswork often associated with stovetop methods.
Essential Equipment for Oven-Baked Bacon
You don’t need fancy gadgets to make great oven bacon. Just a few basic kitchen tools will set you up for success:
- Half Sheet Pan (approximately 13×18-inch): A sturdy, rimmed baking sheet is crucial to catch all the rendered fat and prevent spills. A standard half sheet pan is ideal for a pound of bacon.
- Wire Cooling Rack (approximately 12×17-inch): This is the secret weapon for ultimate crispness. Placing bacon on a wire rack allows air to circulate around each strip and lets the fat drain away, resulting in crispier bacon. Ensure the rack fits comfortably inside your sheet pan.
- Heavy-Duty Aluminum Foil or Parchment Paper: Lining your sheet pan is paramount for easy cleanup. Heavy-duty foil can withstand the heat and prevent tears, while parchment paper is an excellent non-stick option that makes discarding fat effortless.
- Nonstick Spray (optional): A light coating on your wire rack can further prevent sticking, especially with leaner bacon.
- Tongs: Essential for safely handling hot bacon and transferring it to drain.
- Paper Towels: For draining excess grease after cooking, which is key for maximum crispness.
Simple Ingredients for Crispy Oven Bacon
The beauty of this method lies in its simplicity. You only need one core ingredient:
- 1 lb Bacon: Choose your preferred thickness and cut. Thick-cut bacon will yield a chewier texture with crispy edges and require a slightly longer cooking time, while thin-cut bacon will cook faster and be uniformly crisp. High-quality bacon with a good fat-to-meat ratio will always produce the best results.
- Nonstick spray (optional): For coating the rack.
Step-by-Step Guide: How to Cook Bacon in the Oven
Follow these seven easy steps to achieve perfectly crispy, evenly cooked bacon with minimal fuss:
- Preheat the Oven to 375°F (190°C): Achieving the correct oven temperature before you put the bacon in is crucial for even cooking. A fully preheated oven ensures the bacon starts cooking immediately and consistently renders its fat.
- Prepare Your Sheet Pan: Line a large, rimmed baking sheet with heavy-duty aluminum foil or parchment paper. This step is a lifesaver for cleanup, as it catches all the rendered bacon fat, preventing it from baking onto your pan.
- Set Up the Rack (or Alternate Method): Position a wire cooling rack on top of your lined sheet pan. Lightly coat the rack thoroughly with nonstick cooking spray to prevent the bacon from sticking as it crisps. Note: If you don’t have a wire rack that fits your pan, you can still bake bacon directly on the parchment-lined sheet pan. Just be aware that you’ll need to drain accumulated fat during cooking.
- Arrange the Bacon Slices: Lay the bacon slices side-by-side on the prepared rack. It’s perfectly fine for the strips to be close together, but it is very important not to overlap them. Overlapping strips will fuse together during cooking, leading to uneven cooking and parts that remain chewy instead of crisp. Ensure each slice has enough space for air circulation.
- Initial Bake and Pan Rotation: Place the sheet pan in the preheated oven and bake for 10 minutes. After this initial period, carefully rotate the pan 180 degrees. This helps ensure even cooking, especially if your oven has hot spots. If you’re not using a rack, this is also a good time to carefully drain off some of the rendered fat from the pan so that the bacon strips aren’t submerged in it, which can prevent them from crisping properly.
- Continue Baking Until Crispy: Return the bacon to the oven and continue baking for an additional 10 to 15 minutes, or until the bacon reaches your desired level of crispness. The exact cooking time will vary depending on the thickness of your bacon slices and your oven’s calibration. Thicker cuts will take longer, while thinner cuts will cook more quickly. Keep a close eye on it during the last few minutes to prevent burning.
- Drain and Serve: Once the bacon is beautifully crisp and golden-brown, remove the sheet pan from the oven. Using tongs, carefully transfer the hot bacon strips to a plate lined with several thicknesses of paper towels. This allows any excess rendered fat to drain away, ensuring maximum crispness and a less greasy final product. Serve immediately, or allow to cool for later use.
Pro Tips for Achieving Flawless Crispy Bacon
While the basic steps are straightforward, a few expert tips can take your oven-baked bacon from good to absolutely glorious:
- Start with a Cold Oven (Optional Method): Some chefs swear by starting bacon in a cold oven. Place bacon on the rack in a cold oven, then preheat to 375°F (190°C). As the oven heats up, the bacon fat renders slowly and evenly, resulting in less shrinkage and exceptionally flat, crisp strips. This method typically adds about 5-10 minutes to the total cooking time.
- Adjust for Bacon Thickness: Thin-cut bacon will cook faster, often being ready in 15-20 minutes total. Thick-cut bacon, on the other hand, might need 25-30 minutes or even longer to reach optimal crispness. Always monitor closely and adjust as needed.
- Don’t Overcrowd the Pan: While you can place strips close together, avoid jamming too many pieces onto one sheet. Good air circulation is vital for crispness. If cooking a large amount, use two sheet pans and rotate them between racks halfway through.
- Don’t Forget the Fat: The rendered bacon fat is liquid gold! Once the fat has cooled slightly in the lined pan, carefully pour it into a heat-proof container (like a glass jar) and store it in the refrigerator. Use it to add incredible flavor to roasted vegetables, fried eggs, cornbread, or anything that could use a savory boost.
- Watch for Doneness: Bacon can go from perfectly crisp to burnt very quickly. Look for a deep golden-brown color and a firm texture. It will crisp up further as it cools on the paper towels.
Storing Your Delicious Cooked Bacon
Having pre-cooked bacon on hand is a fantastic time-saver for meal prep. Properly stored, it maintains its flavor and texture beautifully.
- Refrigeration: Once the bacon strips have completely cooled to room temperature, wrap them tightly in aluminum foil or place them in an airtight container. Store in the refrigerator for up to 7 days.
- Freezing: For longer storage, cooked bacon freezes exceptionally well. Arrange cooled strips in a single layer on a parchment-lined baking sheet and freeze for about 30 minutes until firm. Then, transfer the semi-frozen strips to a freezer-safe bag or airtight container, layering parchment paper between layers if stacking. This prevents them from sticking together. Frozen bacon retains its flavor for 4 to 6 weeks and can be defrosted in a matter of minutes.
Reheating Cooked Bacon
To enjoy your pre-cooked bacon, simply reheat it using one of these methods:
- Microwave: Place strips on a paper towel-lined plate and microwave in 15-30 second intervals until warm and crisp.
- Oven: For larger batches, spread bacon on a baking sheet and warm in a 350°F (175°C) oven for 5-10 minutes, or until heated through and re-crisped.
- Air Fryer: Arrange bacon in a single layer in the air fryer basket and cook at 350°F (175°C) for 3-5 minutes, shaking the basket halfway, until hot and crispy.
Creative Ways to Enjoy Your Oven-Baked Bacon
Beyond being a breakfast staple, perfectly cooked bacon adds a delectable dimension to countless dishes. Here are just a few ideas to inspire you:
- Classic Breakfast Plate: Serve alongside scrambled eggs, pancakes, waffles, or French toast for a hearty start to your day.
- BLT Sandwich: The quintessential combination of crispy bacon, fresh lettuce, and ripe tomatoes on toasted bread.
- Salad Topping: Crumble crispy bacon over green salads, Cobb salads, spinach salads, or even pasta salads for a burst of flavor and texture.
- Breakfast Burritos & Tacos: Add chopped bacon to your morning wraps with eggs, cheese, and vegetables.
- Potato Topping: Sprinkle over baked potatoes, potato skins, mashed potatoes, or twice-baked potatoes.
- Soup & Stew Garnish: A sprinkle of bacon bits elevates creamy soups (like potato or corn chowder) and hearty stews.
- Quiches & Frittatas: Incorporate diced bacon into savory egg tarts and open-faced omelets.
- Roasted Vegetables: Toss Brussels sprouts, green beans, or asparagus with bacon pieces before roasting for extra depth.
- Pasta Dishes: Use rendered bacon fat as a base for sauces, or toss crispy bacon bits into carbonara or mac and cheese.
- Burgers & Sandwiches: Layer bacon onto your favorite burgers, chicken sandwiches, or club sandwiches for an undeniable savory crunch.
- Chocolate Chip and Bacon Pancakes: An unexpected but delightful sweet and savory combination.
- Scrambled Eggs in Potato Nests: A perfect accompaniment to these creative egg dishes.
- Roasted Okra with Bacon and Tomatoes: A delicious side dish highlighting seasonal produce.
Troubleshooting Common Oven Bacon Issues
Even with the best intentions, sometimes things don’t go exactly as planned. Here are solutions to common problems:
- Bacon Isn’t Crispy Enough:
- Oven Temperature Too Low: Ensure your oven is fully preheated and accurate. A lower temperature might render fat but won’t crisp the meat.
- Pan Too Crowded: Overlapping or too many strips prevent even airflow. Use two pans if necessary.
- Not Using a Rack (or Fat Not Drained): If bacon sits in its own rendered fat, it will essentially fry rather than crisp uniformly. A rack solves this; if no rack, drain fat midway.
- Cooked for Too Short a Time: Thicker bacon needs more time. Continue baking until it reaches your desired crispness.
- Bacon is Too Greasy:
- Not Drained Properly: Always transfer cooked bacon to paper towels to absorb excess fat after removing it from the oven.
- No Rack: As mentioned, a wire rack allows fat to drip away, leading to a less greasy result.
- Bacon is Burnt:
- Oven Temperature Too High: While you want crisp, very high temperatures can burn the lean parts before the fat renders fully. Stick to 375-400°F (190-200°C).
- Cooked for Too Long: Bacon can go from perfect to burnt very quickly, especially thinner cuts. Watch it closely in the last few minutes.
- Uneven Oven Heat: Rotating the pan halfway through helps mitigate this.
Frequently Asked Questions About Oven Bacon
Got more questions about perfecting your oven-baked bacon? We’ve got answers:
- What is the best temperature for baking bacon?
- A temperature of 375°F (190°C) is generally considered ideal. It’s hot enough to render the fat and crisp the bacon efficiently without burning it too quickly. Some prefer 400°F (200°C) for slightly faster cooking, but careful monitoring is key at higher temperatures.
- Can I use parchment paper instead of foil?
- Yes, absolutely! Parchment paper is an excellent alternative to aluminum foil. It provides a non-stick surface and makes cleanup incredibly easy. Some even prefer it as it’s less prone to tearing than foil when removing hot fat.
- How long does it take to cook bacon in the oven?
- Typically, bacon cooked at 375°F (190°C) will take between 15-25 minutes. Thin-cut bacon might be done in 15-20 minutes, while thick-cut bacon can take 20-25 minutes or even longer. Always cook to your desired level of crispness, visually checking towards the end of the cooking time.
- Do I need to flip bacon when baking it in the oven?
- No, one of the main advantages of oven baking is that you don’t need to flip the bacon. The circulating heat cooks both sides evenly. However, rotating the pan halfway through the cooking process is recommended to ensure uniform browning, especially if your oven has hot spots.
- Is oven-baked bacon healthier than pan-fried bacon?
- While bacon is inherently a fatty food, oven baking on a rack can result in slightly less fat absorption compared to pan-frying, as the fat drips away during cooking. When drained properly on paper towels, both methods can yield similar nutritional profiles, but oven baking tends to feel less greasy.
- Can I cook frozen bacon in the oven?
- Yes, you can! Lay frozen bacon strips on your prepared rack and increase the cooking time by about 5-10 minutes. The bacon may release a bit more water initially, but it will still crisp up beautifully.
Conclusion: Master the Art of Oven-Baked Bacon
Mastering the art of oven-baked bacon is a culinary skill that will save you time, reduce mess, and consistently deliver delicious results. With this comprehensive guide, you now have all the knowledge and tips needed to produce perfectly crispy, evenly cooked bacon for any occasion. From quick breakfasts to elaborate meal prep, embracing the oven method will transform your bacon-cooking experience. So go ahead, preheat that oven, and get ready to enjoy the best bacon you’ve ever made!
Nutrition Information (Approximate)
Serving: 2 strips, Calories: 92, Total Fat: 9g, Cholesterol: 15mg, Sodium: 146mg, Carbohydrates: 1g, Protein: 3g
Nutrition information is automatically calculated and should only be used as an approximation.
Enjoyed this recipe? Share your thoughts below!