

Candied orange peel is a delightful treat, perfect on its own or dipped in rich chocolate. More than just a sweet snack, it serves as a foundational ingredient in many traditional German Christmas recipes, lending its distinctive aroma and flavor to festive bakes.
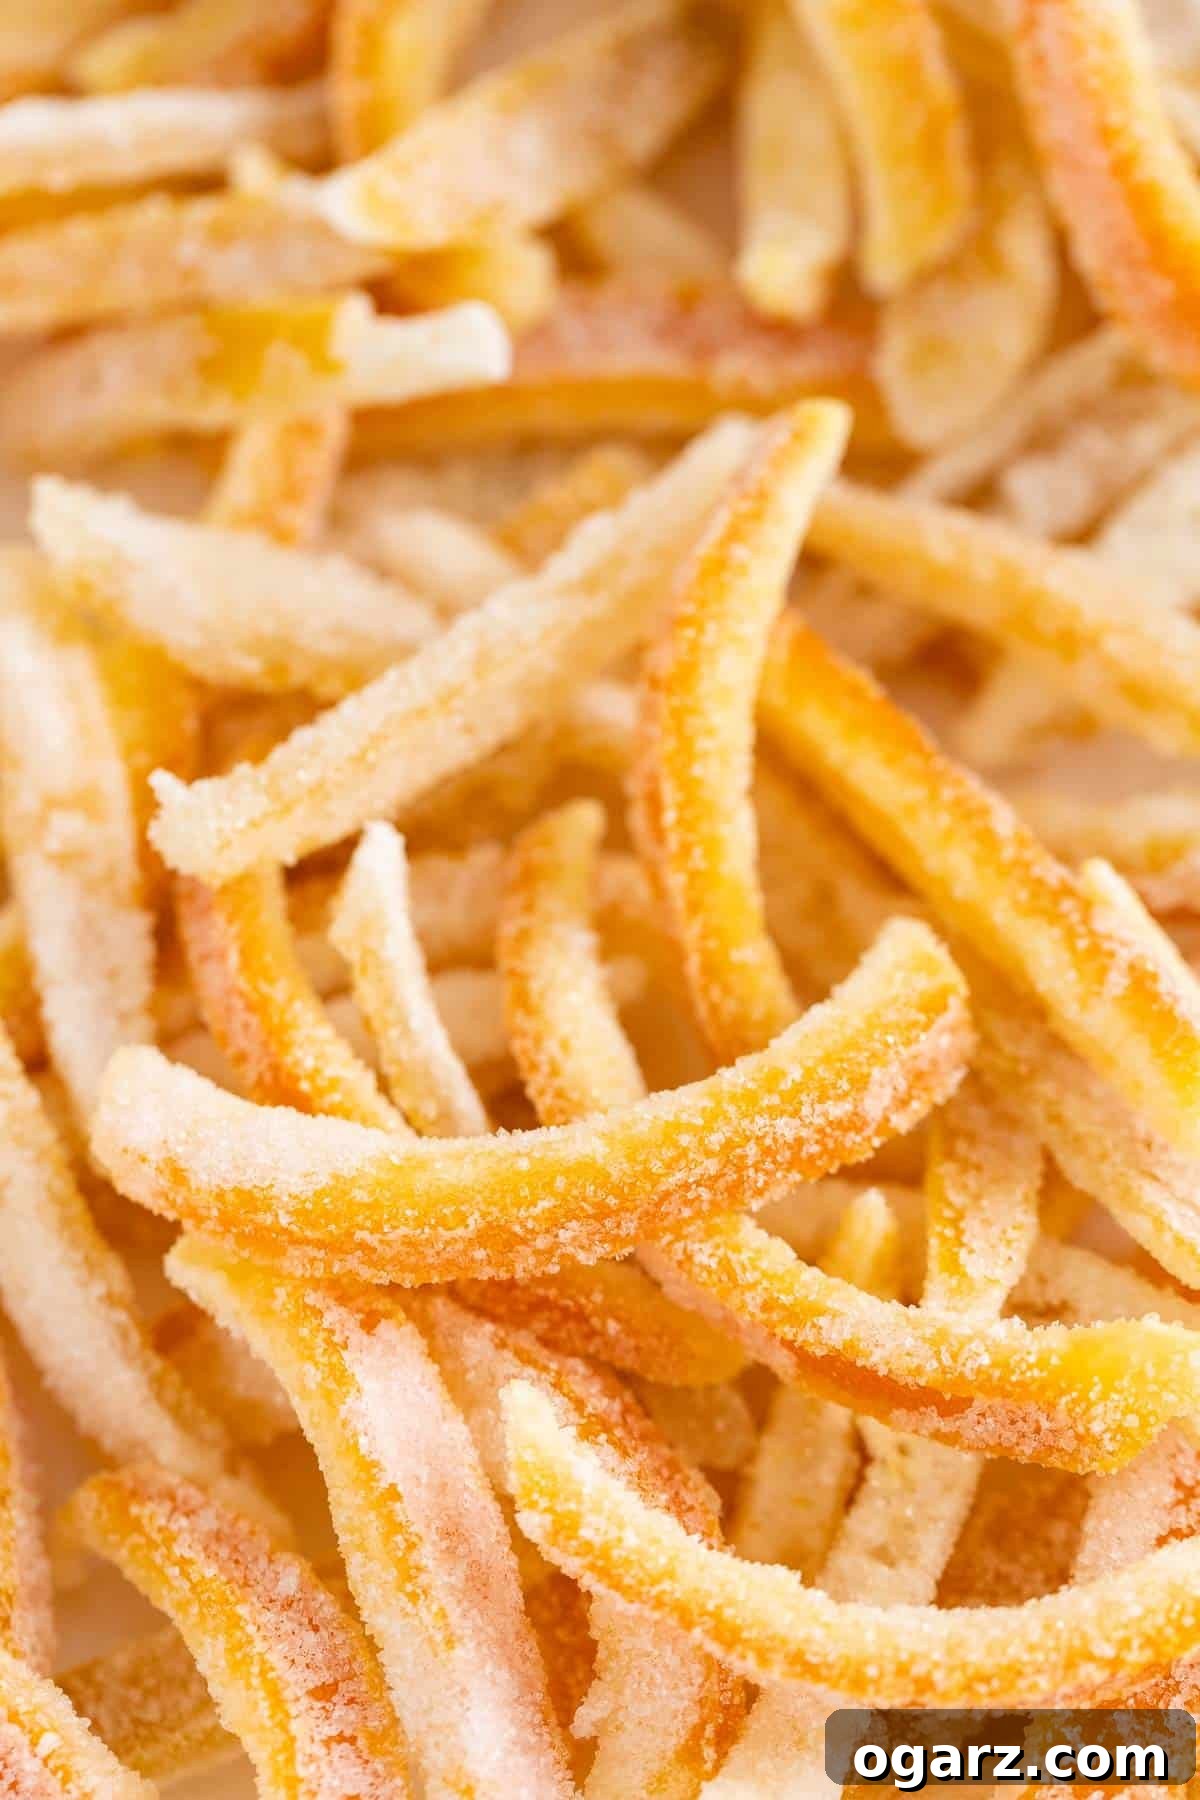
Crafting homemade candied peel might seem like a gourmet endeavor, but it is surprisingly straightforward and incredibly rewarding. While it requires a bit of patience due to simmering and drying times, the process itself is simple, relying on just a few basic ingredients. The superior taste and vibrant orange flavor of homemade candied peel far surpass anything you can find in stores, making the effort truly worthwhile. These tender, sweet strips, coated in a delicate layer of sugar, deliver an intense citrus burst that is indispensable for baking and a joy to savor.
Known as Orangeat in German, candied orange peel, along with candied lemon peel (Zitronat), plays a crucial role in the rich tapestry of German Christmas baking. You’ll find it spotlighted in beloved classics such as our Lebkuchen (German Gingerbread) and German Stollen. Beyond these traditional holiday treats, its versatility shines in various other culinary creations. Imagine its zesty sweetness in freshly baked scones, elegant cakes, or hearty fruitcakes. For a truly special homemade gift, simply dip the candied strips into melted dark or milk chocolate – a delightful indulgence that’s sure to impress.
Why You’ll Adore This Candied Orange Peel Recipe
Embarking on the journey to make your own candied orange peel is a decision you won’t regret. Here’s why this recipe will become a cherished staple in your kitchen:
- Unmatched Quality & Accessibility: High-quality candied citrus peel can be notoriously difficult to source. Often, you’re limited to specialty stores or online retailers, where prices can be steep and freshness is questionable. Making it at home ensures you always have a fresh supply, exactly when you need it, and often at a fraction of the cost.
- Superior Flavor & Purity: Store-bought versions often contain artificial flavors, preservatives, and excessive dyes that detract from the natural essence of the fruit. This homemade recipe guarantees a cleaner, brighter, and more authentic orange flavor. You control every ingredient, ensuring a pure, vibrant taste and a delightfully soft, chewy texture that commercial products rarely achieve. The aroma alone is reason enough to make it from scratch!
- Incredibly Versatile: From enhancing the festive notes of your holiday baking to becoming a standalone gourmet treat, homemade candied orange peel offers endless possibilities. Use it to elevate pastries, add a zing to desserts, or simply enjoy it as a sweet, citrusy snack. It’s also an elegant component for homemade gifts, especially when enrobed in chocolate.
- Simple Process, Impressive Results: Despite its sophisticated appearance, candying orange peel is a surprisingly easy process that requires minimal hands-on time. It’s an excellent project for beginner cooks and seasoned bakers alike, yielding impressive results that taste and look professional.
Essential Ingredients for Perfect Candied Peel
Creating exquisite candied orange peel begins with selecting the right ingredients. Here’s a closer look at what you’ll need and some tips for choosing the best quality. Detailed quantities are provided in the recipe card below.
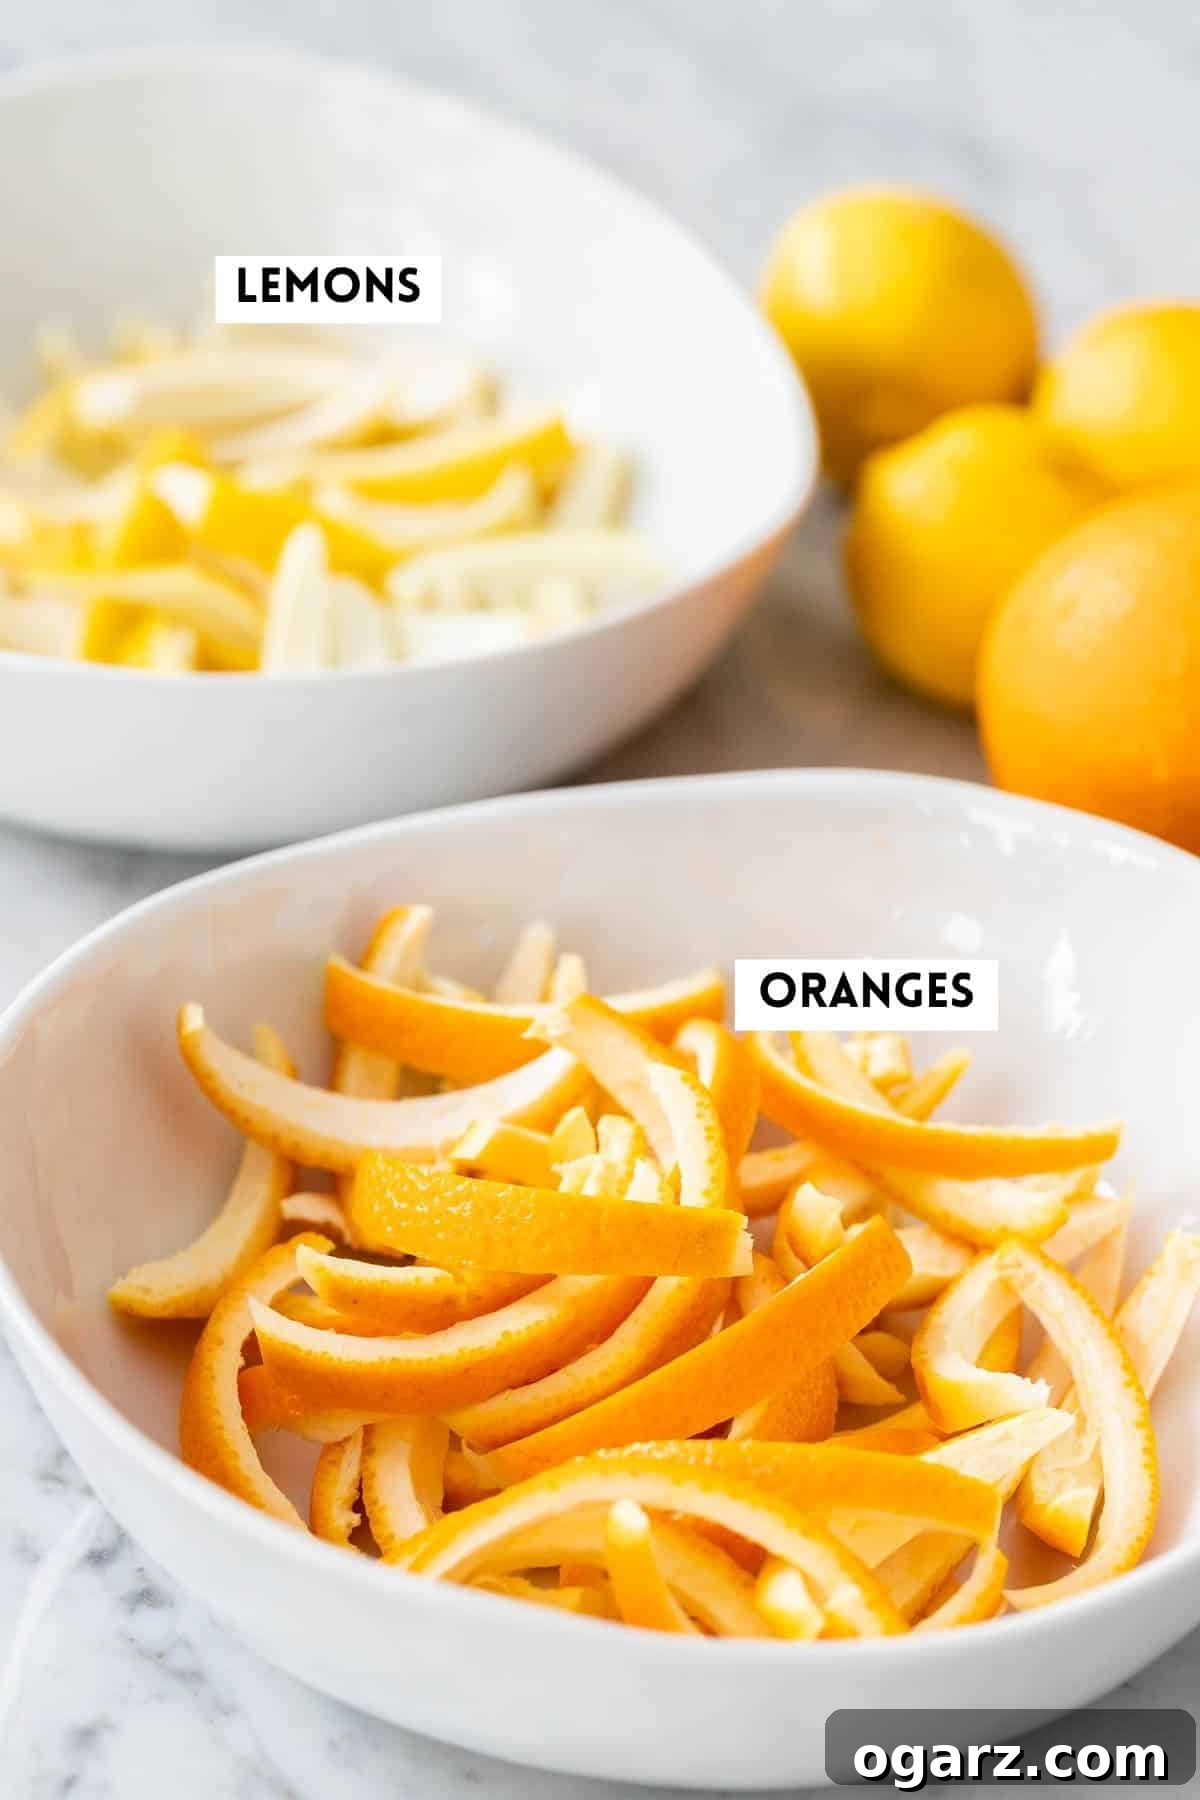
- Oranges: The star of our recipe! For the best flavor and to ensure you’re not ingesting unwanted chemicals, always opt for organic oranges. The peel is where all the action happens, and non-organic varieties are often treated with pesticides and waxes. Navel and Valencia oranges are excellent choices due to their thick peels, which hold up well during the candying process and provide a good amount of flavorful pith. Other varieties like Seville oranges, while more bitter, offer a wonderfully complex flavor profile ideal for traditional European baking.
- Lemons (Optional, but recommended): While the recipe focuses on oranges, you can easily incorporate lemons or even make a batch of pure candied lemon peel (Zitronat). Like oranges, organic lemons are highly recommended. Limes and grapefruits can also be candied using the same method, offering a broader spectrum of citrus flavors. The choice of citrus allows for customization, letting you tailor the candied peel to your specific culinary needs.
- Granulated White Sugar: This is the primary component for the syrup and the optional final coating. White sugar creates a clear syrup, allowing the vibrant color of the citrus peel to shine through. While other sugars can be used, they might impart a different flavor or color to the final product.
- Water: Simple tap water is all you need to create the sugar syrup. Its purpose is to dissolve the sugar and provide the medium for cooking the peels.
- Additional Sugar for Coating (Optional): A small amount of extra granulated sugar is used to coat the dried peels. This step is optional but highly recommended for candied peels intended for snacking or gifting, as it prevents sticking and adds an extra layer of sweetness and sparkle. If using the peels solely for baking, you might choose to skip this step.
Step-by-Step Guide to Crafting Candied Orange Peel
Making candied orange peel at home is a methodical process that yields incredibly delicious results. Follow these detailed instructions to create your own batch of this versatile citrus treat. You’ll find precise measurements and a printable recipe card at the bottom of the page.
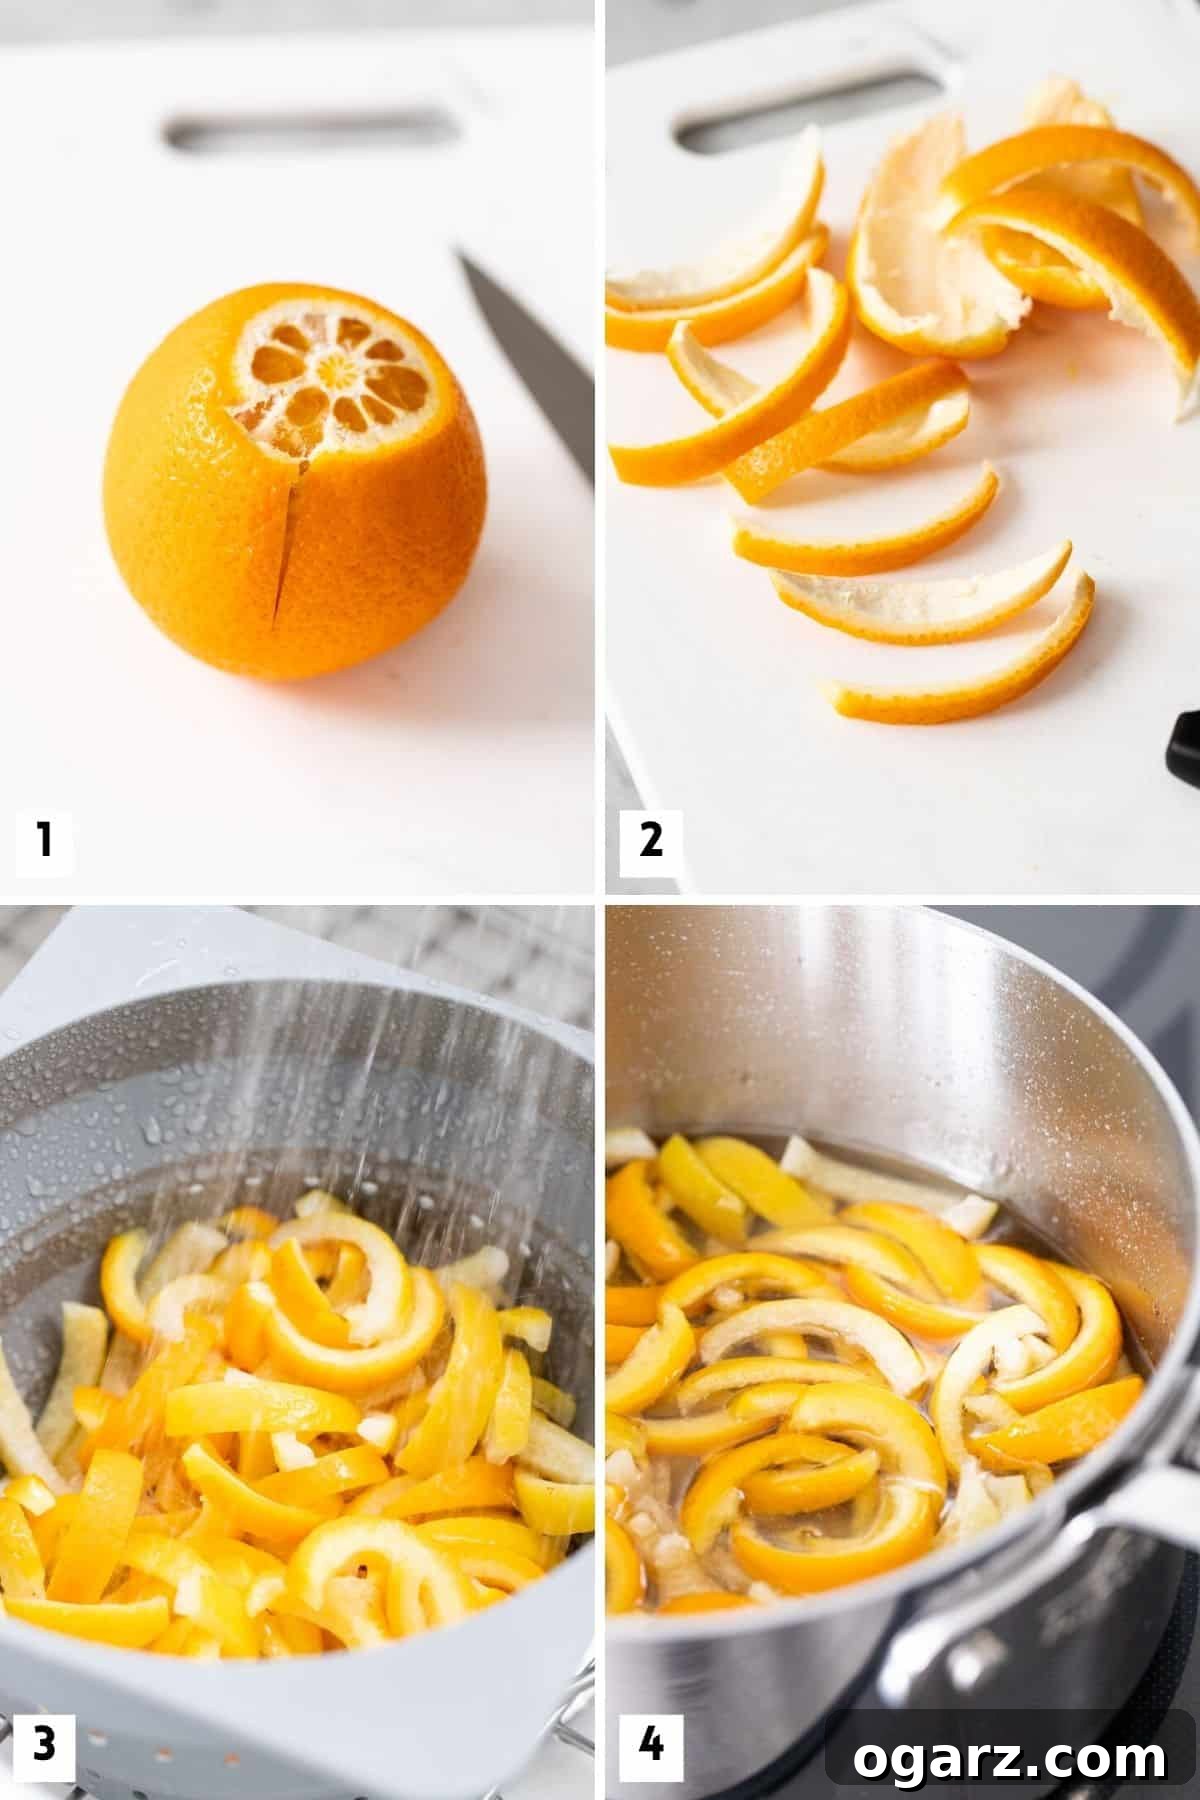
- Prepare the Oranges: Begin by thoroughly washing your organic oranges under hot water to remove any surface impurities or wax. Using a sharp knife, carefully slice off the top and bottom ends of each orange. Then, score the peel into four equal quarters from top to bottom, being careful not to cut too deeply into the fruit itself (Image 1).
- Peel and Slice: Gently separate the scored peel from the orange flesh. You can use your fingers or a small spoon for assistance. Once peeled, lay the orange peel flat on a cutting board and carefully slice it into uniform strips, approximately 1/4-inch (0.6 cm) wide (Image 2). Consistency in thickness is key for even candying.
- First Blanching Cycle: Place the orange peel strips into a medium-sized saucepan. Cover them generously with cold water, ensuring all strips are submerged. Bring the water to a rolling boil over medium-high heat. Once boiling, allow the peels to cook for 5 minutes. This initial blanching helps to soften the peel and begin the process of reducing bitterness.
- Drain and Rinse (Repeat for Bitterness Reduction): Carefully drain the boiled peels in a colander and rinse them thoroughly under cold running water. This cools them down and washes away some of the bitter compounds. Return the rinsed peels to the saucepan, cover with fresh cold water, and repeat the boiling and rinsing process at least once more, or even twice, for a total of two or three blanching cycles. This repeated blanching is crucial for removing excess bitterness from the pith (the white part of the peel) and achieving a tender texture (Images 3 and 4).
- Prepare the Sugar Syrup: In the *same cleaned saucepan*, combine the measured granulated sugar and water. Place the saucepan over medium heat and stir constantly until the sugar completely dissolves. Bring the mixture to a gentle boil, ensuring all sugar crystals have disappeared.
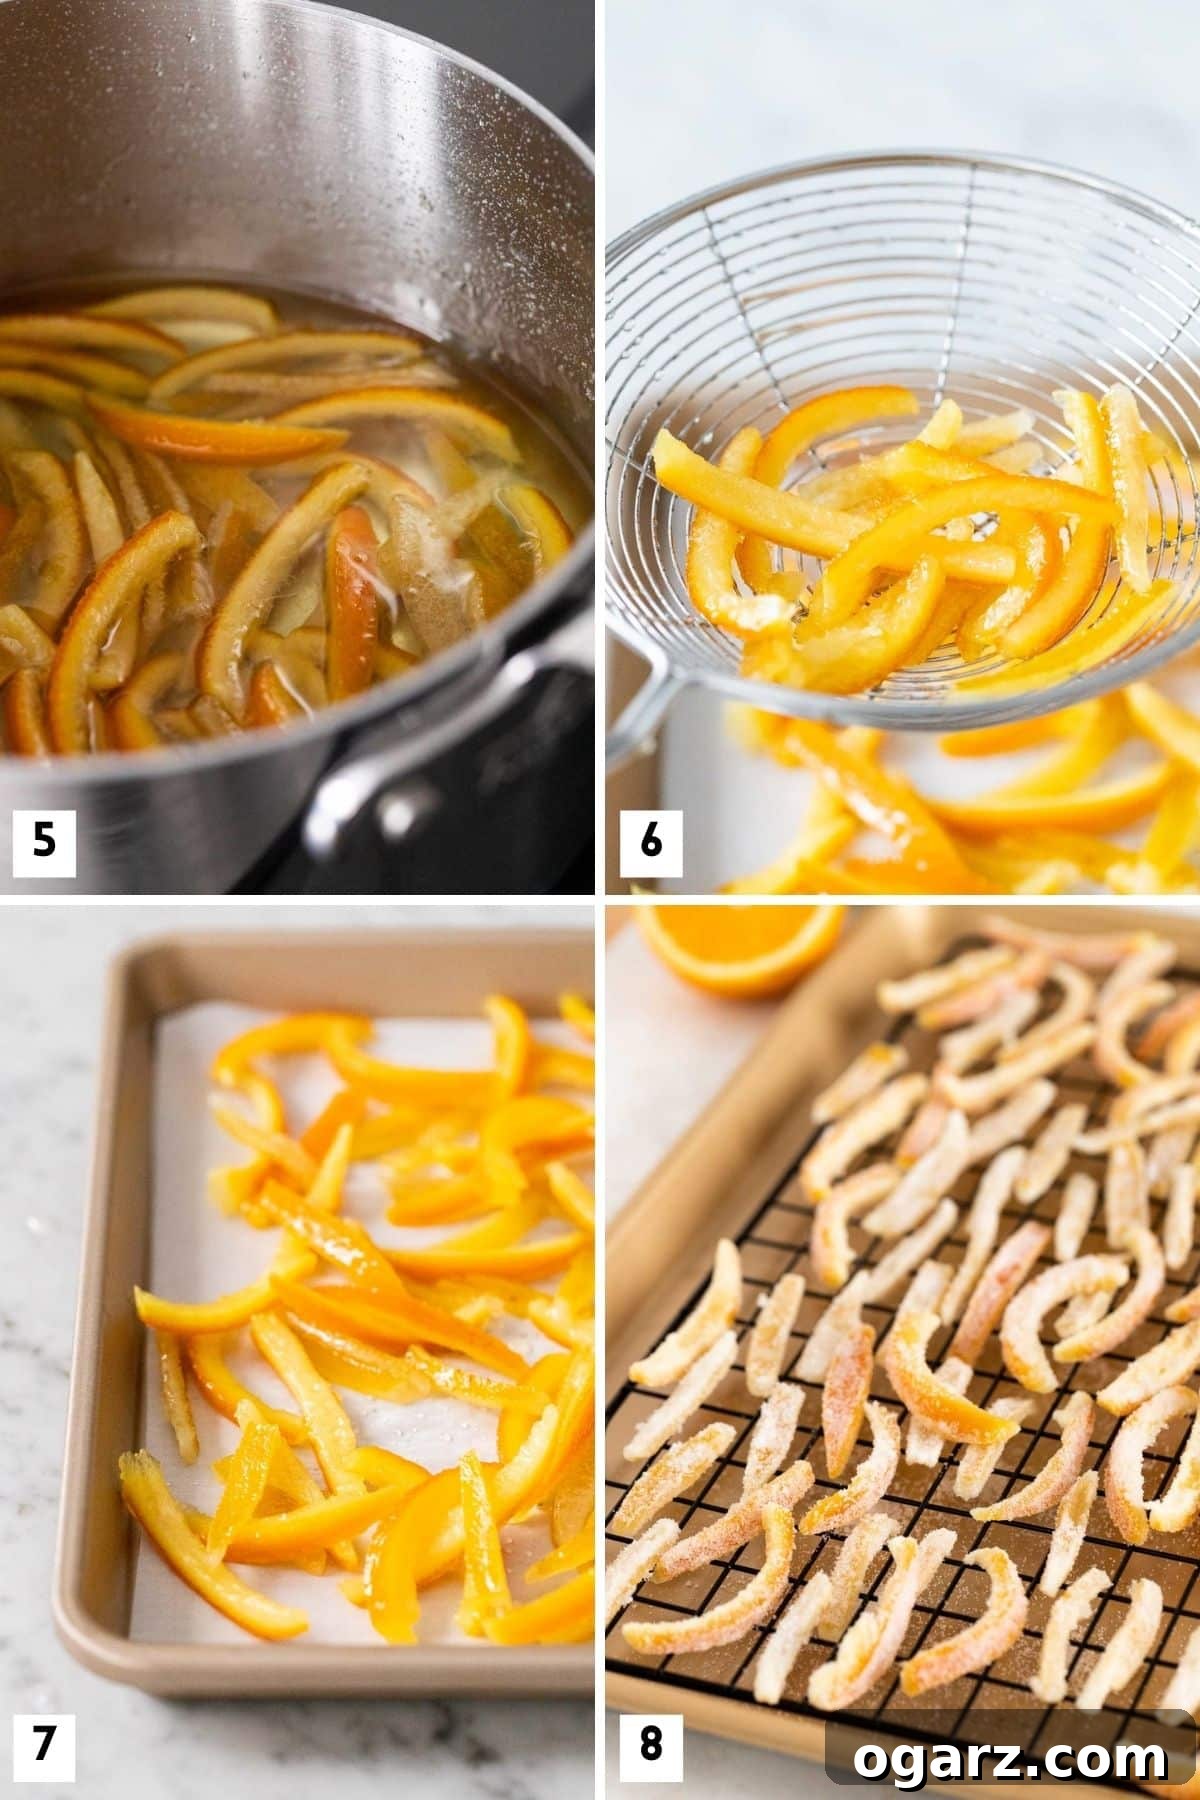
- Simmer the Peels in Syrup: Once the sugar syrup is simmering, carefully add the blanched and drained orange peel strips to the saucepan. Reduce the heat to low, maintaining a gentle simmer. Allow the peels to cook in the syrup for approximately 60 minutes. During this time, the peels will gradually absorb the sugar syrup, becoming beautifully translucent and tender. Stir occasionally to ensure even cooking and prevent sticking (Image 5).
- Cool and Drain: Once the peels are translucent and tender, remove the saucepan from the heat. Using a slotted spoon or a skimmer, carefully remove the candied peels from the hot syrup, allowing any excess syrup to drip back into the pot. Spread the warm peels out in a single layer on a wire rack, placed over a baking sheet or parchment paper to catch any drips. Let them cool down for at least an hour (Images 6 and 7).
- Sugar Coating (Optional): Once cooled, you have two options for coating:
- Individual Rolling: Roll each cooled peel strip in a bowl of granulated sugar until fully coated.
- Bag Method: Alternatively, place the peels into a large ziplock bag with the optional extra sugar. Seal the bag and gently toss until all the peels are evenly coated.
This step adds sweetness and prevents sticking, making them ideal for snacking or gifting. If you intend to use the peels primarily for baking, you can skip this step, as less sugar on the surface makes them easier to incorporate into doughs and batters.
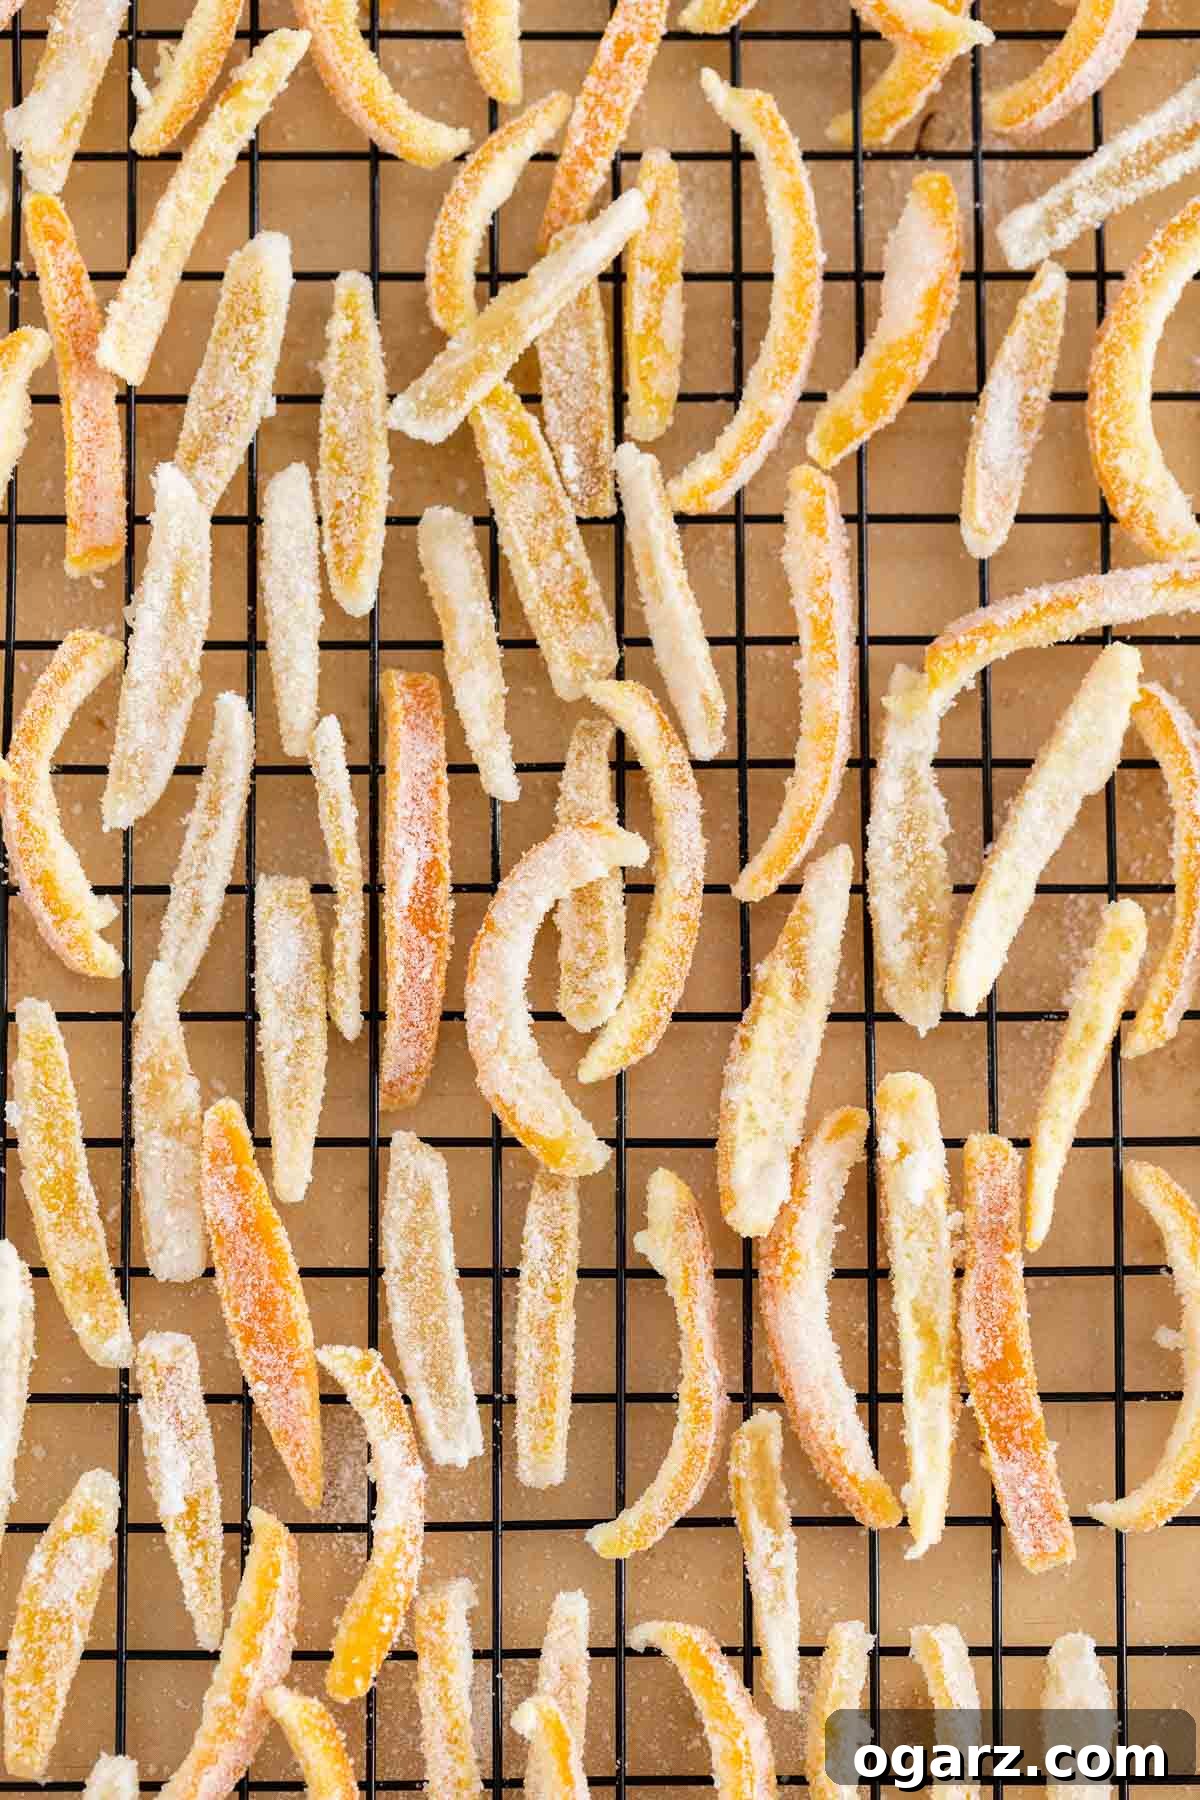
- Final Drying: Arrange the sugar-coated (or uncoated) candied orange peels back on the wire rack in a single layer. Allow them to air dry at room temperature for one to two days, or even longer depending on humidity, until they are completely dry to the touch and firm but still chewy. Turning them occasionally will promote even drying (Image 8). This final drying step is crucial for proper storage and texture.
Expert Tips for Candied Peel Perfection
Achieving perfectly candied citrus peel is a craft, and these expert tips will guide you to flawless results every time, ensuring your homemade treat is as delicious and versatile as possible.
- Embrace All Citrus Fruits: Don’t limit yourself to just oranges! This versatile recipe can be applied to a wide array of citrus. Lemons and limes are fantastic, offering a sharper, more intense tang. Grapefruits yield a wonderfully complex, bittersweet peel, while mandarins and tangerines create smaller, sweeter, and more delicate candied pieces. Experiment with different citrus varieties to discover your favorites and create a diverse collection of candied peels.
- The Non-Negotiable Step: Blanching: Never skip the blanching process! This multi-step boiling and rinsing is paramount for two main reasons: firstly, it significantly reduces and often eliminates the inherent bitterness found in the pith (the white spongy layer beneath the colorful zest). Secondly, it helps to tenderize the peel, transforming it into a soft, pliable texture that readily absorbs the sugar syrup. Typically, 2-3 blanching cycles are sufficient for most oranges, but for very bitter citrus like Seville oranges or certain grapefruits, an extra cycle might be beneficial.
- Ensuring Syrup Coverage: For the peels to properly candy, they must be fully submerged in the sugar syrup. If you’re working with a particularly large batch of peels or exceptionally thick-skinned oranges, you might find the initial syrup quantity insufficient. In such cases, simply increase both the water and sugar proportionally (e.g., if you add an extra 1/2 cup of water, add an extra 1 cup of sugar) to ensure adequate coverage and consistent candying.
- The Role of a Candy Thermometer: While not strictly mandatory for this recipe, a candy thermometer can be a valuable tool for consistency. Aim for the sugar mixture to reach approximately 230°F (110°C), which corresponds to the “soft ball stage.” At this temperature, the syrup is concentrated enough to properly candy the peels, ensuring they become tender without being overly sticky.
- Preserve the Pith (Wisely): It might seem counterintuitive, but resist the urge to scrape away too much of the white pith. A moderate amount of pith is essential for the candied peel’s desirable chewy texture. If the peels are too thin, they tend to become hard and brittle rather than soft and pleasantly chewy. Aim for a thickness that allows for a slight give when gently squeezed.
- Utilize Leftover Fruit: After carefully removing the peels, don’t let the juicy fruit go to waste! The peeled oranges (or lemons/limes) are perfect for immediate consumption, juicing, or adding to smoothies. They are not required for the candying process itself, so enjoy them as a refreshing treat.
- Optimal Drying Techniques: Drying is a critical final step. It typically takes one to two days, but high humidity can extend this. To promote even drying, turn the peels once or twice a day. For easy handling and transport, you can transfer the cooled, semi-dry peels from the wire rack to a parchment paper-lined baking tray. Ensure good air circulation around them.
- Customizing for Baking Applications: If your primary intention is to use the candied peel in baking (e.g., in cake batters or cookie doughs), consider skipping the final sugar coating. Uncoated peels are often less sticky, easier to chop, and incorporate more smoothly into recipes without clumping. Allow them to dry until they are firm but still slightly pliable, rather than bone dry.
- Don’t Waste the Syrup: The leftover citrus-infused sugar syrup is a delightful bonus! It’s essentially a gourmet simple syrup bursting with concentrated citrus flavor. Strain it to remove any small peel fragments and store it in an airtight container in the refrigerator. Use it to sweeten teas, cocktails, or sparkling water, drizzle it over pancakes, yogurt, or oatmeal, or even use it in other dessert recipes where a hint of citrus is desired.
Frequently Asked Questions About Candied Orange Peel
The primary culprit behind bitter candied orange peels is the white layer directly beneath the colorful zest, known as the pith. The pith contains bitter compounds, and if not adequately processed, this bitterness can permeate your final product. The solution is thorough blanching. Repeatedly boiling and rinsing the peels in fresh water significantly reduces these bitter elements, leaving you with a sweet and flavorful treat. Never skip this crucial step, and if your citrus is particularly bitter, consider an extra blanching cycle.
For fully dried and sugar-coated candied orange peels, refrigeration is generally not necessary. The high sugar content acts as a natural preservative, allowing them to remain stable at room temperature. Store them in an airtight container or glass jar in a cool, dark pantry. Properly stored, they will maintain their quality for at least a month, often longer. However, if you’ve opted to skip the sugar coating (for baking purposes, for example) or if the peels are still slightly sticky and not completely dry, it’s advisable to store them in the refrigerator to prevent mold or spoilage and extend their shelf life.
The versatility of candied peel is truly impressive, extending far beyond a simple snack:
- German Christmas Baking: It’s a cornerstone in many traditional German holiday recipes, most famously Lebkuchen and Stollen. You’ll also find it in lesser-known but equally delightful treats like Fruchthaufchen (fruit stacks), Florentiner cookies, and Stollenkonfekt.
- Gourmet Snack & Dessert: Enjoy them rolled in sugar as a vibrant, chewy treat. For an elevated indulgence, dip the candied peels in melted chocolate – dark, milk, or white chocolate all create a stunning contrast of flavors and textures.
- Everyday Baking: Chop and add to muffins, scones, fruitcakes, panettone, biscotti, or even cookie dough for a burst of citrus flavor and pleasant chewiness. It also makes an excellent garnish for cakes and cupcakes.
- Cocktails & Drinks: The citrus syrup (liquid gold!) left over from the candying process is a fantastic byproduct. Use it as a base for refreshing drinks or sophisticated cocktails, or simply mix it with sparkling water for a homemade citrus soda.
- Breakfast & Beyond: Drizzle the citrus syrup over oatmeal, yogurt, ice cream, or pancakes. It can also be used as a flavorful alternative to honey or maple syrup in various recipes.

Proper Storage for Longevity
To ensure your homemade candied citrus peels stay fresh and delicious for as long as possible, proper storage is key. Once completely dry to the touch, transfer the peels to an airtight container or glass jar. Store this container in a cool, dark pantry or cupboard, away from direct sunlight and humidity. When stored correctly, these candied delights will keep their delightful texture and vibrant flavor for at least a month. If you opted to skip the sugar coating for baking purposes, or if the peels are still slightly moist, it is best to store them in the refrigerator to prolong their freshness and prevent spoilage.
More German Christmas Recipes to Try
Christmas Recipes
Zimtsterne (German Cinnamon Star Cookies)
Appetizer Recipes
Easy Cinnamon Candied Almonds
German Recipes
Kinderpunsch (German Non-Alcoholic Punch)
German Recipes
The BEST German Christmas Cookies

Candied Orange Peel (German Orangeat)
Ingredients
- 4 organic oranges
- 4 organic lemons
- 2 cups white sugar
- 1 cup water
For coating
- ⅓ cup white sugar, optional
Instructions
-
Wash oranges and lemons. Cut off the top and bottom, then score the peel into quarters. Gently peel the citrus fruits, then cut the peels into strips about 1/4-inch wide.
-
Place the strips in a medium saucepan, cover with cold water, and bring to a boil. Boil for 5 minutes, then drain in a colander and rinse with cold water. Return peels to the pot and repeat this blanching process once or twice more to remove bitterness.
-
In the same saucepan, combine 2 cups of sugar and 1 cup of water. Bring to a boil, stirring until the sugar is dissolved. Add the blanched peels to the boiling sugar mixture, reduce heat to low, and simmer for about 60 minutes, stirring frequently, until the peels are translucent.
-
Use a slotted spoon to remove the peels from the syrup, letting excess syrup drip off. Spread them out on a wire rack to cool for 1 hour.
-
Optionally, roll the cooled peels in additional granulated sugar or place them in a ziplock bag with sugar and toss to coat. Skip this step if using for baking.
-
Spread the candied peel back on a wire rack to air dry for one to two days until completely dry and firm. Store in an airtight container.
Notes
- Citrus Fruit: This recipe is versatile and works with any citrus fruit including oranges, lemons, limes, and grapefruits.
- Blanching: Do not skip blanching the peels! This crucial step reduces the bitterness of the pith (the white part) and helps achieve a soft, chewy texture.
- Sugar Mixture: Ensure citrus peels are fully submerged in syrup. If you have a large quantity of peel, adjust water and sugar proportionally.
- Candy Thermometer: The ideal temperature for the sugar mixture is around 230°F (soft ball stage).
- Pith: Avoid removing too much pith. A moderate amount contributes to a desirable chewy, rather than tough, candied peel.
- Leftover Fruit: The peeled fruit can be eaten or juiced; it is not used in the candying process.
- Drying: Drying can take a few days. Turn peels once daily for even drying. After cooling, you can transfer them to a parchment paper-lined baking tray for drying.
- For Baking: If you plan to use the peel in baking, I recommend skipping the sugar coating. Let them dry just enough to be firm but still pliable.
- Syrup Reuse: The strained citrus-flavored simple syrup can be repurposed in drinks, cocktails, or mixed with sparkling water for a refreshing beverage.
Nutrition
Enjoyed this recipe? Share your thoughts below!