

Table of Contents
- Mastering the Perfect Roast Turkey: Expert Tips for a Flavorful Feast
- Why Brine Your Turkey?
- Essential Ingredients for a Succulent Turkey
- Step-by-Step: How to Brine a Turkey
- Achieving a Golden, Juicy Roast: How to Cook Your Turkey
- Crafting the Perfect Pan Gravy
- Mastering Your Turkey: Essential Tips for Success
- Handling Leftovers: Storing and Reheating Turkey
- Turkey Shopping Guide: Frequently Asked Questions
- Juicy Roast Turkey, Brined and Butter Basted (Recipe Card)
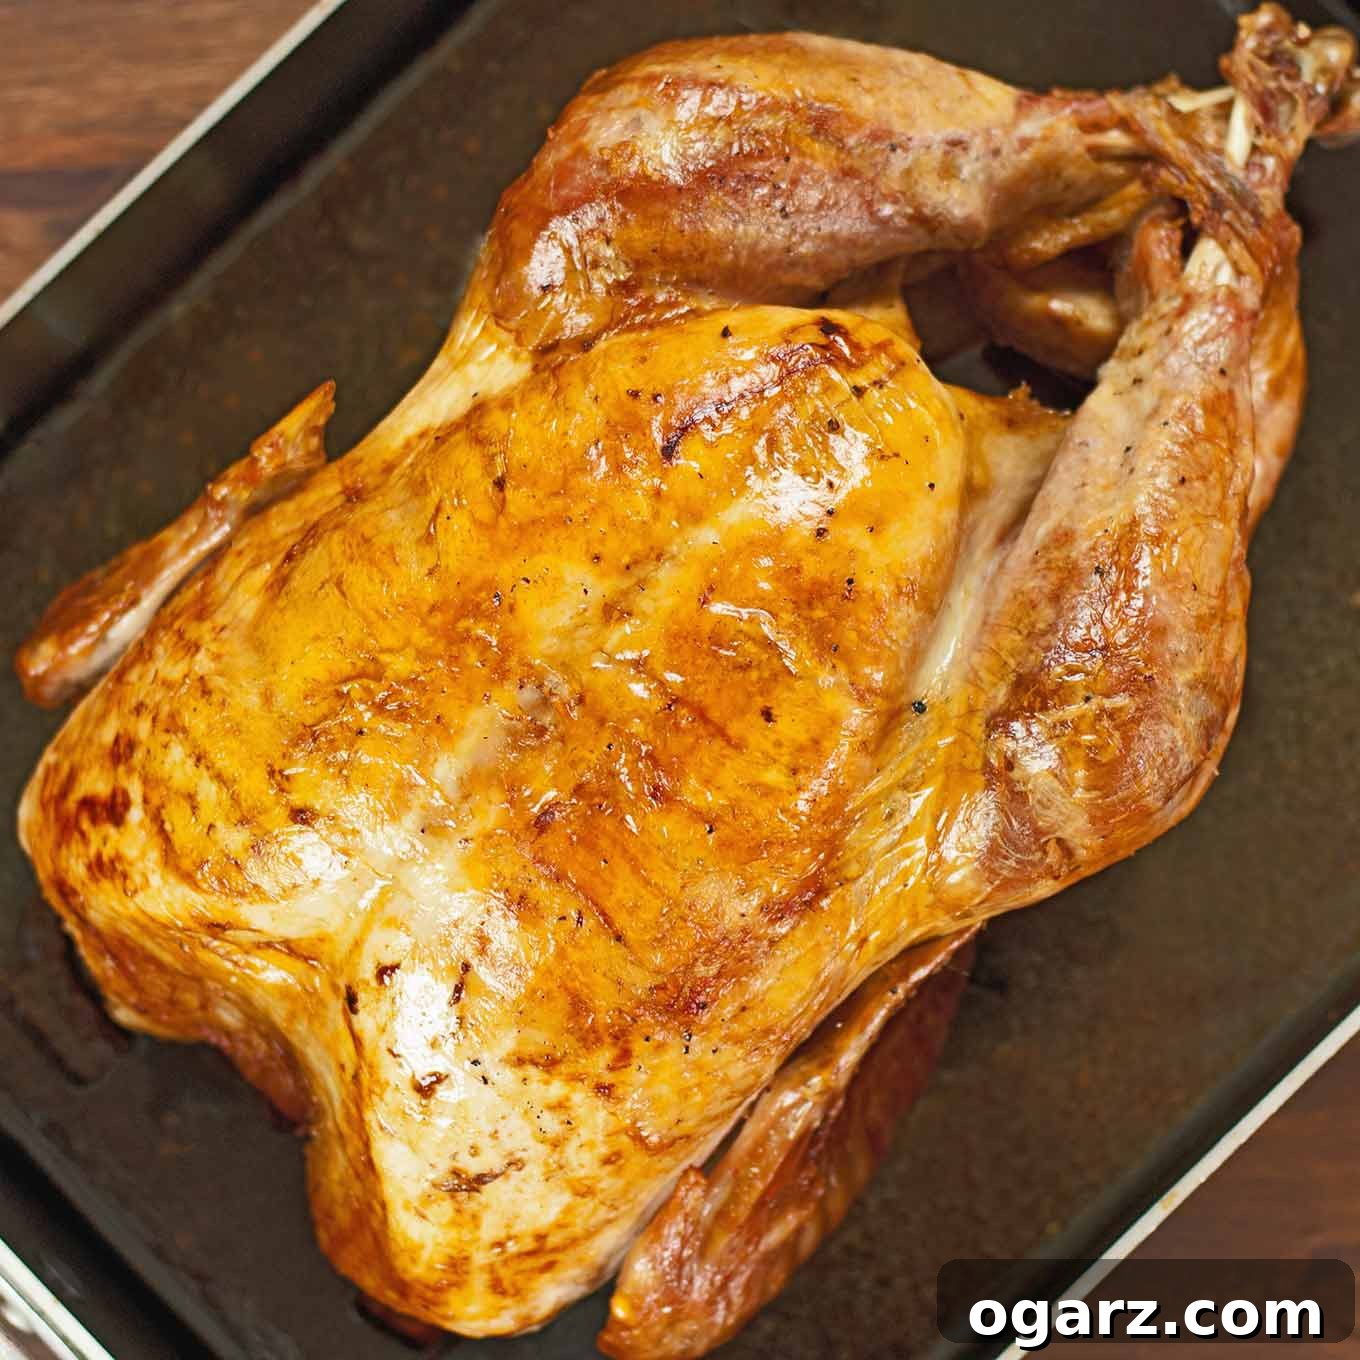
Preparing a truly magnificent roast turkey, one that’s both incredibly juicy and bursting with flavor, can seem like a daunting culinary challenge. However, with the right techniques and a clear, step-by-step guide, achieving a show-stopping holiday centerpiece is far more approachable than you might imagine. This comprehensive guide will demystify the entire process, empowering you to confidently select the ideal turkey, master the art of brining for unparalleled tenderness, butter-baste it to a glorious golden-brown, and whisk up a rich, delectable pan gravy that will impress every guest. From initial defrosting to expert carving and smart leftover storage, you’ll gain all the essential knowledge to ensure your roast turkey dinner is an absolute triumph, making your next holiday meal truly unforgettable.
Mastering the Perfect Roast Turkey: Expert Tips for a Flavorful Feast
Over years of dedicated culinary exploration, our kitchen has rigorously tested various methods for roasting a whole turkey. We’ve honed in on a selection of techniques that consistently yield exceptional results. This particular recipe, which incorporates a wet brine, stands out as a consistently reliable path to producing an outstanding, traditional holiday turkey. The brining process, while requiring a bit of extra effort, guarantees a remarkably tender, flavorful, and incredibly juicy turkey every single time, making the additional steps truly worthwhile. However, we understand that not everyone has the time or inclination for brining. For those instances, the brine is entirely optional; you can simply follow our detailed butter-basting and roasting instructions, and you’ll still be rewarded with a deliciously cooked turkey.
Why Brine Your Turkey?
Brining is a culinary technique that involves soaking meat, in this case, a whole turkey, in a seasoned saltwater solution for an extended period. This process offers a multitude of benefits that elevate the final taste and texture of your roast turkey. The primary advantage of brining is its ability to infuse the meat with moisture, preventing it from drying out during the roasting process. The salt in the brine solution helps to denature the proteins in the turkey’s muscle fibers, causing them to unravel and then re-coagulate in a way that traps moisture. This results in a turkey that is significantly juicier and more tender than one that hasn’t been brined.
Beyond moisture, the brine acts as a vehicle for flavor. By adding various aromatics, herbs, and spices to the saltwater solution, these flavors are absorbed deep into the meat, not just seasoning the surface. This creates a turkey that is flavorful from the inside out, offering a much more complex and satisfying taste profile. While an optional step, integrating a wet brine into your turkey preparation is a highly recommended method for achieving a consistently superior, moist, and exceptionally flavorful roast, transforming your holiday meal into a truly gourmet experience.
Essential Ingredients for a Succulent Turkey
Understanding the role of each component is key to culinary success. Here’s a closer look at the essential ingredients for this recipe. The complete list, including precise quantities, is conveniently located in the printable recipe card below.
- TURKEY: The foundation of your feast. When selecting a turkey for brining, it is absolutely crucial to scrutinize the label. Opt for a bird that has not been “pre-brined” or “self-basted,” meaning it hasn’t been injected with a salt solution by the producer. Using a turkey that’s already been treated with salt and then brining it yourself will likely lead to an unpleasantly salty outcome. If you happen to have an injected turkey, consider alternative flavoring methods or try our specialized buttermilk and honey-brined turkey recipe, which is formulated to accommodate such birds.
- AROMATICS: These simple additions are powerhouse flavor enhancers. Inserting chunks of apple, onion, celery, and garlic into the turkey’s cavity before roasting serves a dual purpose. Firstly, they infuse the turkey meat with subtle, sweet, and savory notes as it cooks. Secondly, they contribute significantly to the depth and richness of the pan drippings, which are the base for your exquisite gravy.
- FRESH HERBS: The vibrant essence of fresh rosemary, thyme, and sage sprigs tucked into the cavity alongside the aromatics elevates the turkey’s natural flavors. Fresh herbs release their aromatic oils more effectively during roasting, providing a more fragrant and pronounced herbaceousness compared to their dried counterparts. We highly recommend sticking with fresh herbs for the best results in this recipe.
- BUTTER: Butter plays a vital role in achieving both flavor and a beautiful golden-brown crust. Spreading softened butter diligently under the skin of the breast and over the legs helps to moisten the lean breast meat and promotes even browning across the entire bird. Given that the turkey is brined with salt, we strongly advise using unsalted butter to maintain control over the overall sodium content of your finished dish.
- CHICKEN BROTH: This humble liquid is indispensable for a successful roast. Pouring low-sodium chicken broth into the bottom of the roasting pan serves several critical functions. It prevents the precious pan drippings from burning, ensuring they remain flavorful and usable for gravy. Furthermore, it acts as an excellent base, contributing savory depth to your homemade pan gravy. Always opt for the low-sodium version to manage salt levels, especially after brining.
For the Brine (Optional, but Recommended):
- SPICES: The brine is not just about salt; it’s also a fantastic opportunity to layer in complex flavors. Whole cloves, allspice berries, cinnamon sticks, and bay leaves are simmered to release their warm, fragrant essences, which then permeate the turkey, adding a subtle yet distinctly aromatic profile.
- SALT AND SUGAR: These are the cornerstones of any effective brine. Kosher salt is essential due to its crystal structure and purity, which allows for consistent brining. Be aware that different brands of kosher salt (e.g., Morton vs. Diamond Crystal) can have varying sodium contents by volume, so for optimal consistency with this recipe, we specifically recommend Morton kosher salt. White granulated sugar is used to balance the saltiness, promote beautiful browning of the skin, and contribute to the overall flavor complexity.
Step-by-Step: How To Brine A Turkey
This section provides a detailed overview of the turkey brining process, designed to enhance the flavor, texture, and juiciness of your roast. For even more precise and detailed instructions, please refer to the printable recipe card located further down the page.
Brining a turkey involves immersing it in a carefully crafted solution of water, salt, sugar, and a selection of herbs and spices for several hours or even overnight. This method is a game-changer for achieving incredibly tender and juicy meat. The magic of brining lies in the science: the salt in the solution initiates a process where the turkey’s muscle proteins absorb moisture and flavorings. This not only prevents the meat from drying out during cooking but also breaks down some of the muscle fibers, resulting in a significantly more tender and flavorful turkey once roasted.

1. PREPARE THE BRINE SOLUTION: Begin by creating your aromatic brine base. Into a large saucepan, add the whole cloves, allspice berries, cinnamon sticks, and bay leaves. Pour in 2 quarts of water and bring the mixture to a gentle simmer over medium heat. Once simmering, reduce the heat to medium-low, cover the saucepan, and allow the spices to infuse for 30 minutes. This step is crucial for extracting maximum flavor from the aromatics. After infusing, use a slotted spoon to carefully remove all the spices from the liquid. Next, stir in the kosher salt and granulated sugar until they are completely dissolved. Remove the saucepan from the heat and stir in an additional quart of cold water; this helps to rapidly cool down the brine. Finally, transfer this concentrated mixture into a food-safe 5-gallon plastic tub or a very large brining bag. Pour in an additional 5 quarts of ice water. It is absolutely essential that the entire brine solution is very cold (ideally 40°F or below) before you introduce the turkey. This rapid cooling prevents any undesirable bacterial growth and ensures food safety.
2. ADD THE TURKEY TO THE BRINE: Before adding your bird, carefully remove the neck, giblets, liver, and any other packaged parts from the turkey’s cavity. These can be reserved for making a flavorful gravy or stock later. Drain any accumulated liquid from the turkey’s cavity. Gently lower the entire bird into the prepared cold brine solution. Ensure that the turkey is fully submerged and that the cavity has filled with the liquid. Cover the tub or seal the brining bag tightly and refrigerate for 8 hours or overnight. For optimal results and even brining, if you notice the turkey isn’t completely submerged or appears unevenly saturated, turn it over once about midway through the brining time.
IMPORTANT FOOD SAFETY NOTE: For your safety and to prevent bacterial contamination, your turkey must always remain refrigerated at a temperature of 40°F (4°C) or below throughout the entire brining process. Never brine a turkey at room temperature.
Interested in brining just a turkey breast for a smaller gathering? Consider trying our delicious apple cider turkey brine recipe, specifically tailored for turkey breasts!
Achieving a Golden, Juicy Roast: How To Cook Your Turkey
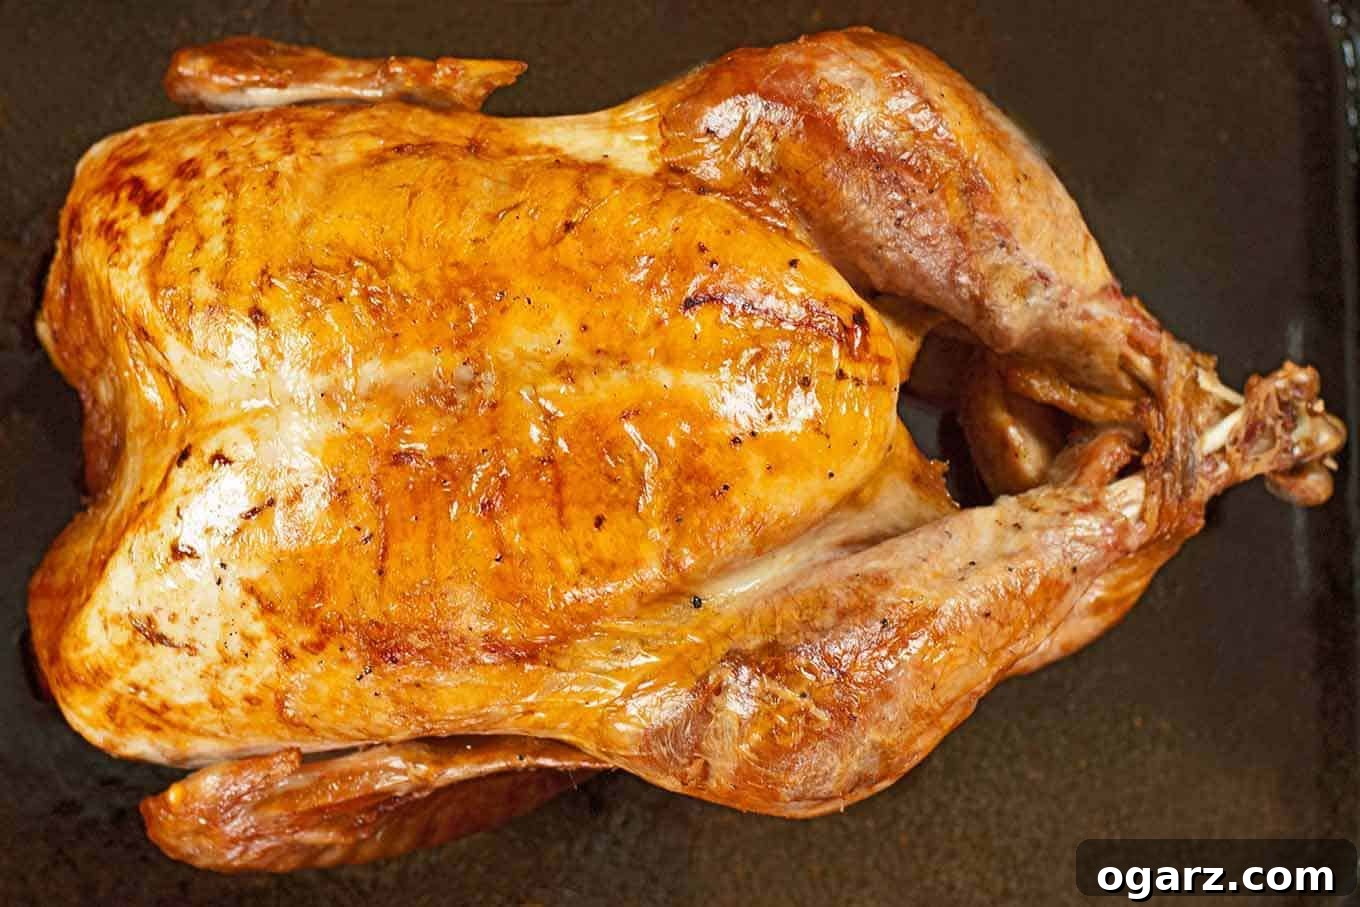
This section offers a comprehensive guide to the turkey roasting process, designed to yield a perfectly cooked, golden-brown bird. For a more precise and detailed recipe with exact measurements, please refer to the printable recipe card below.
1. RINSE AND PREPARE THE TURKEY: Start by thoroughly coating a sturdy roasting pan, ideally one fitted with a rack, with a generous amount of nonstick spray. Carefully remove the turkey from its brine solution (if you brined it). Rinse the turkey thoroughly, both inside and out, under cool running water. This step is essential to remove any excess salt from the brine. Once rinsed, pat the turkey completely dry, inside and out, with paper towels. A dry surface is crucial for achieving that coveted crispy skin. If you opted not to brine your turkey, generously season its cavity with salt and freshly ground black pepper at this stage.
2. ADD AROMATICS AND PREPARE FOR ROASTING: Gently stuff the turkey’s cavity with the apple chunks, onion, celery, whole garlic cloves, and sprigs of fresh sage, thyme, and rosemary. These aromatics will infuse the bird with incredible flavor as it roasts. To create a compact shape that promotes even cooking and easier carving, tuck the wings behind and under the back of the bird. Then, tie the drumstick ends together securely with kitchen twine. Place the prepared turkey on the roasting rack, breast-side up. Allow the turkey to sit at room temperature, uncovered, for 1 hour. This step helps to reduce the refrigerator chill, ensuring a more even cook and preventing the exterior from cooking too quickly while the interior remains cold.
3. COAT THE TURKEY WITH BUTTER: After the turkey has rested for an hour, preheat your oven to a robust 425°F (220°C). Now, for the butter basting: meticulously work your fingers under the skin of the turkey breast, gently separating the skin from the meat without tearing it. Spread a generous amount of softened butter evenly under the skin, then massage the breast from the outside to distribute the butter as thoroughly as possible. Take the remaining softened butter and rub it all over the outside of the bird, paying special attention to coating the thighs and drumsticks. This butter layer contributes immensely to flavor, moisture, and a stunning golden-brown finish. If you chose not to brine your turkey, this is the time to season the entire exterior liberally with kosher salt and freshly ground black pepper.
4. BEGIN ROASTING AT HIGH TEMPERATURE: Pour 3 cups of low-sodium chicken broth into the bottom of the roasting pan. Carefully place the turkey into the preheated oven. Roast the turkey at 425°F (220°C) for an initial 30 minutes. This high heat jump-starts the browning process, creating a beautiful crisp skin. After 30 minutes, rotate the roasting pan 180 degrees in the oven to ensure even cooking and browning, then immediately reduce the oven temperature to 325°F (160°C).
5. CONTINUE ROASTING AT LOWER TEMPERATURE: Continue roasting the turkey at the lower temperature, basting the bird every 30 minutes with the flavorful pan juices that accumulate in the bottom of the pan. The general guideline for an unstuffed whole turkey is approximately 13 minutes per pound of turkey. This calculation includes the initial 30 minutes at the higher temperature. For a 10 to 12-pound turkey, you can anticipate an additional roasting time of about 1-1/2 to 2 hours, depending on various factors like oven calibration and actual turkey weight.
6. CHECK THE INTERNAL TEMPERATURE FOR DONENESS: To prevent overcooking and ensure a perfectly juicy turkey, begin checking the turkey’s internal temperature after 1-1/4 to 1-1/2 hours of total cooking time (refer to recipe notes for more details). To accurately check for doneness, insert an instant-read meat thermometer into the thickest, innermost part of the turkey thigh, making sure the thermometer does not touch any bone. Your turkey is perfectly cooked when the thermometer registers a safe internal temperature of 165°F (74°C).
7. LET THE TURKEY REST BEFORE CARVING: Once your turkey has reached the ideal internal temperature, remove it from the oven. This next step is perhaps the most crucial for a truly juicy bird: allow the turkey to rest, uncovered, for a minimum of 30 minutes before you begin carving. This resting period enables the internal juices, which have migrated to the center of the bird during cooking, to redistribute throughout the meat. Carving too soon will result in juices running out, leaving you with dry meat. Resting ensures every slice remains moist and tender.
How to Make Pan Gravy
A delicious, rich pan gravy is the quintessential accompaniment to a perfectly roasted turkey, adding a luxurious finish to your holiday meal. Using the savory drippings from the roasting pan ensures an incredible depth of flavor that complements the turkey beautifully.
1. PREPARE THE PAN JUICES: While your turkey is resting and its juices are redistributing (a critical step for moist meat), turn your attention to the pan drippings. Carefully skim off any excess fat from the surface of the pan juices, leaving behind the rich, flavorful liquid. Transfer these precious drippings into a 4-cup measuring cup. If the amount of drippings is less than 3 cups, add enough low-sodium chicken broth to bring the total liquid volume up to 3 cups. This ensures you have a sufficient base for a generous amount of gravy.
2. CREATE THE SMOOTH, THICK GRAVY: Pour the combined pan juices and chicken broth into a medium saucepan. Bring the liquid to a gentle simmer over medium heat, allowing it to warm through and its flavors to meld. In a separate small bowl, whisk together 1/4 cup of cornstarch with 1/3 cup of cold water until you form a smooth, lump-free slurry. This slurry is your thickening agent. Gradually whisk the cornstarch slurry into the simmering broth in the saucepan. Continue whisking constantly for 1-2 minutes until the gravy thickens to your desired consistency and becomes beautifully smooth. Finally, taste the gravy and season it to perfection with salt and freshly ground black pepper. Adjust seasoning as needed. Transfer the luscious pan gravy to a warm serving bowl or a classic gravy boat and serve alongside your magnificent roast turkey.
Mastering Your Turkey: Essential Tips for Success
Preparing a roast turkey is a significant undertaking, and a few key tips can make all the difference between a good meal and an exceptional one. Here’s expert advice for ensuring your turkey is handled, prepared, and served to perfection.
STORING A TURKEY SAFELY: A whole turkey is a substantial piece of meat, requiring careful handling to ensure food safety. It’s imperative that your turkey is stored in the refrigerator at a consistent temperature of 40°F (4°C) or below. Keep it in its original packaging on the lowest shelf of your refrigerator to prevent any potential drips from contaminating other foods. Remove it from the fridge only 1 to 1-1/2 hours prior to roasting to allow it to temper slightly, which aids in more even cooking.
DEFROSTING A FROZEN TURKEY: If you’ve purchased a frozen turkey, proper defrosting is paramount. Always defrost a frozen turkey in the refrigerator, *never* on the kitchen counter at room temperature, as this can create a breeding ground for bacteria. A good rule of thumb is to allow approximately 24 hours of defrosting time for every 5 pounds of turkey weight. Always round up when calculating this time to be safe. For instance, a 12-pound turkey will require a full three days to defrost thoroughly in the refrigerator.
SPEEDING UP THE DEFROSTING PROCESS: If you find yourself in a pinch and your turkey hasn’t defrosted in time, there’s a safe and effective way to speed up the process:
- Keep the turkey sealed in its original, unopened wrapper. Place the wrapped turkey in a large container, such as a cooler, a clean utility sink, or a food-safe bucket.
- Completely submerge the turkey in cold tap water. You might need to place something heavy on top of the turkey to keep it fully submerged in the water.
- Crucially, change the cold water every 30 minutes. This prevents the water from warming up and keeps the turkey at a safe temperature.
- Using this cold-water method, allow approximately 30 minutes of defrosting time per pound of turkey. For example, a 12-pound turkey, starting from fully frozen, would take about 6 hours to completely defrost using this method.
- Once the turkey is fully defrosted using this method, it is essential to **prepare it for roasting immediately**. Do not refreeze or store it for later.
HOW TO ACHIEVE CRISPY TURKEY SKIN: For that irresistible, golden-brown, crispy skin, a simple trick makes all the difference. After you’ve removed the turkey from its wrapper (or, if brined, after rinsing and thoroughly patting it dry), place the turkey uncovered on a roasting rack in the refrigerator for a minimum of 6 hours, or even overnight, before you plan to roast it. This exposure to the cold, dry air of the refrigerator dries out the skin, which is the secret to achieving maximum crispiness during cooking.
EXPERT CARVING TIPS: To ensure your beautifully roasted turkey is served perfectly, plan to do your carving in the kitchen, not at the dinner table. This allows for a more focused and mess-free process. Ensure you have a good, sharp carving knife and a carving fork, along with a cutting board that is sufficiently large to accommodate the entire turkey. Ideally, the cutting board should have a channel or groove around its perimeter to catch any delicious juices that run out during carving, which can then be added to your gravy. For comprehensive, step-by-step visual instructions on how to carve a turkey efficiently and elegantly, we highly recommend watching the Culinary Institute of America’s How to Carve a Turkey video. Their method is widely regarded as one of the best and easiest to follow.
Handling Leftovers: Storing and Reheating Leftover Turkey
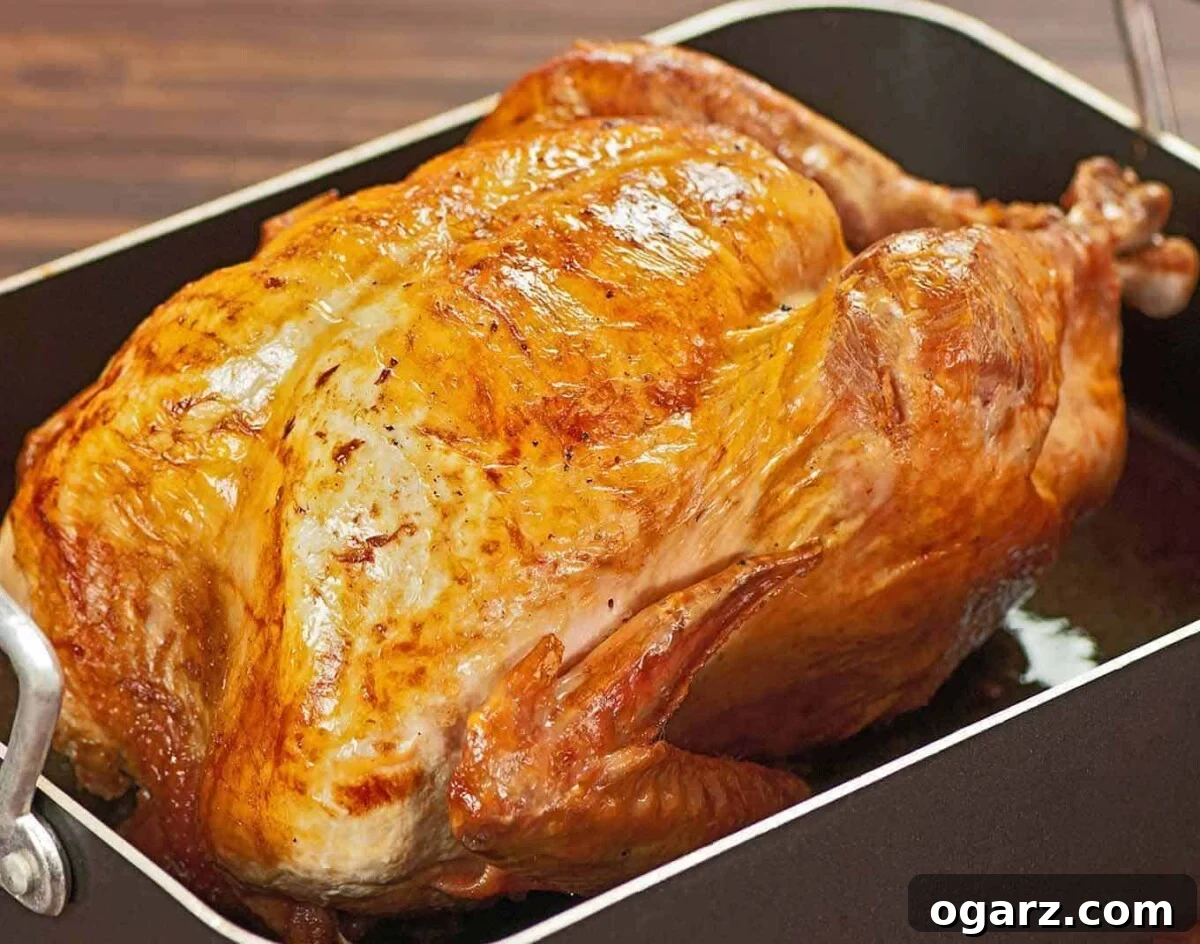
Leftover turkey is a cherished part of any holiday feast, but proper handling is key to enjoying it safely and deliciously for days to come. Food safety is paramount when dealing with cooked poultry.
For safety reasons, it is absolutely essential to refrigerate all leftover turkey within 2 hours of removing the bird from the oven. Prompt cooling prevents the growth of harmful bacteria. Once cooled, store your leftover turkey tightly wrapped in an airtight container or heavy-duty aluminum foil. When properly stored, it will remain fresh for up to four days in the refrigerator. For longer storage, you can freeze leftover turkey for up to six weeks. To freeze, portion the turkey into smaller, manageable amounts, wrap them tightly, and place them in freezer-safe bags or containers to prevent freezer burn.
Tips for Reheating Leftover Turkey:
Reheating turkey without drying it out can be a challenge, but this method ensures your leftovers remain moist and flavorful:
- Pour approximately 1/2-inch of turkey or chicken broth into a large frying pan.
- Heat the broth to a gentle simmer over medium heat.
- Add slices of cooked turkey in a single layer to the simmering broth.
- Warm the turkey for only 30 to 45 seconds per side, just until it’s heated through. Overheating will dry out the meat.
- Remove the warmed turkey slices and plate them immediately for individual servings. This method gently reheats the turkey while infusing it with extra moisture and flavor from the broth.
Beyond simple reheating, leftover turkey is incredibly versatile. It’s perfect for delicious sandwiches, hearty soups, comforting casseroles, and flavorful salads, offering numerous ways to extend the joy of your holiday meal.
Turkey Shopping Guide: Frequently Asked Questions
Navigating the array of turkey options at the grocery store can be confusing, especially with various labels and terms. Here are some of the most common questions about buying a whole turkey, along with detailed answers to help you make an informed choice for your holiday feast.
A reliable guideline for estimating turkey quantity is to plan on 1-1/4 pounds (approximately 570 grams) of turkey per person. This calculation accounts for a decent portion for each guest and leaves a comfortable amount for anticipated leftovers. For example, a 12 to 13-pound bird should comfortably feed 10 people and provide you with enough delicious leftovers for sandwiches, soups, or other post-holiday meals. If you have particularly hearty eaters or want to ensure a substantial amount of leftovers, you might consider increasing this to 1.5 pounds per person.
When both types of turkeys are cooked properly, the difference in taste and texture between a fresh and a frozen turkey is often minimal. A fresh bird typically has a slight edge in juiciness and texture, as its cells haven’t undergone the freezing and thawing process. However, this difference is usually subtle and would likely only be noticeable if you were to taste them side-by-side. Frozen turkeys offer convenience and are often more readily available, especially outside of peak holiday seasons. Therefore, if buying a frozen turkey suits your needs, there’s no need to worry about making a significant compromise on quality or flavor, provided it’s defrosted correctly.
Self-basting turkeys are birds that have been pre-treated by the producer. They are typically injected with a solution containing broth, various seasonings, and a significant amount of salt. The purpose of this injection is to ensure the turkey remains moist and flavorful with minimal effort from the home cook. Because these turkeys are already infused with a salt solution, it is highly advisable *not* to brine them further. Attempting to brine an already self-basted turkey will likely result in an unpleasantly salty and potentially rubbery bird. The same caution applies to kosher turkeys; these birds are pre-salted as an integral part of the koshering process, so they should also not be brined.
The term “all-natural” on a turkey label generally indicates that the bird contains no artificial ingredients, colors, or chemical preservatives. While this label suggests a minimally processed product, it’s important to note that an “all-natural” turkey may still have been injected with a brining solution similar to that found in self-basting turkeys (broth, salt, and water). Because the exact definition and application of “all-natural” can vary among producers and is less strictly regulated than other labels, it is crucial to read the label carefully and thoroughly. Look for explicit statements regarding added solutions or ingredients to ensure you know precisely what you are purchasing.
These labels refer to the living conditions and diet of the turkeys, often indicating higher animal welfare standards and potentially affecting flavor:
Pasture-raised: These turkeys spend a significant portion of their lives outdoors on pastures, foraging for insects and grasses, supplemented with feed. This varied diet and active lifestyle can contribute to a richer, more complex flavor in the meat.
Free-range: Free-range turkeys have access to the outdoors, but the extent of that access can vary. It simply means they are not confined indoors at all times, though the outdoor space might be limited. They typically eat a conventional feed.
Organic: Organic certification is the most stringent. Organic turkeys are raised on 100% organically grown feed, are never given antibiotics or growth hormones (which are generally prohibited in all poultry anyway), and must have outdoor access, often making them pasture-raised or free-range by default. Their diet and lifestyle are believed by many to result in superior flavor and texture.
A heritage turkey is a specific type of turkey that is descended from traditional, historic breeds, distinct from the broad-breasted white turkeys commonly found in supermarkets today. To be classified as a heritage turkey, a bird must meet specific criteria related to natural mating, long and productive outdoor lifespan, and slow growth rate. These turkeys are generally smaller than commercially bred birds, possess a more robust, “turkey-like” flavor, and have a different meat distribution—less breast meat but more muscular and flavorful thighs and legs. Due to their specific breeding and raising practices, heritage turkeys are a niche market product. If you plan to purchase one, it is highly recommended to find a local producer and reserve your bird well in advance, as they are exceptionally popular and often sell out completely long before major holiday seasons like Thanksgiving or Christmas.
Juicy Roast Turkey, Brined and Butter Basted
Ingredients
- 10 to 12 pound minimally processed fresh turkey, see notes below
- 1 large Granny Smith apple, peeled and cut into chunks
- 1 small onion, peeled and quartered
- 1 stalk celery including leafy top, roughly chopped
- 4 cloves garlic, peeled and left whole
- 1 sprig fresh sage
- 2 sprigs fresh thyme
- 1 sprig fresh rosemary
- 5 tablespoons butter, softened
- 4 to 6 cups chicken broth, divided
- 1/4 cup cornstarch
For the brine:
- 10 whole cloves
- 10 whole allspice berries
- 2 cinnamon sticks
- 3 bay leaves
- 1 cup kosher salt
- 1 cup sugar
- 2 gallons water, divided
Instructions
Brining the turkey:
- Prepare the brine by adding the cloves, allspice, cinnamon, and bay leaves to a large saucepan. Add 2 quarts of water and bring to a simmer over medium heat.
- Reduce the heat to medium-low, cover, and cook for 30 minutes. Remove the spices with a slotted spoon, then stir in the salt and sugar until completely dissolved. Remove from the heat and stir in another quart of cold water to speed cooling.
- Add the mixture to a food-safe 5-gallon plastic tub. Pour in an additional 5 quarts of ice water. The water must be very cold (40°F) before you add the turkey.
- Remove the neck, giblets, liver, etc. from the turkey and reserve them for gravy or stock. Drain off any liquid that has accumulated in the cavity of the turkey and add the bird to the cold brine.
- Be sure the turkey is fully submerged, and the cavity has filled with liquid. Cover and refrigerate for 6 to 8 hours. Note: If you feel the turkey is unevenly submerged, turn it once about midway through the brining time.
Rinse the turkey:
- Thoroughly coat a roasting pan fitted with a rack with nonstick spray. Remove the turkey from the brine, rinse it inside and out under cool running water, then pat dry thoroughly with paper towels.
- IF YOU DID NOT BRINE YOUR TURKEY: Season the cavity with salt and pepper before proceeding to the next step.
Add the aromatics:
- Add the apple chunks, onion, celery, garlic, sage, thyme, and rosemary to the turkey’s cavity. Tuck the wings behind and under the back of the bird and tie the drumstick ends together with kitchen twine.
- Place the turkey on the roasting rack breast side up and set aside, uncovered, for 1 hour to reduce the refrigerator chill.
Coat the turkey with butter:
- After 1 hour, preheat the oven to 425°F (400°F convection – see notes).
- Carefully work your fingers under the skin of the turkey breast to loosen it from the meat. Spread 2 tablespoons of the softened butter under the skin, massaging afterward to distribute the butter as evenly as possible. Take the remaining butter and rub it all over the outside of the bird being sure to coat the thighs and drumsticks.
- IF YOU DID NOT BRINE YOUR TURKEY: After spreading the butter over the outside of the bird, season liberally with salt (we recommend kosher) and pepper.
Begin roasting (high temp):
- Pour 3 cups of chicken broth into the roasting pan and place the turkey in the oven. Roast the turkey for 30 minutes at 425°F, then rotate the roasting pan in the oven and reduce the temperature to 325°F.
Continue roasting (lower temp):
- Continue roasting, basting the turkey with the accumulating pan juices every 30 minutes.
- Roasting time for a whole turkey (unstuffed) is approximately 13 minutes per pound. This includes the 30 minutes at the higher temperature. Depending on size, you can expect to roast your 10 to 12-pound turkey for an additional 1-1/2 to 2-1/4 hours (see notes).
Check the temperature:
- To avoid overcooking, start checking the turkey’s internal temperature after 1-1/2 hours of total cooking time (see notes).
- To properly check the temperature, insert an instant-read thermometer into the thick, interior section of the thigh, away from the bone. Turkey is done when that temperature registers 165°F.
Let the turkey rest:
- Remove the turkey from the oven, and let it rest for 30 minutes to help keep the juices from running out before carving.
Make the pan gravy:
- While the turkey rests, skim any excess fat from the pan juices and transfer them to a 4-cup measure. Add enough extra chicken broth to equal 3 cups of liquid total.
- Pour the broth into a saucepan and bring it to a simmer over medium heat. In a small bowl, whisk together the cornstarch with 1/3 cup water to make a slurry. Add it to the simmering broth and continue whisking just until thickened and smooth. Season to taste with salt and freshly ground black pepper. Transfer to a bowl or gravy boat for serving.
Notes
About the Roasting Time
The total roasting time needed for a whole turkey can vary considerably. Much depends on the starting temperature of the turkey when it enters the oven, how much heat is lost when opening the oven door for basting, and the accuracy and consistency of the oven itself. Always use both your good judgment and a reliable meat thermometer to determine doneness, rather than relying solely on time.
Convection Oven Notes
If your oven has a convection feature, we generally recommend turning it off for roasting turkey, as the hot circulating air can potentially throw off cooking times and may dry out the turkey more quickly. If you are unable to roast without the convection fan, adjust your initial oven temperature: start the turkey at 400°F (200°C) instead of 425°F (220°C). Reduce the temperature to 325°F (160°C) after 30 minutes as written in the recipe. However, begin checking the internal temperature earlier, after 1-1/4 hours of total cooking time. Convection cooking can reduce the overall roasting time by up to 25%. Always consult your oven’s manual for its specific best practices and recommendations regarding convection roasting.
Tips for Success
HOW TO GET CRISPY SKIN: For that highly sought-after crispy skin on your turkey, remove it from its wrapper (or if you’ve brined it, remove it from the brine and pat it thoroughly dry), and then let it sit uncovered in the refrigerator for a minimum of 6 hours, or ideally overnight, before you proceed with roasting. This drying process is key.
CARVING TIPS: Plan to carve your turkey in the kitchen rather than at the table. Ensure you have a good, sharp carving knife and a spacious cutting board, preferably one equipped with a channel around the edges to collect any delicious juices that run out. For clear, step-by-step guidance on how to carve a turkey, we strongly recommend watching the Culinary Institute of America’s How to Carve a Turkey video. Their method is highly effective and easy to follow.
FOOD SAFETY: Always prioritize food safety with cooked poultry. Be sure to refrigerate all leftovers within 2 hours of removing the turkey from the oven. Store the turkey tightly wrapped in an airtight container for up to four days in the refrigerator, or for longer storage, it can be kept safely in the freezer for up to six weeks.
Nutrition
Nutrition information is automatically calculated and should only be used as an approximation.